There are quite a lot of articles/videos on Laravel + Vue CRUD, but not enough is published on the newest Vue.js 3 version, using the new Composition API. So, with this step-by-step detailed article, let's fill in that gap, building a simple Company management form.
Notice: the link to the final repository is at the end of the article.
Install Laravel and Laravel Breeze
We start from the very beginning, by installing a fresh Laravel project, and a Laravel Breeze starter kit:
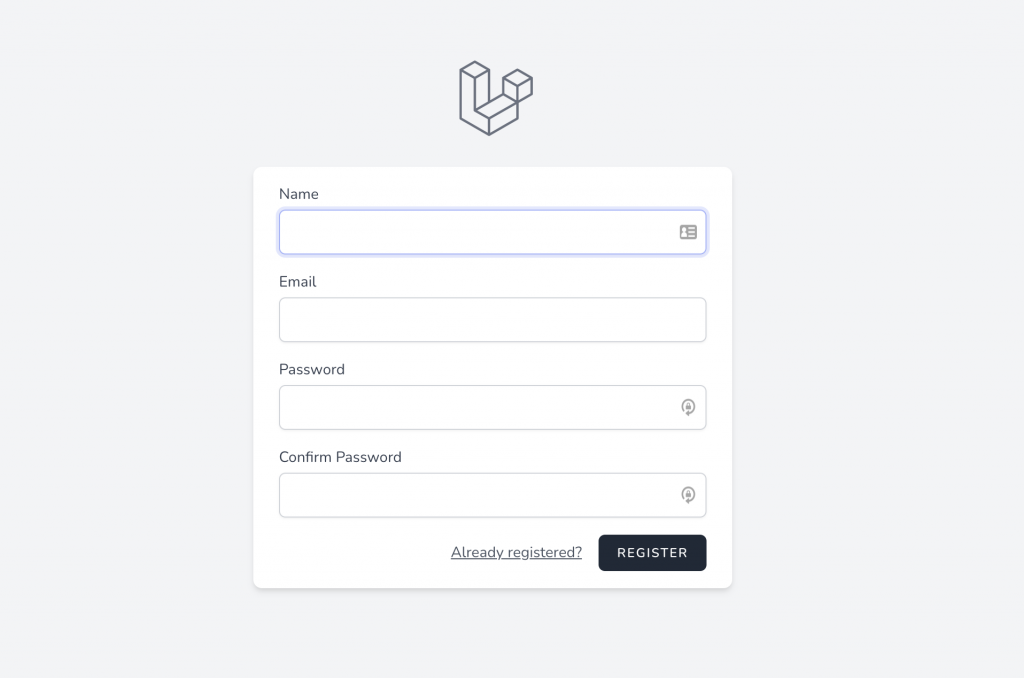
laravel new projectcd project// editing .env file herecomposer installphp artisan migratecomposer require laravel/breeze --devphp artisan breeze:install bladeBy this point, we should have a default Laravel Breeze with Tailwind CSS design, and Login/Register functionality:
Creating Model and API CRUD
We will manage one table called Companies, with four text fields: name, email, address, website.
So, we create the model, and automatically create migrations with -m:
php artisan make:model Company -mThis is the DB structure: database/migrations/xxxxx_create_companies_table.php:
class CreateCompaniesTable extends Migration{ public function up() { Schema::create('companies', function (Blueprint $table) { $table->id(); $table->string('name'); $table->string('email'); $table->string('address')->nullable(); $table->string('website')->nullable(); $table->timestamps(); }); } public function down() { Schema::dropIfExists('companies'); }}Then, of course, we run the migration:
php artisan migrateIn the app/Models/Company.php model, we make all fields fillable:
class Company extends Model{ use HasFactory; protected $fillable = ['name', 'email', 'address', 'website'];}Next, we create a Controller, with a few flags to generate exactly what we need:
php artisan make:controller Api/CompanyController --resource --api --model=CompanyPersonally, I like to use API Resources to transform the data. Although in this project, we won't make any transformations, I still have a habit of generating them:
php artisan make:resource CompanyResourceAnd, inside of app/Http/Resources/CompanyResource.php, there's this default code:
class CompanyResource extends JsonResource{ public function toArray($request) { return parent::toArray($request); }}Next, for validation, we generate a FormRequest class:
php artisan make:request CompanyRequestIn this case, I will re-use the same validation rules for both store/update functions, so this is the content of app/Http/Requests/CompanyRequest.php:
class CompanyRequest extends FormRequest{ public function authorize() { return true; } public function rules() { return [ 'name' => ['required', 'string'], 'email' => ['required', 'email'], 'address' => ['nullable', 'string'], 'website' => ['nullable', 'url'], ]; }}We use those API Resource and Form Request classes inside of our app/Http/Controllers/API/CompanyController.php, which has this code:
namespace App\Http\Controllers\Api; use App\Http\Controllers\Controller;use App\Http\Requests\CompanyRequest;use App\Http\Resources\CompanyResource;use App\Models\Company; class CompanyController extends Controller{ public function index() { return CompanyResource::collection(Company::all()); } public function store(CompanyRequest $request) { $company = Company::create($request->validated()); return new CompanyResource($company); } public function show(Company $company) { return new CompanyResource($company); } public function update(CompanyRequest $request, Company $company) { $company->update($request->validated()); return new CompanyResource($company); } public function destroy(Company $company) { $company->delete(); return response()->noContent(); }}And, we tie it all together to call that Controller from the routes/api.php:
use App\Http\Controllers\Api\CompanyController; // ... Route::apiResource('companies', CompanyController::class);In this simple project, we won't use any Middleware, the routes are public.
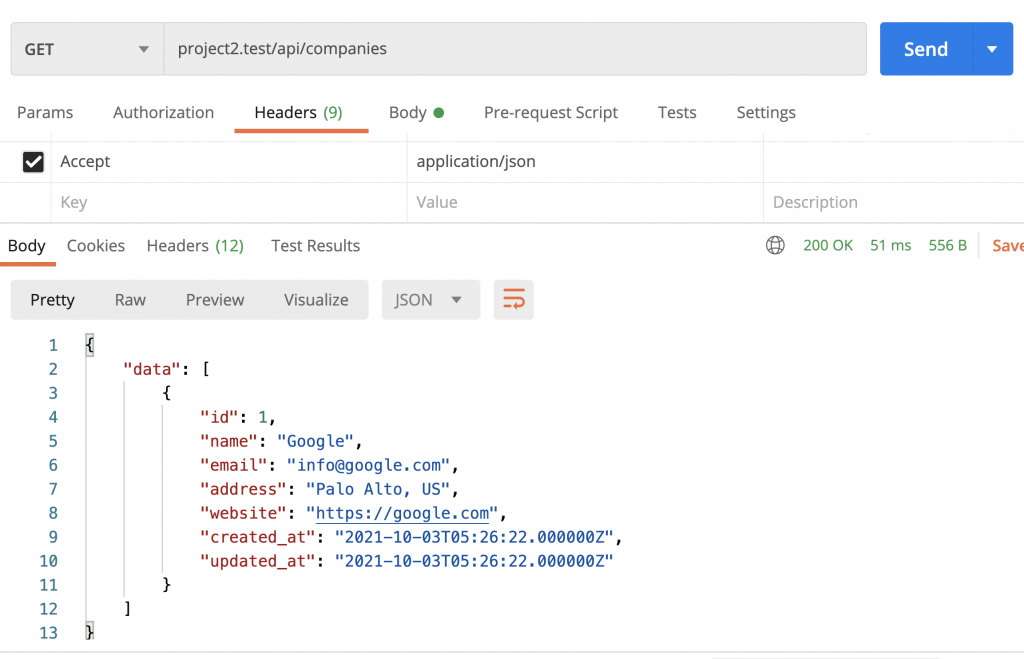
So, at this point, we have an API ready, and if we enter some company manually in the DB, here's what we get via Postman:
Installing Vue and "Hello World"
Now, we get to the front-end. We install Vue.js, Vue Router and Vue Loader:
npm install vue@latest vue-router@4As of Monday, February 7, 2022 Vue 3 is the default version. So you can install Vue 3 using @latest which versions is what we want in this article to use Composition API.
Next, we need to tell Vite to use vue when compiling. First, install vite vue plugin.
npm install --save-dev @vitejs/plugin-vueThen import Vue plugin import vue from '@vitejs/plugin-vue'; in vite.config.js. Then add Vue to plugins array.
Before:
export default defineConfig({ plugins: [ laravel({ input: [ 'resources/css/app.css', 'resources/js/app.js', ], refresh: true, }), ],});After:
import vue from '@vitejs/plugin-vue'; export default defineConfig({ plugins: [ laravel({ input: [ 'resources/css/app.css', 'resources/js/app.js', ], refresh: true, }), vue({ template: { transformAssetUrls: { base: null, includeAbsolute: false, }, }, } ], resolve: { alias: { vue: 'vue/dist/vue.esm-bundler.js', }, },) });Now, we need to create our first Vue.js component. For now, it will not do anything dynamic, just show the "Hello world", in resources/js/components/companies/CompaniesIndex.vue:
<template> Hello world.</template>That's it in this file, for now, we won't add any <script> element, we'll get to that part in the next section.
Now, let's create our routes file. We will have three routes: company index, create, and edit forms. But, for now, let's stick with the first one, here's the Vue.js 3 version syntax of resources/js/router/index.js:
import { createRouter, createWebHistory } from 'vue-router' import CompaniesIndex from '@/components/companies/CompaniesIndex.vue' const routes = [ { path: '/dashboard', name: 'companies.index', component: CompaniesIndex }]; export default createRouter({ history: createWebHistory(), routes})Next, we add the id="app" in the main Blade file of our project resources/views/layouts/app.blade.php:
<body class="font-sans antialiased"> <div class="min-h-screen bg-gray-100" id="app"> Now, we can create our Vue application inside of that #app, here's the Vue 3 version syntax for it, in resources/js/app.js:
import './bootstrap'; import Alpine from 'alpinejs'; window.Alpine = Alpine; Alpine.start(); import { createApp } from 'vue'; import router from './router' import CompaniesIndex from '@/components/companies/CompaniesIndex.vue'; createApp({ components: { CompaniesIndex }}).use(router).mount('#app') Next, let's prepare the Laravel view to contain the Vue functionality. We need to add this line to routes/web.php file, which would load the dashboard on any other view coming from Vue Router:
Route::view('/{any}', 'dashboard') ->middleware(['auth']) ->where('any', '.*');We change the default Laravel Breeze file resources/views/dashboard.blade.php to include the
<x-app-layout> <x-slot name="header"> ... </x-slot> <div class="py-12"> <div class="mx-auto max-w-7xl sm:px-6 lg:px-8"> <div class="overflow-hidden bg-white shadow-sm sm:rounded-lg"> <div class="p-6 bg-white border-b border-gray-200"> <router-view /> </div> </div> </div> </div></x-app-layout>That's it, let's run the main command to compile it all:
npm run devSo, now, after logging into our Laravel Breeze dashboard, we should see this:

Yay, we enabled Vue.js in our project!
List of Companies: Composition API
In Vue 3, the way to create components was changed, with the introduction of Composition API. It allows you to divide the parts of the component to separate files, to then be re-used. The problem appears in larger projects, but I would advise using it even on smaller projects like this one, to get into the habit of separating the concerns, and make code more readable.
So if you came here with some Vue 2 background, the code below will not look too familiar to you, so please read the official Vue documentation on Why Composition API, and also this article: Vue 3 Composition API vs. Options API.
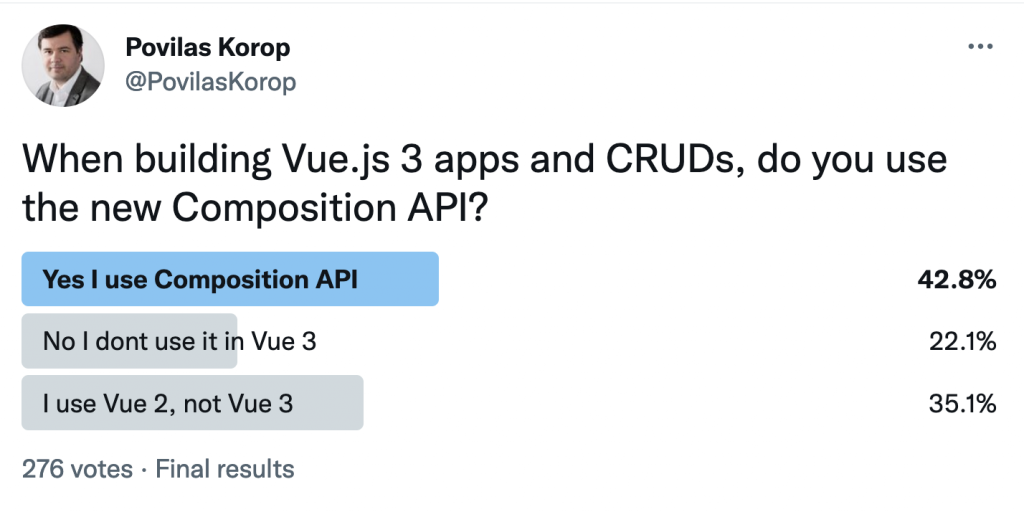
Notice: you still can use the "old way" of components in Vue 3 as well, but, while preparing for this article, I asked my Twitter audience, and many people with Vue 3 actually do use the Composition API:
To have a CRUD of Companies, we will use a Composition API thing called Composable, which is a separate file that will contain all the methods we need. It's kind of like a Service in Laravel if you wish.
So, we create resources/js/composables/companies.js, with this code:
import { ref } from 'vue'import axios from 'axios'import { useRouter } from 'vue-router' export default function useCompanies() { const company = ref([]) const companies = ref([]) const errors = ref('') const router = useRouter() const getCompanies = async () => { let response = await axios.get('/api/companies') companies.value = response.data.data } const getCompany = async (id) => { let response = await axios.get(`/api/companies/${id}`) company.value = response.data.data } const storeCompany = async (data) => { errors.value = '' try { await axios.post('/api/companies', data) await router.push({ name: 'companies.index' }) } catch (e) { if (e.response.status === 422) { for (const key in e.response.data.errors) { errors.value = e.response.data.errors } } } } const updateCompany = async (id) => { errors.value = '' try { await axios.patch(`/api/companies/${id}`, company.value) await router.push({ name: 'companies.index' }) } catch (e) { if (e.response.status === 422) { for (const key in e.response.data.errors) { errors.value = e.response.data.errors } } } } return { errors, company, companies, getCompany, getCompanies, storeCompany, updateCompany }}A few things to note here.
The usual standard name of the function of Composable is useSomething(), and it doesn't necessarily need to be the same as the filename.
Next, we use axios for the API requests, which is by default included in Laravel installation, we just need to import it and can make the requests like axios.get() and axios.post().
Next, what is that ref thing? It is shorter for "reference", and as it is said in the official Vue 3 documentation, "In Vue 3.0 we can make any variable reactive anywhere with a new ref function". So, when we define our variables with, for example, const companies = ref([]) syntax, now whenever we call getCompanies, companies will be mutated and the view will be updated to reflect the change.
The next thing to notice is that we use Vue Router to redirect to the list, by its name companies.index, after a successful store/update method. In case of validation errors with code 422, we parse the error structure and turn it into a String variable of errors.
Finally, we define what we return from the Composable file - all variables and methods.
Now, let's fill them into our resources/js/components/companies/CompaniesIndex.vue with the actual table of data about the companies. Here's our updated code, the table in the template part, and the Composition API in the script setup part.
<template> <div class="min-w-full overflow-hidden overflow-x-auto align-middle sm:rounded-md"> <table class="min-w-full border divide-y divide-gray-200"> <thead> <tr> <th class="px-6 py-3 bg-gray-50"> <span class="text-xs font-medium leading-4 tracking-wider text-left text-gray-500 uppercase">Name</span> </th> <th class="px-6 py-3 bg-gray-50"> <span class="text-xs font-medium leading-4 tracking-wider text-left text-gray-500 uppercase">Email</span> </th> <th class="px-6 py-3 bg-gray-50"> <span class="text-xs font-medium leading-4 tracking-wider text-left text-gray-500 uppercase">Address</span> </th> <th class="px-6 py-3 bg-gray-50"> <span class="text-xs font-medium leading-4 tracking-wider text-left text-gray-500 uppercase">Website</span> </th> </tr> </thead> <tbody class="bg-white divide-y divide-gray-200 divide-solid"> <template v-for="item in companies" :key="item.id"> <tr class="bg-white"> <td class="px-6 py-4 text-sm leading-5 text-gray-900 whitespace-no-wrap"> {{ item.name }} </td> <td class="px-6 py-4 text-sm leading-5 text-gray-900 whitespace-no-wrap"> {{ item.email }} </td> <td class="px-6 py-4 text-sm leading-5 text-gray-900 whitespace-no-wrap"> {{ item.address }} </td> <td class="px-6 py-4 text-sm leading-5 text-gray-900 whitespace-no-wrap"> {{ item.website }} </td> </tr> </template> </tbody> </table> </div></template> <script setup>import useCompanies from '@/composables/companies'import { onMounted } from 'vue'; const { companies, getCompanies } = useCompanies() onMounted(getCompanies)</script>The table doesn't need much comment, it's just doing the foreach loop, with this syntax:
<template v-for="item in companies" :key="item.id"> <tr> <td>{{ item.property }}</td> </tr></template>Now, how do we get the companies variable? I will add some comments with the script part:
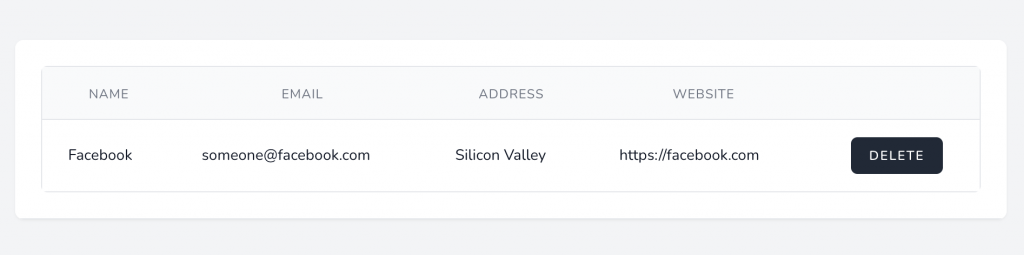
<script setup>// Here we're using a Composable file, its code is aboveimport useCompanies from '@/composables/companies' // onMounted will define what method to "fire" automaticallyimport { onMounted } from 'vue'; // We need only two things from the useCompanies() composableconst { companies, getCompanies } = useCompanies() // We get the companies immediatelyonMounted(getCompanies)</script>And, after running npm run dev, we see this on the dashboard:

See, the Composition API isn't that difficult? Now, let's add one more method to it.
A Button to Delete Company
Contrary to popular CRUD articles where Delete comes last, I want to implement it immediately now, cause it will be short and will demonstrate the Composition API power.
In the Composable file resources/js/composable/companies.js we add one more method that calls the Delete API endpoint. Also, we need to return that method at the bottom:
const destroyCompany = async (id) => { await axios.delete(`/api/companies/${id}`)} return { errors, company, // ... destroyCompany}Now, we can call that method from our component. So, in the resources/js/components/companies/CompaniesIndex.vue we add a button in the template, with the method in the script:
<template>... <th class="bg-gray-50"></th> ... <td class="px-6 py-4 text-sm leading-5 text-center text-gray-900 whitespace-no-wrap"> <button @click="deleteCompany(item.id)" class="inline-flex items-center px-4 py-2 text-xs font-semibold tracking-widest text-white uppercase transition duration-150 ease-in-out bg-gray-800 border border-transparent rounded-md hover:bg-gray-700 active:bg-gray-900 focus:outline-none focus:border-gray-900 focus:ring ring-gray-300 disabled:opacity-25"> Delete</button></td> </template> <script setup>const { companies, getCompanies, destroyCompany } = useCompanies() const deleteCompany = async (id) => { if (!window.confirm('You sure?')) { return } await destroyCompany(id) await getCompanies()} onMounted(getCompanies)</script>The template part is pretty clear, we just add button @click="deleteCompany(item.id)" there.
The script part is more interesting. We add destroyCompany to be fetched from the Composable file, we also define a local method deleteCompany, which in turn calls that composable method of destroyCompany, and then calls to getCompanies again, to refresh the table. So, see, how we re-use the Composable file, without polluting the main component? This is one of the benefits of Composition API.
Also, see that we need to list the deleteCompany in the return of setup() method, otherwise it wouldn't be visible in the template part, for our button.
That's it for this section, we've made the delete button work!
Create Company: Route, Form, Validation
Next, above the table, let's add a button that would lead to the form for creating a new company. For now, let's create an empty component in resources/js/components/companies/CompaniesCreate.vue:
<template> Create form coming soon.</template>Next, we add a route to the resources/js/router/index.js:
import CompaniesIndex from '@/components/companies/CompaniesIndex.vue'import CompaniesCreate from '@/components/companies/CompaniesCreate.vue' const routes = [ { path: '/dashboard', name: 'companies.index', component: CompaniesIndex }, { path: '/companies/create', name: 'companies.create', component: CompaniesCreate }, ];Finally, we add a button above the table, with router-link, in the resources/js/components/companies/CompaniesIndex.vue:
<template> <div class="flex mb-4 place-content-end"> <div class="px-4 py-2 text-white bg-indigo-600 cursor-pointer hover:bg-indigo-700"> <router-link :to="{ name: 'companies.create' }" class="text-sm font-medium">Create company</router-link> </div> </div> <div class="min-w-full overflow-hidden overflow-x-auto align-middle sm:rounded-md">Notice, that we call the route by its name - the same one that we defined in the routes file.
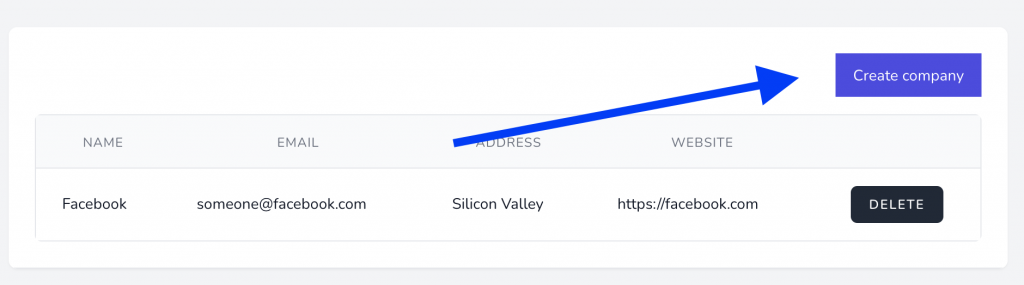
So, for now, our button looks like this:
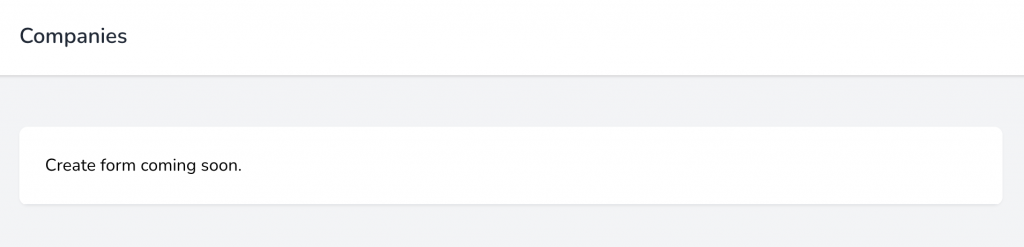
It leads to a page that is empty for now:
Now, we will fill it with the form and script to process that form, here's the full code for resources/js/components/companies/CompaniesCreate.vue:
<template> <div v-if="errors"> <div v-for="(v, k) in errors" :key="k" class="bg-red-400 text-white rounded font-bold mb-4 shadow-lg py-2 px-4 pr-0"> <p v-for="error in v" :key="error" class="text-sm"> {{ error }} </p> </div> </div> <form class="space-y-6" @submit.prevent="saveCompany"> <div class="space-y-4 rounded-md shadow-sm"> <div> <label for="name" class="block text-sm font-medium text-gray-700">Name</label> <div class="mt-1"> <input type="text" name="name" id="name" class="block w-full mt-1 border-gray-300 rounded-md shadow-sm focus:border-indigo-300 focus:ring focus:ring-indigo-200 focus:ring-opacity-50" v-model="form.name"> </div> </div> <div> <label for="email" class="block text-sm font-medium text-gray-700">Email</label> <div class="mt-1"> <input type="text" name="email" id="email" class="block w-full mt-1 border-gray-300 rounded-md shadow-sm focus:border-indigo-300 focus:ring focus:ring-indigo-200 focus:ring-opacity-50" v-model="form.email"> </div> </div> <div> <label for="address" class="block text-sm font-medium text-gray-700">Address</label> <div class="mt-1"> <input type="text" name="address" id="address" class="block w-full mt-1 border-gray-300 rounded-md shadow-sm focus:border-indigo-300 focus:ring focus:ring-indigo-200 focus:ring-opacity-50" v-model="form.address"> </div> </div> <div> <label for="website" class="block text-sm font-medium text-gray-700">Website</label> <div class="mt-1"> <input type="text" name="website" id="website" class="block w-full mt-1 border-gray-300 rounded-md shadow-sm focus:border-indigo-300 focus:ring focus:ring-indigo-200 focus:ring-opacity-50" v-model="form.website"> </div> </div> </div> <button type="submit" class="inline-flex items-center px-4 py-2 text-xs font-semibold tracking-widest text-white uppercase transition duration-150 ease-in-out bg-gray-800 border border-transparent rounded-md ring-gray-300 hover:bg-gray-700 active:bg-gray-900 focus:outline-none focus:border-gray-900 focus:ring disabled:opacity-25"> Create </button> </form></template> <script setup>import useCompanies from '../../composables/companies'import { reactive } from 'vue' const form = reactive({ name: '', email: '', address: '', website: ''}) const { errors, storeCompany } = useCompanies() const saveCompany = async () => { await storeCompany({ ...form })}</script>In the template section, the most important parts are <form @submit.prevent="saveCompany"> and then each field has v-model="form.[field_name]", binding it to the form object.
That form is described below, in the script section, with default values:
const form = reactive({ name: '', email: '', address: '', website: ''})The reactive thing, which we need to import with import { reactive } from 'vue', is very similar to the ref that we discussed above, but the inner value should be dictionary-structured data like JS object instead of a single value.
Next, the saveCompany() method will be a local component method, which, in turn, calls the Composable method of createCompany().
In case of validation errors, we have errors string with all the errors, separated by a space symbol. The result looks like this:

And if all goes well, we are automatically redirected (but without reloading the full page) to the list of companies. It is done in the Composable file, by router.push({ name: 'companies.index' }).
Company Edit/Update Form
The edit form will be almost identical to the create form, with just a few differences.
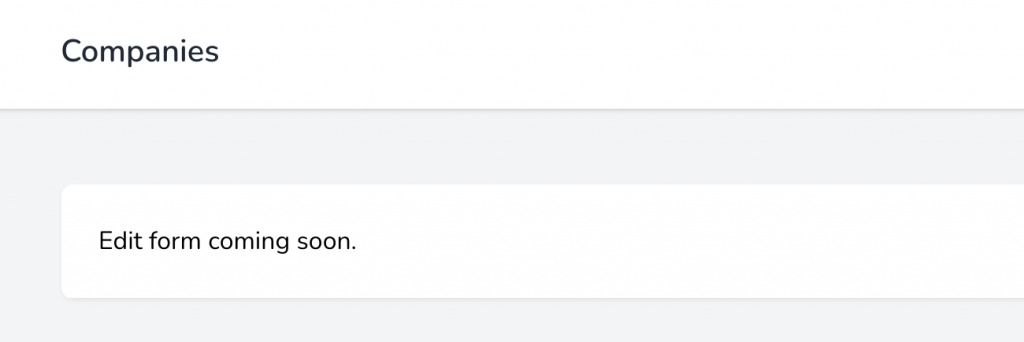
First, the empty component resources/js/components/companies/CompaniesEdit.vue:
<template> Edit form coming soon.</template>Next, the route in resources/js/router/index.js - this time with a parameter :id and with a setting props: true:
import CompaniesIndex from '@/components/companies/CompaniesIndex.vue'import CompaniesCreate from '@/components/companies/CompaniesCreate.vue'import CompaniesEdit from '@/components/companies/CompaniesEdit.vue' const routes = [ { path: '/dashboard', name: 'companies.index', component: CompaniesIndex }, { path: '/companies/create', name: 'companies.create', component: CompaniesCreate }, { path: '/companies/:id/edit', name: 'companies.edit', component: CompaniesEdit, props: true }, ];Then, a button to edit a particular record in resources/js/components/companies/CompaniesIndex.vue:
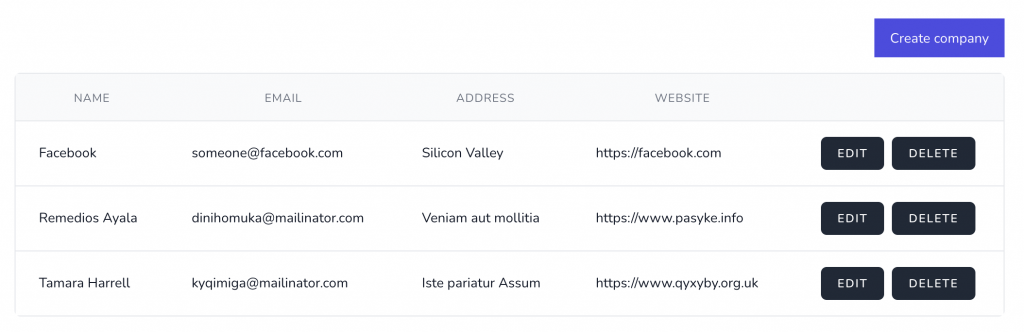
<td class="px-6 py-4 text-sm leading-5 space-x-2 text-center text-gray-900 whitespace-no-wrap"> <router-link :to="{ name: 'companies.edit', params: { id: item.id } }" class="px-4 py-2 rounded-md text-white border border-transparent bg-indigo-600 cursor-pointer hover:bg-indigo-700">Edit</router-link> <button @click="deleteCompany(item.id)" class="...">Delete</button></td>Here's the visual result:
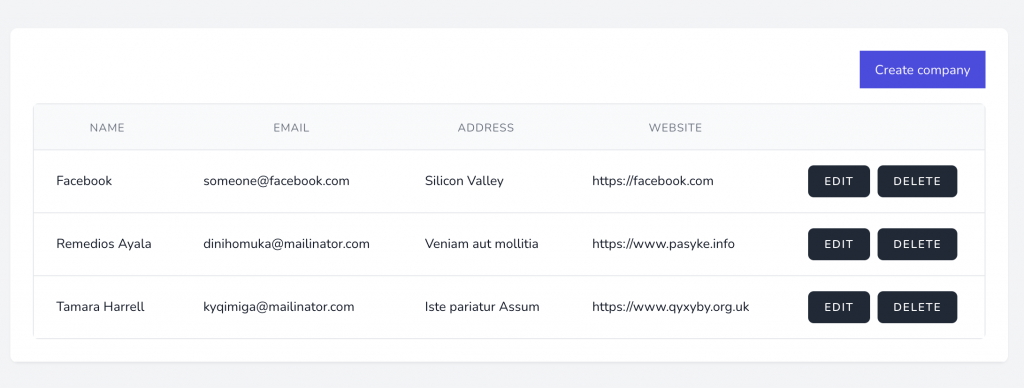
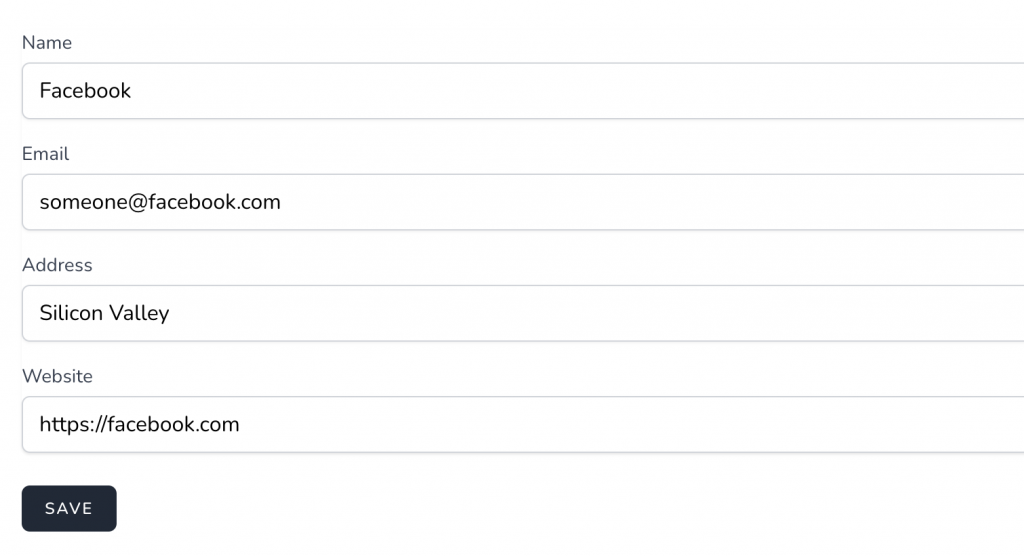
And, when we click Edit, we see this, as expected:
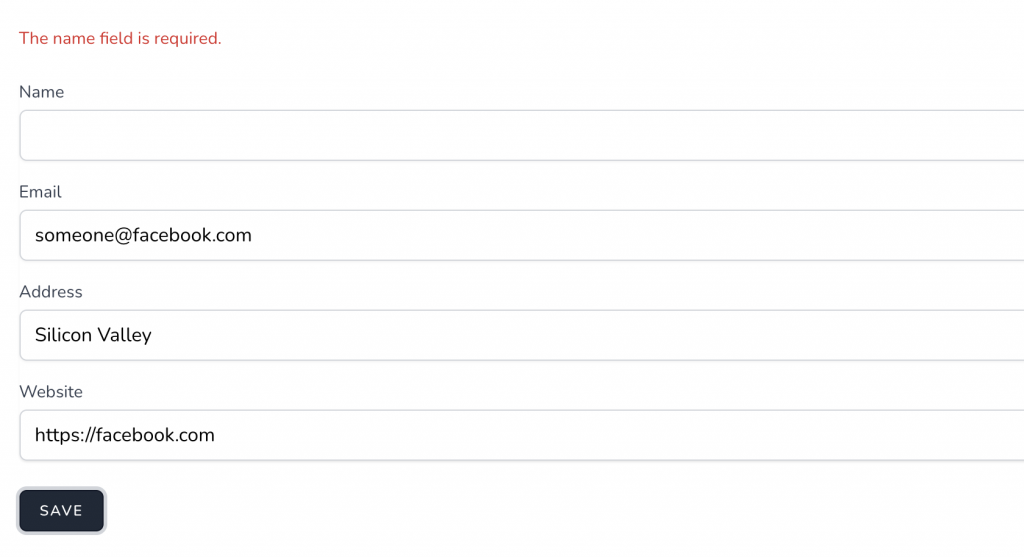
Now, let's build the actual form. Here's the code of resources/js/components/companies/CompaniesEdit.vue:
<template> <div v-if="errors"> <div v-for="(v, k) in errors" :key="k" class="bg-red-400 text-white rounded font-bold mb-4 shadow-lg py-2 px-4 pr-0"> <p v-for="error in v" :key="error" class="text-sm"> {{ error }} </p> </div> </div> <form class="space-y-6" v-on:submit.prevent="saveCompany"> <div class="space-y-4 rounded-md shadow-sm"> <div> <label for="name" class="block text-sm font-medium text-gray-700">Name</label> <div class="mt-1"> <input type="text" name="name" id="name" class="block w-full mt-1 border-gray-300 rounded-md shadow-sm focus:border-indigo-300 focus:ring focus:ring-indigo-200 focus:ring-opacity-50" v-model="company.name"> </div> </div> <div> <label for="email" class="block text-sm font-medium text-gray-700">Email</label> <div class="mt-1"> <input type="text" name="email" id="email" class="block w-full mt-1 border-gray-300 rounded-md shadow-sm focus:border-indigo-300 focus:ring focus:ring-indigo-200 focus:ring-opacity-50" v-model="company.email"> </div> </div> <div> <label for="address" class="block text-sm font-medium text-gray-700">Address</label> <div class="mt-1"> <input type="text" name="address" id="address" class="block w-full mt-1 border-gray-300 rounded-md shadow-sm focus:border-indigo-300 focus:ring focus:ring-indigo-200 focus:ring-opacity-50" v-model="company.address"> </div> </div> <div> <label for="website" class="block text-sm font-medium text-gray-700">Website</label> <div class="mt-1"> <input type="text" name="website" id="website" class="block w-full mt-1 border-gray-300 rounded-md shadow-sm focus:border-indigo-300 focus:ring focus:ring-indigo-200 focus:ring-opacity-50" v-model="company.website"> </div> </div> </div> <button type="submit" class="inline-flex items-center px-4 py-2 text-xs font-semibold tracking-widest text-white uppercase transition duration-150 ease-in-out bg-gray-800 border border-transparent rounded-md ring-gray-300 hover:bg-gray-700 active:bg-gray-900 focus:outline-none focus:border-gray-900 focus:ring disabled:opacity-25"> Save </button> </form></template> <script setup>import useCompanies from '@/composables/companies'import { onMounted } from 'vue'; const { errors, company, updateCompany, getCompany } = useCompanies()const props = defineProps({ id: { required: true, type: String }}) onMounted(() => getCompany(props.id)) const saveCompany = async () => { await updateCompany(props.id)}</script>It is very similar to the Create form, but here are a few differences.
First, we accept the props, then call the Composable methods with that exact parameter: getCompany(props.id) and updateCompany(props.id).
Next, in the create form we had a form variable that we defined as an object with keys and empty values. In this case, we actually have a variable company that is saved in the Composable file, so we don't need to even pass it anywhere, we just get it from useCompanies() and use it as a local one. On the very event of mounted, we call getCompany() but we don't need to assign the result to a variable, it's all done in the composables/companies.js. Now, you see the beauty of Composition API?
The submit and validation parts work absolutely identical as the create form: redirects to the index in case of success, or show the error in case of the validation error.
Conclusion
That's it, we've built a CRUD with Vue 3 Composition API and Laravel API on the back-end.
The link to the final repository: https://github.com/LaravelDaily/Laravel-9-Vue-Composition-API-CRUD
Of course, it's a very simple example: with only text fields, with no fancy design styling elements, with just core basics. But that was exactly the point - to give you a head start, from here you can read more about Vue and API, and practice more complex scenarios.
If I forgot/missed something in this article, or if you have any ideas for future articles on this topic, let me know in the comments.
-front_grid.jpg)


-=-{-axios.get('apiabilities')-.then(response-=-{-front_grid.jpg)
;-(5)-front_grid.jpg)
When i run dev command below error showen...
failed to load config from C:\Users\ck\Desktop\testApp\testApp\vite.config.js error when starting dev server: TypeError: (0 , import_vue.default) is not a function at Object.