
One of the quickest ways to launch a website is to use a prebuilt HTML/CSS theme, free or paid. In this tutorial, I will show step-by-step how to take such Bootstrap-based theme for a real estate project, and turn it into a Laravel project: with layout, components and Eloquent data.
We'll be building quite a simple project based on a free Bootstrap 5 theme called Property.
These are the steps we will cover:
- Building main layout (2 ways - with/without Blade Components)
- Static pages using that layout: Services, About, Contact
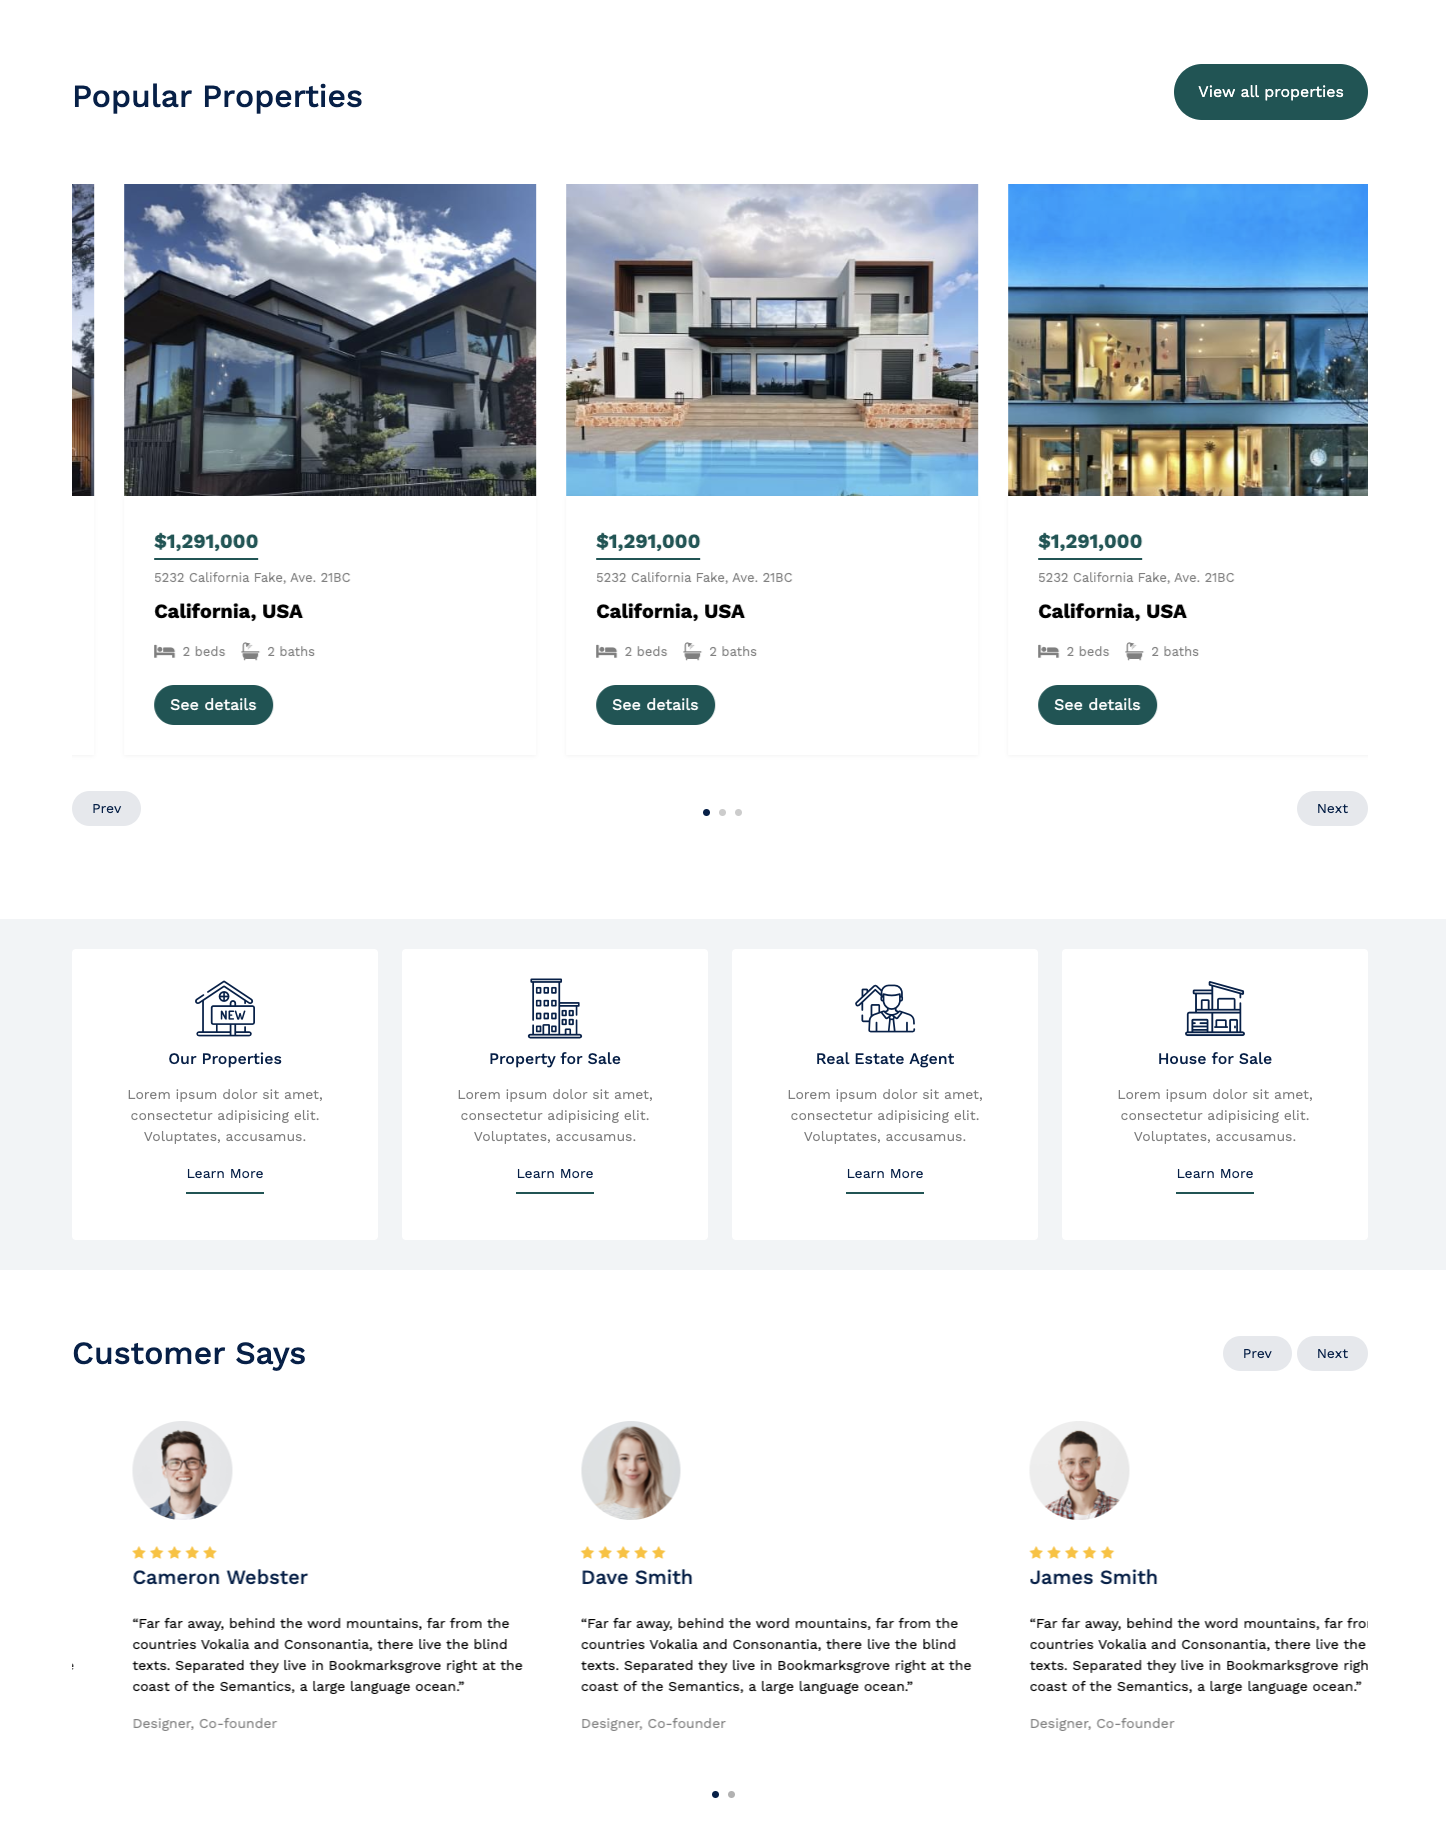
- Homepage sections: Agents, Testimonials, and their data
- Properties list with Blade Component and Livewire pagination
- Single property page re-using Blade Component
So, let's begin our journey!
New Laravel Project
As with every new Laravel project, we need to start by creating a new project. We will not use any of the starter kits.
laravel new projectThen, we need to remove the Tailwind CSS.
vite.config.js:
import { defineConfig } from 'vite';import laravel from 'laravel-vite-plugin';import tailwindcss from '@tailwindcss/vite'; export default defineConfig({ plugins: [ laravel({ input: ['resources/css/app.css', 'resources/js/app.js'], refresh: true, }), tailwindcss(), ],});packages.json:
{ "$schema": "https://json.schemastore.org/package.json", "private": true, "type": "module", "scripts": { "build": "vite build", "dev": "vite" }, "devDependencies": { "@tailwindcss/vite": "^4.0.0", "axios": "^1.11.0", "concurrently": "^9.0.1", "laravel-vite-plugin": "^2.0.0", "tailwindcss": "^4.0.0", "vite": "^7.0.7" }}resources/css/app.css:
@import 'tailwindcss'; /** **/ @source '../../vendor/laravel/framework/src/Illuminate/Pagination/resources/views/*.blade.php';@source '../../storage/framework/views/*.php';@source '../**/*.blade.php';@source '../**/*.js'; @theme { --font-sans: 'Instrument Sans', ui-sans-serif, system-ui, sans-serif, 'Apple Color Emoji', 'Segoe UI Emoji', 'Segoe UI Symbol', 'Noto Color Emoji';} /** **/You can see the GitHub commit with the changes here.
Main Layout
Next, download the theme from here and extract it. Now we need to copy all assets to the Laravel project. Copy CSS, fonts, images, and js folders into the Laravel projects public folder.
Now, we will create the main app layout which all pages will extend. Create a new file resources/views/layouts/app.blade.php.
php artisan make:view layouts/appCopy everything from templates index.html into the newly created app.blade.php.
For layouts, we will use Blade Layouts Template Inheritance. For this, we need to set the blade directive @yield in resources/views/layouts/app.blade.php. In the downloaded template content starts at line 89 with a class of hero and continues until line 923 with a class of site-footer. Before removing all that content, let's prepare the resources/views/welcome.blade.php file. We will use this file because, by default, it goes to the first page. Replace all its content with the code below:
@extends('layouts.app') @section('content') {{-- Content goes here--}}@endsectionNow cut the whole content from resources/views/layouts/app.blade.php from about 89 lines to 922 and add it into resources/views/welcome.blade.php inside the @section directive. And in resources/views/layouts/app.blade.php instead of the whole content just add @yield('content').
</nav> <!-- end of navigation --> <div class="hero"> <!-- start of content --> <div class="hero-slide"> <!-- content --> </div></div> <!-- end of content --> <div class="site-footer"> <!-- start of footer -->All assets in the main layout like CSS, JS, and images need to be wrapped into the asset() helper. For example, CSS files would like below:
resources/views/layouts/app.blade.php
// ...<link rel="stylesheet" href="fonts/icomoon/style.css" /> <link rel="stylesheet" href="fonts/flaticon/font/flaticon.css" /> <link rel="stylesheet" href="css/tiny-slider.css" /><link rel="stylesheet" href="css/aos.css" /><link rel="stylesheet" href="css/style.css" /> <link rel="stylesheet" href="{{ asset('fonts/icomoon/style.css') }}" /> <link rel="stylesheet" href="{{ asset('fonts/flaticon/font/flaticon.css') }}" /> <link rel="stylesheet" href="{{ asset('css/tiny-slider.css') }}" /><link rel="stylesheet" href="{{ asset('css/aos.css') }}" /><link rel="stylesheet" href="{{ asset('css/style.css') }}" /> // ...If you would visit your projects page, you should see the homepage working.
You can see the GitHub
Thanks for sharing and very detailed explanation!! Easy to follow the instructions.
Incredible useful! Many thanks!
nice
I have an error
When I add pagination in resources/views/properties/index.blade.php after @livewire('properties'). How to fix this, please help.
Solved. i see well explain in github. I should add $properties->link() in properties.blade.php
Small thing (spelling):
In code block of class Testimonial the title is "app/Models/Agent.php"
Thanks a lot, fixed!
Great relief. Many that are already familar with bootstrap like me were afraid of fixing another time to learn Tailwing sooner