
By default, the Filament login form contains email and password fields. In this short tutorial, let's see how to log in to the panel using name or email in the same field. Instead of name, you can have username, the logic would be similar.
We can do this by customizing authentication.
All Filament Panels settings are made in the Service Provider. For this example, we will use the default AdminPanelProvider. Here we have a login() method which accepts an action class as a parameter:
app/Providers/Filament/AdminPanelProvider.php:
class AdminPanelProvider extends PanelProvider{ public function panel(Panel $panel): Panel { return $panel ->default() ->id('admin') ->path('admin') ->login(Login::class) // ... }}Let's create our own Login page and inject it into a login method. I will create this class in the App\Filament\Auth directory. It needs to extend the original Login class from the Filament.
app/Filament/Auth/Login.php:
use Filament\Pages\Auth\Login as BaseAuth; class Login extends BaseAuth{ // ...}You can check the full code of the Filament Login class in the GitHub repository. For our use case, we will need to override three methods:
-
form()- to show the form differently -
getCredentialsFromFormData()- to process form data correctly -
throwFailureValidationException()- to show errors properly
Also, we will replace the method getEmailFormComponent() with our own new method called getLoginFormComponent() for using a different field instead of email. We will call that field "Login" which will accept email or username value.
app/Filament/Auth/Login.php:
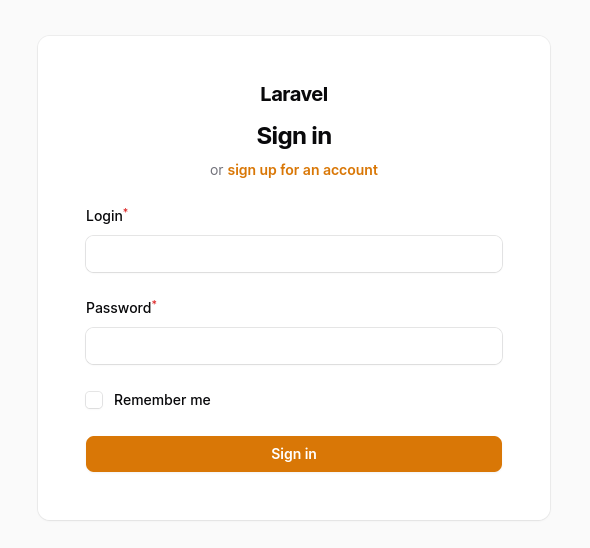
use Filament\Forms\Form;use Filament\Forms\Components\TextInput;use Filament\Forms\Components\Component;use Filament\Pages\Auth\Login as BaseAuth; class Login extends BaseAuth{ public function form(Form $form): Form { return $form ->schema([ $this->getEmailFormComponent(), $this->getLoginFormComponent(), $this->getPasswordFormComponent(), $this->getRememberFormComponent(), ]) ->statePath('data'); } protected function getLoginFormComponent(): Component { return TextInput::make('login') ->label('Login') ->required() ->autocomplete() ->autofocus() ->extraInputAttributes(['tabindex' => 1]); } }We have a login form where we can enter name or email for the credentials.
Now, let's overwrite the getCredentialsFromFormData() method to use either name or email for authenticating.
app/Filament/Auth/Login.php:
class Login extends BaseAuth{ // ... protected function getCredentialsFromFormData(array $data): array { $login_type = filter_var($data['login'], FILTER_VALIDATE_EMAIL ) ? 'email' : 'name'; return [ $login_type => $data['login'], 'password' => $data['password'], ]; }}In this method, we use the PHP function filter_var to check if the entered value is email. Depending on that, we assign the login_type variable to the DB name email or name.
We have created our custom Login action. Now we just need to inject it into the login method in the AdminPanelProvider.
app/Providers/Filament/AdminPanelProvider.php:
use App\Filament\Auth\Login; class AdminPanelProvider extends PanelProvider{ public function panel(Panel $panel): Panel { return $panel ->default() ->id('admin') ->path('admin') ->login(Login::class) // ... }}Finally, the problem is that the validation errors still come for data.email field and not the data.login field, which means the error message won't be visible. We need to fix it, by overwriting another method:
app/Filament/Auth/Login.php:
class Login extends BaseAuth{ // ... protected function throwFailureValidationException(): never { throw ValidationException::withMessages([ 'data.login' => __('filament-panels::pages/auth/login.messages.failed'), ]); }}That's it. Users can log in to the Filament panel using name or email in the same field.
If you want more Filament examples, you can find more real-life projects on our FilamentExamples.com.
Nice trick but no error messages are displayed when login failed! I added this to login.php
Is user right password, wrong the username, how to validate?
Also work adding this instead:
Thank you, I found these older comments and updated the tutorial accordingly.
You can add the tab index attribute to the new login field to properly use the tab key to jump between fields:
This should be added to the article. Great tips.
Thank you, I found these older comments and updated the tutorial accordingly.
Hello, thank you for this tutorial. I tried to follow it, but i got stuck with this error. (using PHP 8.2.22 — Laravel 11.19.0) Please, any clues how to diagnose/fix this? I'm sorry i'm new at this.
" Cannot declare class Login, because the name is already in use "
on app/Filament/Auth/Login.php :8
might be wrong namespace
Cannot work with custom authGuard . Already define in Panel Provider.