
Tutorial last revisioned on July 02, 2024 with Filament v3
Filament is great for admin panels, but what if you want to use it as an e-shop with payments? In this tutorial, we will show how to integrate Stripe one-time checkout into Filament.
Prepare for quite a long "ride" because there's a lot of work to implement it properly, with all the JS/PHP/Livewire elements, validation, and webhooks.
Table of Contents
- Data Preparation: Models/Migrations/Factories
- Filament Product Resource
- Custom Filament Pages: Checkout and Payment Status
- Back-end: Stripe PHP Library and Payment Intent
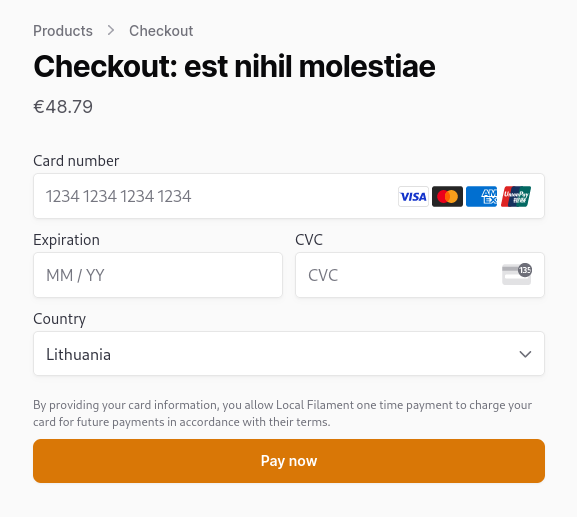
- Checkout Page: Stripe.js, Form and Stripe Elements
- Handle the Submit Event
- Show Payment Status
- Post-payment Events: Order Approval and Webhooks
Ready? Let's dive in!
1. Data Preparation
Our goals in this section:
- Create Product and Order Model
- Add relationships
- Populate
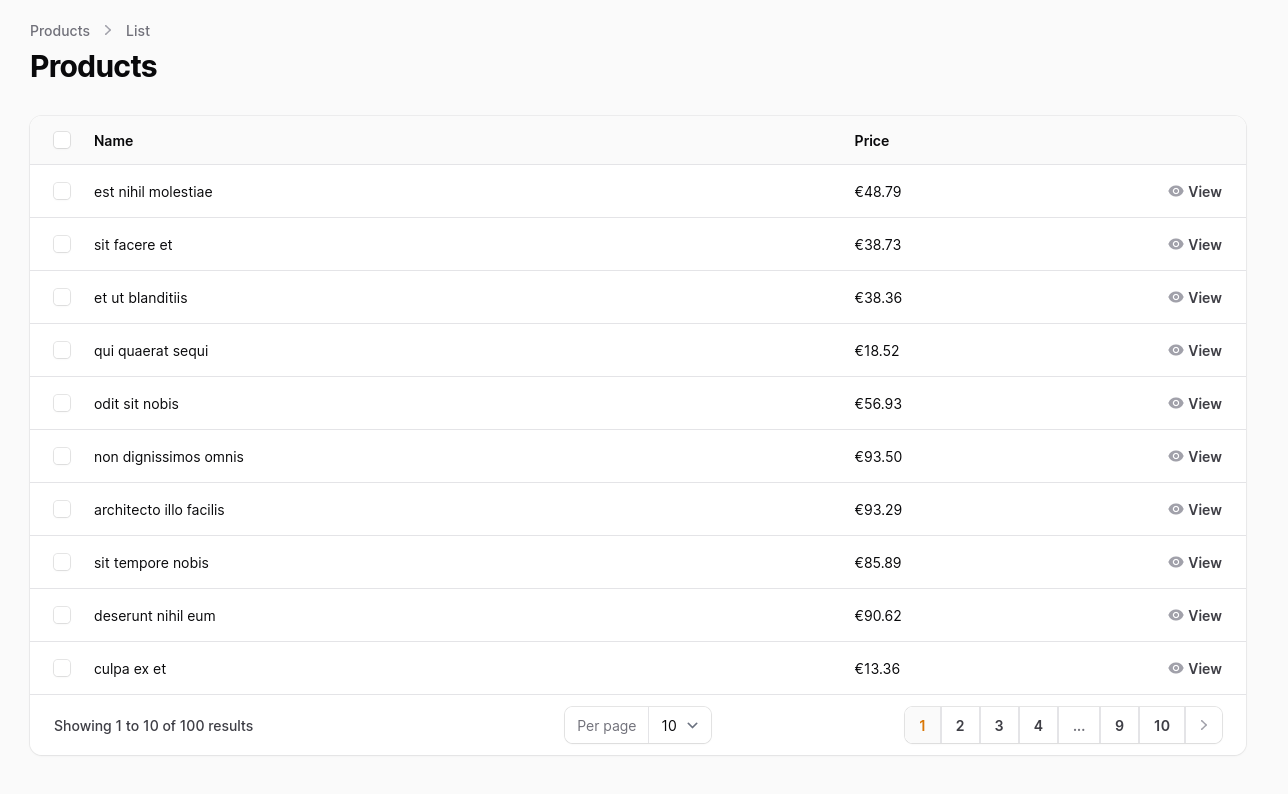
productstable - Create a
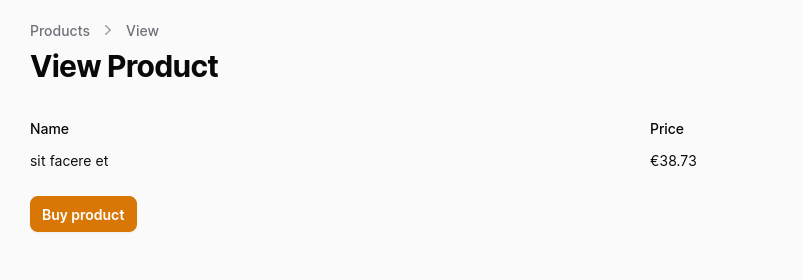
ProductResourcelist and view pages - Add the Buy product to view page
That is how our final pages should look like.
1.1. Migrations, Factories and Models
First, let's create Models; only the Product will have a factory.
php artisan make:model Product -mfphp artisan make:model Order -mThen, update the migrations.
database/migrations/XXXXXX_create_products_table.php
Schema::create('products', function (Blueprint $table) { $table->id(); $table->string('name'); $table->bigInteger('price'); $table->timestamps();});database/migrations/XXXXXX_create_orders_table.php
use App\Models\Product;use App\Models\User; // ... Schema::create('orders', function (Blueprint $table) { $table->id(); $table->foreignIdFor(Product::class); $table->foreignIdFor(User::class); $table->bigInteger('amount'); $table->timestamps();});In ProductFactory, we define column data. Notice that we store the price in cents.
database/factories/ProductFactory.php
public function definition(): array{ return [ 'name' => fake()->words(3, asText: true), 'price' => rand(999, 9999), ];}app/Models/User.php
use Illuminate\Database\Eloquent\Relations\HasMany; // ... public function orders(): HasMany{ return $this->hasMany(Order::class);}And then add relationships into Models.
app/Models/Product.php
use Illuminate\Database\Eloquent\Relations\HasMany; // ... public function orders(): HasMany{ return $this->hasMany(Order::class);}app/Models/Order.php
use Illuminate\Database\Eloquent\Relations\BelongsTo; // ... protected $fillable = [ 'product_id', 'user_id', 'amount',]; public function product(): BelongsTo{ return $this->belongsTo(Product::class);} public function user(): BelongsTo{ return $this->belongsTo(User::class);}1.2. Database Seeder
Now let's update DatabaseSeeder.
database/seeders/DatabaseSeeder.php
use App\Models\Product; use App\Models\User; public function run(): void{ User::factory()->create([ 'name' => 'Admin', ]); Product::factory(100)->create();}And seed the database.
php artisan migrate:fresh --seed2. Filament Product Resource
Generate ProductResource and view pages using the Artisan command. Filament doesn't create a view page by default, so we must add the --view flag when creating a resource.
php artisan make:filament-resource Product --viewImplementation of the resource file:
app/Filament/Resources/ProductResource.php
namespace App\Filament\Resources; use App\Filament\Resources\ProductResource\Pages;use App\Models\Product;use Filament\Infolists\Components\Actions;use Filament\Infolists\Components\Actions\Action;use Filament\Infolists\Components\TextEntry;use Filament\Infolists\Infolist;use Filament\Resources\Resource;use Filament\Tables;use Filament\Tables\Columns\TextColumn;use Filament\Tables\Table;use NumberFormatter; class ProductResource extends Resource{ protected static ?string $model = Product::class; protected static ?string $navigationIcon = 'heroicon-o-rectangle-stack'; public static function infolist(Infolist $infolist): Infolist { return $infolist ->schema([ TextEntry::make('name'), TextEntry::make('price') ->formatStateUsing(function ($state) { $formatter = new NumberFormatter(app()->getLocale(), NumberFormatter::CURRENCY); return $formatter->formatCurrency($state / 100, 'eur'); }), Actions::make([ Action::make('Buy product') ->url('/'), ]), ]); } public static function table(Table $table): Table { return $table ->columns([ TextColumn::make('name'), TextColumn::make('price') ->formatStateUsing(function ($state) { $formatter = new NumberFormatter(app()->getLocale(), NumberFormatter::CURRENCY); return $formatter->formatCurrency($state / 100, 'eur'); }), ]) ->actions([ Tables\Actions\ViewAction::make(), ]) ->bulkActions([ Tables\Actions\BulkActionGroup::make([ Tables\Actions\DeleteBulkAction::make(), ]), ]); } public static function getPages(): array { return [ 'index' => Pages\ListProducts::route('/'), 'view' => Pages\ViewProduct::route('/{record}'), ]; }}Filament's infolists can use...
Premium Members Only
This advanced tutorial is available exclusively to Laravel Daily Premium members.
Already a member? Login here
Premium membership includes:
Hello everyone, im living in country which unfortunately is'nt supported by stripe. So will this tutorial works for me (just for testing)?
You should ask Stripe support as we are not sure.
Awesome ! Thank you
I got an error
Did you add:
protected StripeClient $stripe;To your file?
I apologize i have a typo on the $stirpe. I also have another question, I learned that we must store a price in decimal right ? And yeah i know this is just a tutorial and make it simple, but i tried to change the price and amount to be decimal so far so good untill the payment step i got an error saying something like "amount" is not an integer. Mind explaining for me ?
You can store price in integer or decimal. You don't really need this change if you're concerned about data type used.
Never store price in float or double.
Hi, Thank you for the tutorial could you please also provide the full working code. I follow the guide but got this error Invalid value for elements(): clientSecret should be a client secret of the form ${id}secret${secret}. Y
The Stripe Elements script code in section 5.3 is missing a closing
});The correct code is:Would it be possible to have the checkout form pop up in a modal, rather than a separate page? I'm having trouble figuring out how to call the view from a modal, while first calling the Checkout class.
Thanks for this great tutorial!
The links to the "Practical Laravel Queues on Live Server" and "Queues in Laravel" courses in section "8.2 Webhooks" have the wrong urls. They direct to "laraveldaily.test", but should direct to "laraveldaily.com".
Thank you for letting us know, fixed!
You're welcome! :-)
How can I send an invoice (or receipt) to a customer after payment success?
Changed this :
into :
juste in case customer is deleted from stripe but not from your users table.