File uploads is one of the most important functions on the internet, and we have bigger files nowadays, which means it's not enough to have simple input fields - we need AJAX and processing file upload "in the background". Here I will show you a simple example of that in Laravel 5.
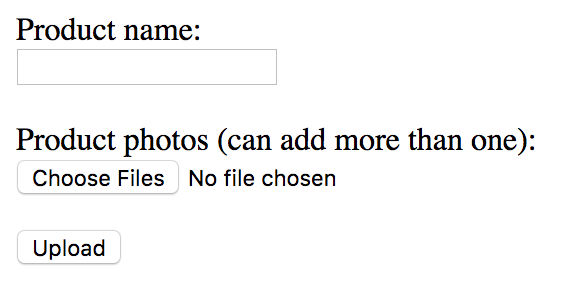
Let's say, we have a simple form to upload the product and many photos for it.

And we want to upload photos and see upload progress immediately, only then submitting the form. For that we will use a jQuery-File-Upload library.
Step 1. Database structure
Here's how our migration files will look:
Schema::create('products', function (Blueprint $table) {
    $table->increments('id');
    $table->string('name');
    $table->timestamps();
});

Schema::create('product_photos', function (Blueprint $table) {
    $table->increments('id');
    $table->integer('product_id')->unsigned()->nullable();
    $table->foreign('product_id')->references('id')->on('products');
    $table->string('filename');
    $table->timestamps();
});
And then we have two simple models - app/Product.php and app/ProductPhoto.php.
class Product extends Model
{
    protected $fillable = ['name'];
}
class ProductPhoto extends Model
{
    protected $fillable = ['product_id', 'filename'];

    public function product()
    {
        return $this->belongsTo('App\Product');
    }
}
As you can see, field product_photos.product_id is nullable - which means we can upload photos without saving product with them yet. We'll show later why.
Step 2. Routes and MVC
First, let's decide our URLs. In routes/web.php we will have this:
Route::get('/', 'UploadController@uploadForm');
Route::post('/upload', 'UploadController@uploadSubmit');
Route::post('/product', 'UploadController@postProduct');
Basically, homepage for the form, then /upload for AJAX file submit, and /product for submitting the whole product with photos.
Then we have app/Http/Controllers/UploadController.php with these methods:
public function uploadForm()
{
    return view('upload_form');
}

public function uploadSubmit(Request $request)
{
    // This method will cover file upload
}

public function postProduct(Request $request)
{
    // This method will cover whole product submit
}
Step 3. Building the form
Our resources/views/upload_form.blade.php will look like this:
<form action="/product" method="post">
    {{ csrf_field() }}
    Product name:
    <br>
    <input type="text" name="name">
    <br><br>
    Product photos (can add more than one):
    <br>
    <input type="file" id="fileupload" name="photos[]" data-url="/upload" multiple="">
    <br>
    <div id="files_list"></div>
    <p id="loading"></p>
    <input type="hidden" name="file_ids" id="file_ids" value="">
    <input type="submit" value="Upload">
</form>
Step 4. Processing the upload and submit
Now, let's download jQuery-File-Upload library and put its /js contents into our /public/js. And then we can use it like this - in the end of our upload_form.blade.php:
<script src="//ajax.googleapis.com/ajax/libs/jquery/1.9.1/jquery.min.js"></script>
<script src="/js/vendor/jquery.ui.widget.js"></script>
<script src="/js/jquery.iframe-transport.js"></script>
<script src="/js/jquery.fileupload.js"></script>
<script>
    $(function () {
        $('#fileupload').fileupload({
            dataType: 'json',
            add: function (e, data) {
                $('#loading').text('Uploading...');
                data.submit();
            },
            done: function (e, data) {
                $.each(data.result.files, function (index, file) {
                    $('<p/>').html(file.name + ' (' + file.size + ' KB)').appendTo($('#files_list'));
                    if ($('#file_ids').val() != '') {
                        $('#file_ids').val($('#file_ids').val() + ',');
                    }
                    $('#file_ids').val($('#file_ids').val() + file.fileID);
                });
                $('#loading').text('');
            }
        });
    });
</script>
To be honest, I'm not a strong front-ender, so the syntax was written according to jQuery-File-Upload library examples. But basically, it works like this:
- fileupload() method is attached to input field and takes two important parameters - name="photos[]" data-url="/upload";
- Those parameters are passed via AJAX request to /upload URL - meaning UploadController and method uploadSubmit();
- uploadSubmit() physically uploads the file, stores information in the database but doesn't store product_photos.product_id because we don't have ID yet. After upload it returns JSON with array of file results;
public function uploadSubmit(Request $request)
{
    $photos = [];
    foreach ($request->photos as $photo) {
        $filename = $photo->store('photos');
        $product_photo = ProductPhoto::create([
            'filename' => $filename
        ]);

        $photo_object = new \stdClass();
        $photo_object->name = str_replace('photos/', '',$photo->getClientOriginalName());
        $photo_object->size = round(Storage::size($filename) / 1024, 2);
        $photo_object->fileID = $product_photo->id;
        $photos[] = $photo_object;
    }

    return response()->json(array('files' => $photos), 200);

}
- Those results are shown to the user in the file list (filename and size) and also in the hidden field file_ids which stores values from product_photos.id column;
We can upload more files like this, and our files list will grow bigger and bigger. As soon as we hit the main submit - the data will be posted and UploadController method postProduct() will save the data into products DB table, and also assign new product ID to product_photos entries:
public function postProduct(Request $request)
{
    $product = Product::create($request->all());
    ProductPhoto::whereIn('id', explode(",", $request->file_ids))
        ->update(['product_id' => $product->id]);
    return 'Product saved successfully';
}
And that's it - we get the success message!
Here's a quick video demo of the final result:
Of course, it's a really simple example, but it gets the main job done.
How you can expand it:
- Add more validation or Auth to the Requests;
- Store more fields to the files like original filename, size, extension etc.
- Not only uploading the files but deleting them in the same form
- Deleting unsaved files from the server if the submit wasn't clicked
- Add progress bar for uploading bigger files
- etc.
For that you may want to read the documentation of jQuery-File-Upload library and the examples there.
Also related: Laravel Filesystem documentation
