
Looking at Laravel job descriptions, you will find Redis quite often. This tutorial will cover the basics of using it with Laravel and how to use it in your projects.
Look at these job description examples:
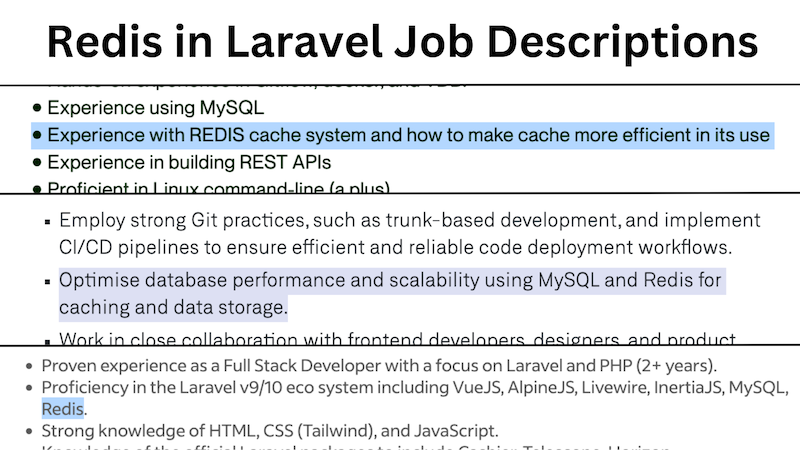
Generally, in Laravel, Redis is used for two purposes:
- Cache Driver
- Queue Driver
In this tutorial, we will cover both.
As a "teaser", here's what the Laravel queue looks like when using Redis.
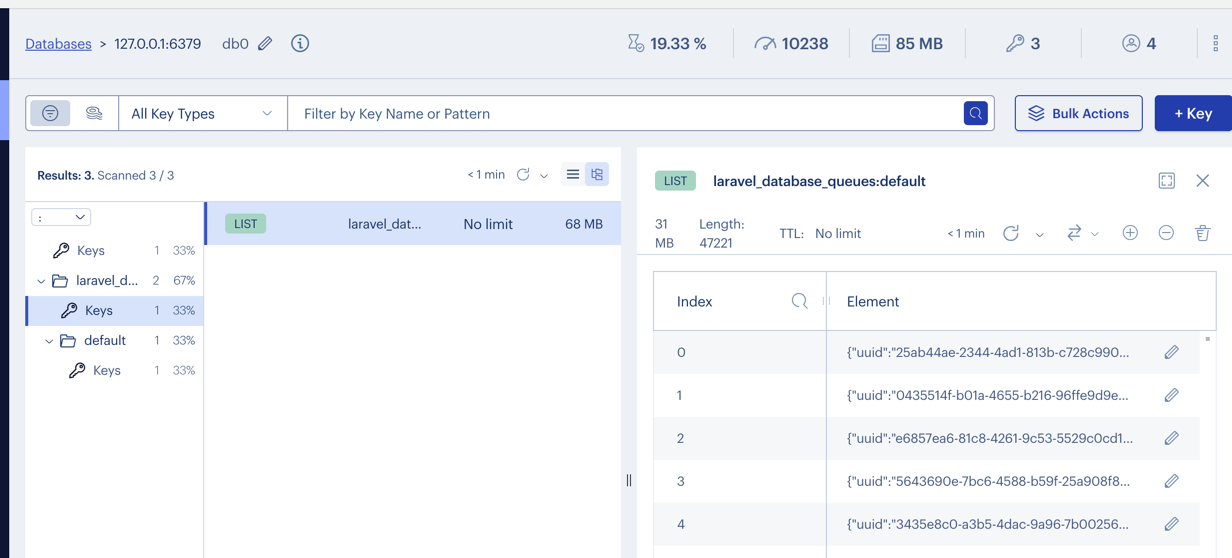
Table of Contents
This tutorial will generally consist of three main parts:
- First, we'll look at Redis in general cause it's not a Laravel-specific tool.
- Then, we'll get to Laravel examples: cache and queues
- Finally, we'll get back to Redis, showing more of its functionality
Here's what you will see inside this long tutorial.
- Intro: What is Redis?
- Redis Setup
- Reading and Writing Data
- Redis in Laravel: Setup for Caching
- Laravel Example 1: Cache Any Data
- Laravel Example 2: Cache Eloquent Models
- Redis in Laravel: Queues
- Redis Naming Rules
- Redis Data Types
- Redis Commands
- Redis Pipelines
- Redis Transactions
- Protecting Redis Data
- Redis Memory Warning
A long journey ahead, huh? Let's dive in, then!
Intro: What is Redis?
In short, we can treat Redis as a "database" stored in memory. It is not a database like MySQL or Postgres but a key-value store that can be used to store data in memory. This means that we can store keys like this:
KEY VALUE # For example:widget:total 100 # This will store the value 100 in the key widget:totalThis will allow us to store data in memory (system RAM) and access it very quickly. And we mean VERY quickly. Redis is so fast that it can handle millions of requests per second. This makes it an excellent tool for caching data used often or storing data that needs to be accessed quickly. For example, it's a great place to store complex data (like report totals) that needs to be accessed often but takes a long time to calculate.
Of course, Redis is not limited by this. It can be used to store any data that you want. It can be used as a cache, as a database, as a message broker, as a queue, and much more. It is a versatile tool that can be used in many ways as it supports many data types. You can even write your own commands for it using Lua if you want to.
That said, we understand that it is a lot to process. Let's start with the basics and see how to use Redis in our Laravel applications.
Redis Setup
Running Redis on your local machine might seem complex, but there is excellent documentation that covers all platforms.
You only need to focus on how you will launch it. If you have a supervisor set up - fantastic, but if not - you can run it with this command:
redis-serverOnce done, you can use your Redis instance with the redis-cli command.
Redis Insights
We recommend you install a tool called RedisInsight as this will allow you to monitor your Redis instance and see what is going on:
It is an excellent tool as you can run the profiler and see what commands are being executed and how long they take:

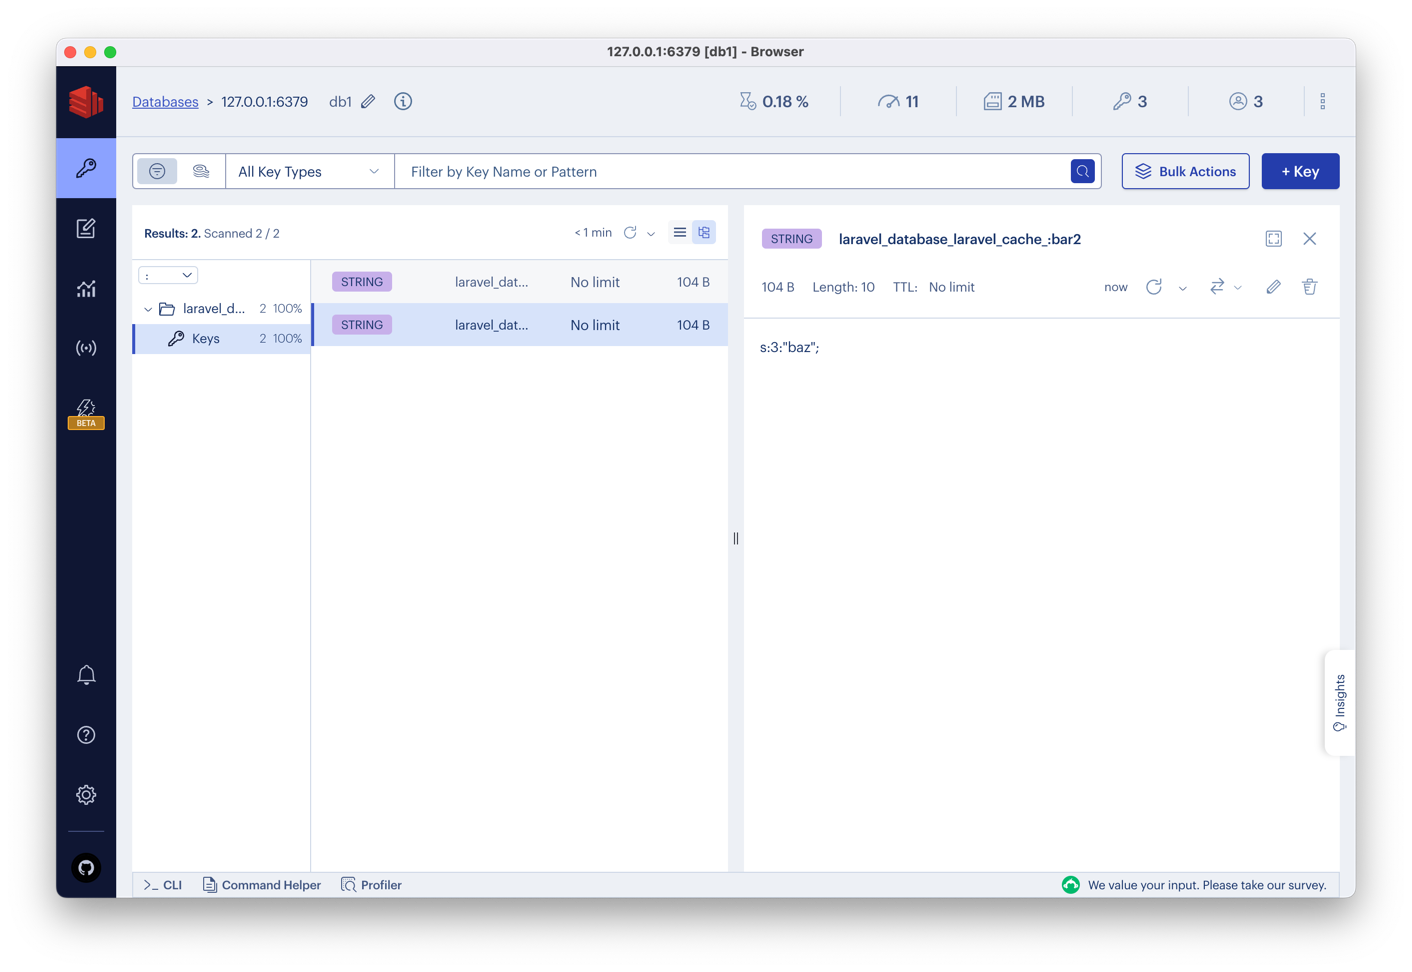
You can also switch multiple databases (Laravel uses database 0 for all Redis things and database 1 for cache by default). To do this, you change this number:

Once you click it, you can enter 1 or 0 to switch between databases. Of course, you can create more database instances (there are 16 of them by default) if you want to, but that is something other than what we will cover in this tutorial.
Reading and Writing Data
Before diving into Laravel implementation examples, we need to understand our options for reading and writing data to Redis. There are two ways to do this:
- Using Redis Facade is the easiest way to interact with Redis directly, without any wrappers. It allows us to run custom commands and logic without any limitations
- Using Cache Helper - this is the easiest way to interact with Redis, but it has some limitations. It only allows us to use a few commands and does not allow us to run custom logic
This tutorial will cover both ways, but your chosen option will depend on your needs. You will see us using two styles of code:
// Cache Facadeuse Illuminate\Support\Facades\Cache; Cache::driver('redis')// or if your .env file has CACHE_DRIVER=redisCache:: // Redis Facadeuse Illuminate\Support\Facades\Redis; Redis::command()Redis in Laravel: Setup for Caching
To start with Redis in Laravel, you must install the predis/predis package, as...
Premium Members Only
This advanced tutorial is available exclusively to Laravel Daily Premium members.
Already a member? Login here
Premium membership includes:
Comments & Discussion
You can also switch multiple databases (Laravel uses database 0 for all Redis things and database 1 for cache by default). To do this, you change this number:
What a great tip! I've had to switch databases before trying to look for some value and I never know this was the case, always assumed it was some element of randomness involved.
What would be a good rule to follow if we cached the Top 10 selling products of our shop and we update the price of 2 products ?
How to work with cache when we have an ajax listing with filters for example? Do I have to change the logic of my page to perform searches directly in Redis? Or do I get the entire listing and filter through collect? What's the best way?
This depends on many factors. For example, if you need to have real-time access - I wouldn't cache anything there. But if there's delay allowed - you can cache.
Choosing redis search vs normal search - depends on performance and dataset. So I would personally build small prototypes for each!
Just noted, if you use Windows 10 and use Redis Server on WSL2 with PHP 8.1, and see error
Class "Redis" not found.
You must add this too your .env configuration.
After that it will work.