
This article is a "draft" lesson of the upcoming series on Flutter mobile app development using Laravel API on the back-end. The prerequisite of this lesson is that you have already installed Android Studio and all the tools needed for Flutter, and you're familiar with how to launch/run the application from there.
Default Flutter main.dart is not "Hello World"
In Android Studio, when you create a new Flutter project, it is created with the lib/main.dart file that contains the majority of the main features that you need to know for app development in Flutter.
When launched, it gives a good-looking simple application that increases the counter number in the center, every time you click on the plus button at the bottom:
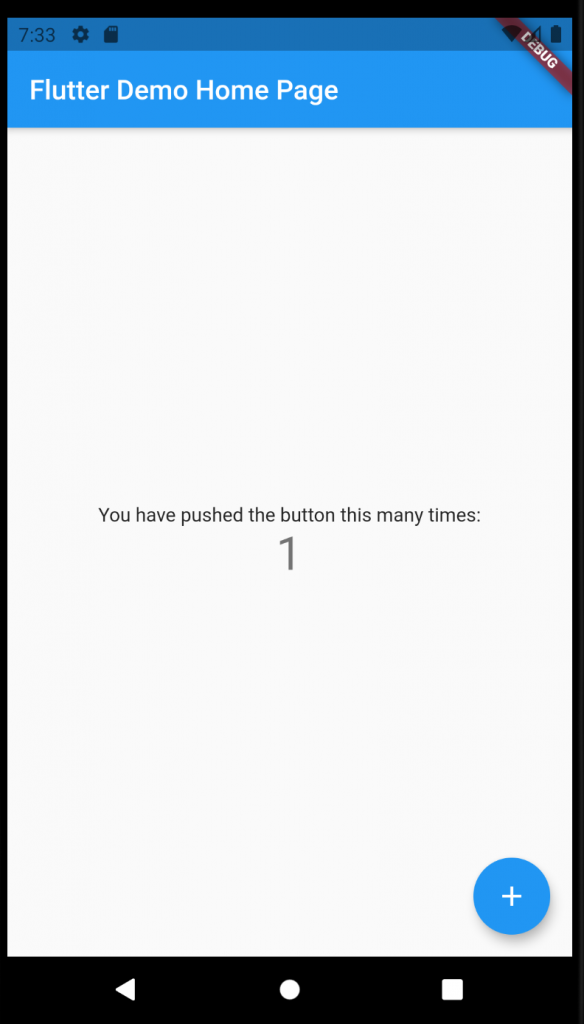
However, it is too complicated to understand for newcomers: what are stateless/stateful widgets, how states work, how to define variables, etc. Just look at the code - even with very useful comments, it's hard to grasp everything:
import 'package:flutter/material.dart';

void main() {
  runApp(MyApp());
}

class MyApp extends StatelessWidget {
  // This widget is the root of your application.
  @override
  Widget build(BuildContext context) {
    return MaterialApp(
      title: 'Flutter Demo',
      theme: ThemeData(
        // This is the theme of your application.
        //
        // Try running your application with "flutter run". You'll see the
        // application has a blue toolbar. Then, without quitting the app, try
        // changing the primarySwatch below to Colors.green and then invoke
        // "hot reload" (press "r" in the console where you ran "flutter run",
        // or simply save your changes to "hot reload" in a Flutter IDE).
        // Notice that the counter didn't reset back to zero; the application
        // is not restarted.
        primarySwatch: Colors.blue,
      ),
      home: MyHomePage(title: 'Flutter Demo Home Page'),
    );
  }
}

class MyHomePage extends StatefulWidget {
  MyHomePage({Key? key, required this.title}) : super(key: key);

  // This widget is the home page of your application. It is stateful, meaning
  // that it has a State object (defined below) that contains fields that affect
  // how it looks.

  // This class is the configuration for the state. It holds the values (in this
  // case the title) provided by the parent (in this case the App widget) and
  // used by the build method of the State. Fields in a Widget subclass are
  // always marked "final".

  final String title;

  @override
  _MyHomePageState createState() => _MyHomePageState();
}

class _MyHomePageState extends State<MyHomePage> {
  int _counter = 0;

  void _incrementCounter() {
    setState(() {
      // This call to setState tells the Flutter framework that something has
      // changed in this State, which causes it to rerun the build method below
      // so that the display can reflect the updated values. If we changed
      // _counter without calling setState(), then the build method would not be
      // called again, and so nothing would appear to happen.
      _counter++;
    });
  }

  @override
  Widget build(BuildContext context) {
    // This method is rerun every time setState is called, for instance as done
    // by the _incrementCounter method above.
    //
    // The Flutter framework has been optimized to make rerunning build methods
    // fast, so that you can just rebuild anything that needs updating rather
    // than having to individually change instances of widgets.
    return Scaffold(
      appBar: AppBar(
        // Here we take the value from the MyHomePage object that was created by
        // the App.build method, and use it to set our appbar title.
        title: Text(widget.title),
      ),
      body: Center(
        // Center is a layout widget. It takes a single child and positions it
        // in the middle of the parent.
        child: Column(
          // Column is also a layout widget. It takes a list of children and
          // arranges them vertically. By default, it sizes itself to fit its
          // children horizontally, and tries to be as tall as its parent.
          //
          // Invoke "debug painting" (press "p" in the console, choose the
          // "Toggle Debug Paint" action from the Flutter Inspector in Android
          // Studio, or the "Toggle Debug Paint" command in Visual Studio Code)
          // to see the wireframe for each widget.
          //
          // Column has various properties to control how it sizes itself and
          // how it positions its children. Here we use mainAxisAlignment to
          // center the children vertically; the main axis here is the vertical
          // axis because Columns are vertical (the cross axis would be
          // horizontal).
          mainAxisAlignment: MainAxisAlignment.center,
          children: <Widget>[
            Text(
              'You have pushed the button this many times:',
            ),
            Text(
              '$_counter',
              style: Theme.of(context).textTheme.headline4,
            ),
          ],
        ),
      ),
      floatingActionButton: FloatingActionButton(
        onPressed: _incrementCounter,
        tooltip: 'Increment',
        child: Icon(Icons.add),
      ), // This trailing comma makes auto-formatting nicer for build methods.
    );
  }
}
Not a typical simple "Hello world", right?
Plan B: Realistic "Hello World"
So, instead of this all-in-one default example, let's implement a much more simple one - just a simple screen with "Hello world" in the center.
Here's the code that you can copy-paste instead of the default lib/main.dart, replacing all of its contents. Below, I will explain it line by line:
import 'package:flutter/material.dart';

void main() => runApp(MyApp());

class MyApp extends StatelessWidget {
  @override
  Widget build(BuildContext context) {
    return MaterialApp(
      title: 'Welcome to Flutter',
      home: Scaffold(
        appBar: AppBar(
          title: Text('Welcome to Flutter'),
        ),
        body: Center(
          child: Text(
              'Hello World',
              style: TextStyle(fontSize: 28, fontWeight: FontWeight.bold)
          ),
        ),
      ),
    );
  }
}
Now, this is something we can work with. So, step-by-step.
import 'package:flutter/material.dart';This line means importing a Material Design library, which is the default library of Flutter that provides everything we need for Material Design widgets. More on widgets below.
void main() => runApp(MyApp());This line is defining the main() method that will run automatically, when the application is launched.
Important syntax here is => symbol, it's a short syntax for a function that contains only one line. Longer option of writing the same thing would be:
void main() {
    runApp(MyApp());
}
As you can see, runApp() is the only thing this function is doing, so we can shorten it with arrow syntax. In the future, you will do it a lot with Flutter, so it's quite important to remember.
Next, runApp(MyApp()) will point to the main widget that will be launched to run the application. Now, let's see what's inside that MyApp() widget.
class MyApp extends StatelessWidget {
  @override
  Widget build(BuildContext context) {
    return MaterialApp(
      // ... will discuss internals a bit later
    );
  }
}
Ok, here's where we get to the most important topic in Flutter: widgets. Basically, all elements that you can see on the app screen are widgets: buttons, text fields, labels, etc.
But also there are other types of widgets for different purposes, stuff like Container, Column, or even Padding, to style all the elements exactly as you want.
In this case, here you can see a "global" StatelessWidget class being used, and extended by your main class called MyApp. The one that we use in runApp(MyApp()) as a parameter.
Stateless widget means that there will be no dynamic behavior happening on the screen, so no variables or data changes after some button click. In our case, it will be just a text "Hello world". We will cover another type, Stateful Widgets, in later lessons.
So, your main application widget is likely to extend a Stateless widget, and inside you need to add a build() method, that will describe what's inside that widget. Before that, you add @override keyword which means that you're overriding that method which already exists in the parent class.
The return of the build() method should be a type Widget, and method build() accepts a required parameter of type BuildContext - even if you don't actually use that variable inside, you still need to have it as a parameter.
The method build() returns a widget called MaterialApp. You can find the description for it in the official Flutter widget docs, but for now all you need to know is that it's a widget from Material Design library (remember, the one that we included on the very first line).
MaterialApp Widget: What's Inside
Let's go deeper, into this code:
return MaterialApp(
  title: 'Welcome to Flutter',
  home: Scaffold(
    appBar: AppBar(
      title: Text('Welcome to Flutter'),
    ),
    body: Center(
      child: Text(
          'Hello World',
          style: TextStyle(fontSize: 28, fontWeight: FontWeight.bold)
      ),
    ),
  ),
);
Quite a few things are happening here. The main thing is that, as you use some widget, like MaterialApp, you provide its parameters as comma-separated pairs of key:value. Every widget has its own set of possible parameters, so you need to use the documentation, and also Android Studio will help and hint some of them.
For example, MateralApp widget, among other parameters, has title and home. If we quote the official documentation...
- title: A one-line description used by the device to identify the app for the user. It is not visible, it's just a system title.
- home: The widget for the default route of the app. In our case, we will have only one "page", so we will define it just inline, later we will have a more complex app so we will define the home page dynamically, depending on whether the user is logged in or not.
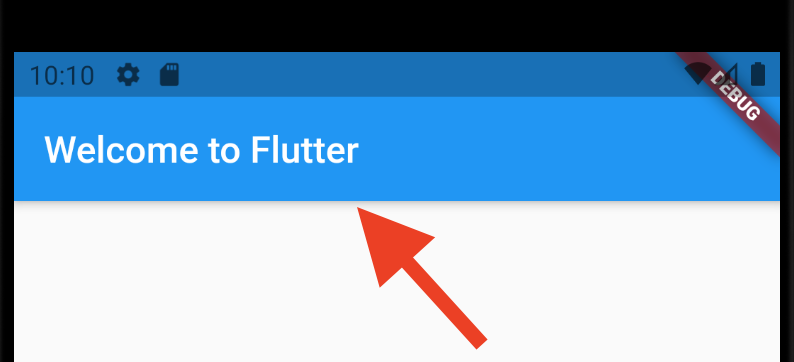
The home widget will be defined by another widget type called Scaffold. As its official documentation says, it implements the basic material design visual layout structure.
So this is where we finally get visual: Scaffold widget has properties like appBar, Body, bottomNavigationBar and others.
In our case, we use two of them: appBar and body.
The property appBar is expecting a Widget (see, everything in Flutter is a widget) of type AppBar. Again, it has various properties, but for our case, we will use just one: title.
For the title, we will return... guess what... a widget! Yes, even a simple text is a widget, class Text, which accepts the actual text (Welcome to Flutter), and optionally more properties - we'll get to that in a minute, with a second Text example.
Now, the second property of the Scaffold widget is body. It's returning, surprise surprise... a widget. In this example, I've chosen a Center widget, described in the official docs as "A widget that centers its child within itself"
Ok, so now we have a widget that has children? Yes, indeed, in fact you may have already noticed that all the structure of every Flutter screen is a tree of widgets - parents and children. In some widgets, the property is called exactly that: child. And before you ask, yes, it expects a widget. We will use the same Text widget, as in the title, but this time - with a second parameter style:
child: Text(
    'Hello World',
    style: TextStyle(fontSize: 28, fontWeight: FontWeight.bold)
),
The value of style parameter may be very different, but for this example I've chosen TextStyle, which may also accept many parameters - see the documentation and play around with the keys and values yourself, as a homework.
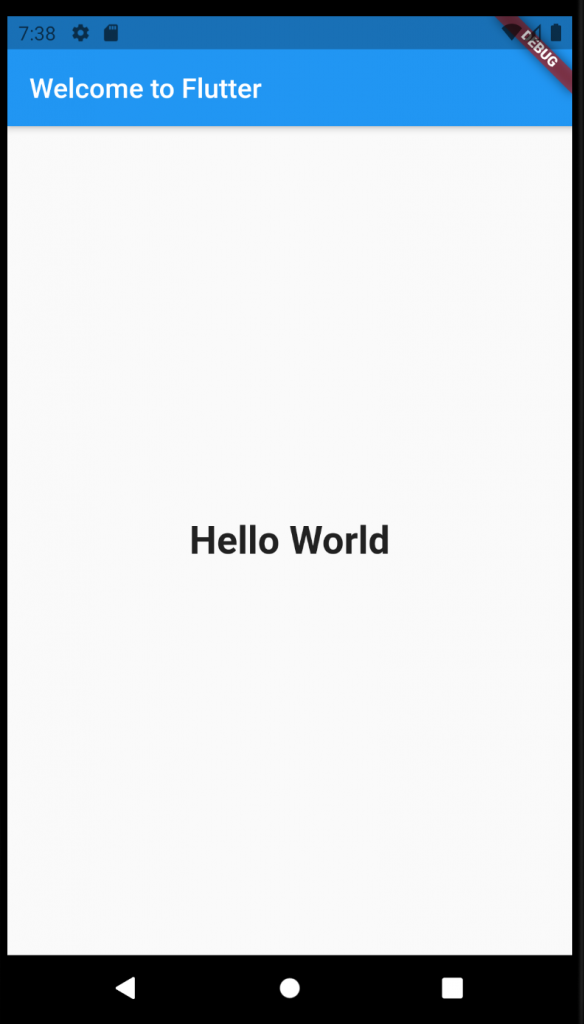
For my chosen size of 28 and bold font, it looks like this - let's look at the final result again:
So, that's it, you have created the first static simple mobile app with Flutter and hopefully understood its structure.
Next, you would dive into more widgets and their properties, to style your application exactly as you want, and in the further future - make your app dynamic, with Stateful widgets, buttons, variables and exchanging the data with external API.
No comments yet…