Let's start this course by looking at the default tests when creating a new Laravel project. You can see a folder named tests with Feature and Unit tests.

Feature VS Unit: Short Version
We will talk more deeply about their differences later in the course. But in most cases, you should start with feature tests, meaning you check some features of your application to see whether they work or not.
Unit tests are more about separate, so-called units of your code, like a function inside the class. You would test if that function internally works correctly.
In this course, we will focus most on the feature tests.
PEST vs PHPUnit
Historically, Laravel tests were written with PHPUnit framework, but in recent years, Pest framework grew more popular and became the default framework in Laravel 11.
But you can choose the testing framework during Laravel installation with Laravel installer:
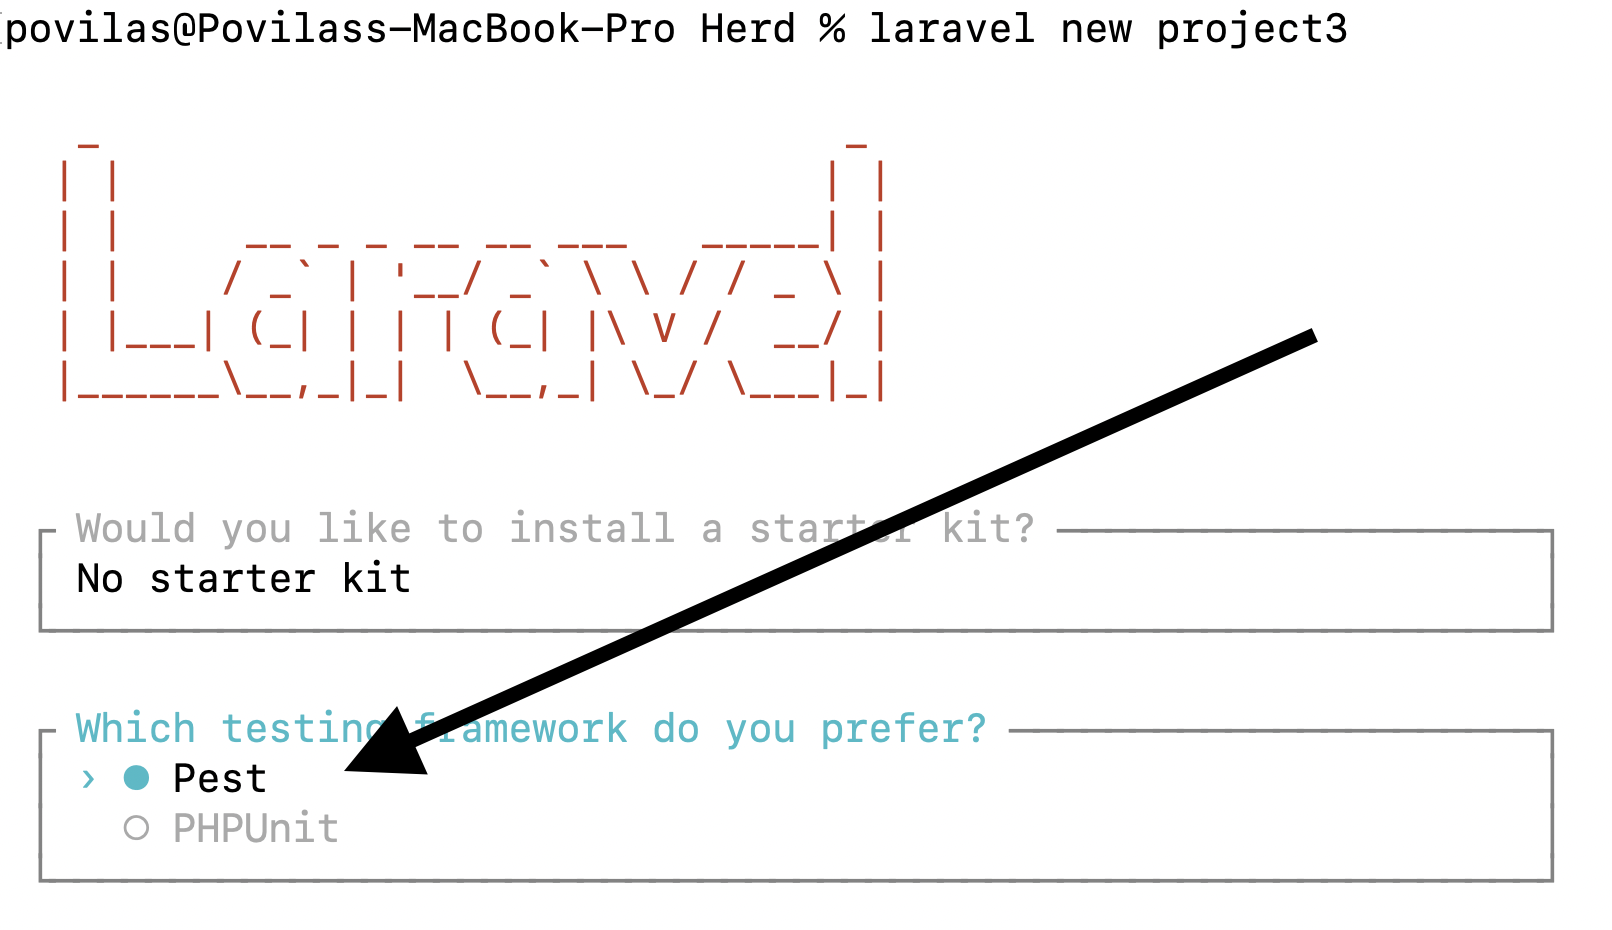
You can write tests in either Pest or PHPUnit. Both are popular and viable options. It's about personal preference:
- Pest tests are shorter and quicker to write, with some extra functionality like Architecture Testing
- PHPUnit tests are more "standard" if you wish to use them outside Laravel or find more examples on forums
In this course, for the code examples, we will use Pest, but at the end of each lesson, we will also show the same syntax using PHPUnit.
First Run of First Tests
Now let's look at the ExampleTest in the tests/Feature folder.
When writing tests using Pest, every test starts with the function test() or it(). Pest appends it to the test name when the it() function is used.
it('returns a successful response', function () { $response = $this->get('/'); $response->assertStatus(200);});We get the home page URL and check (tests use the word "assert" instead) that the status of that request is 200.
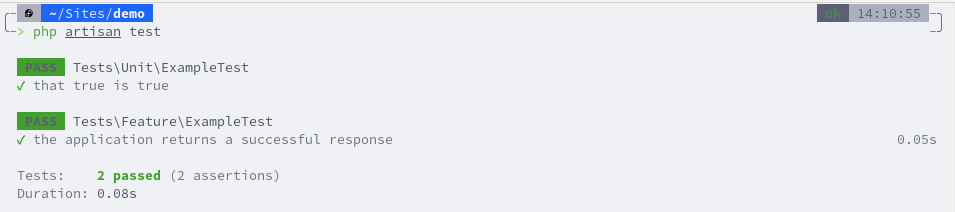
To run these tests in the Terminal, execute this command:
php artisan test
We can see that two tests passed successfully: one from Unit and one from Feature tests.
Now, what happens when a test fails? Let's change the status and re-run the tests.
it('returns a successful response', function () { $response = $this->get('/'); $response->assertStatus(403);});php artisan test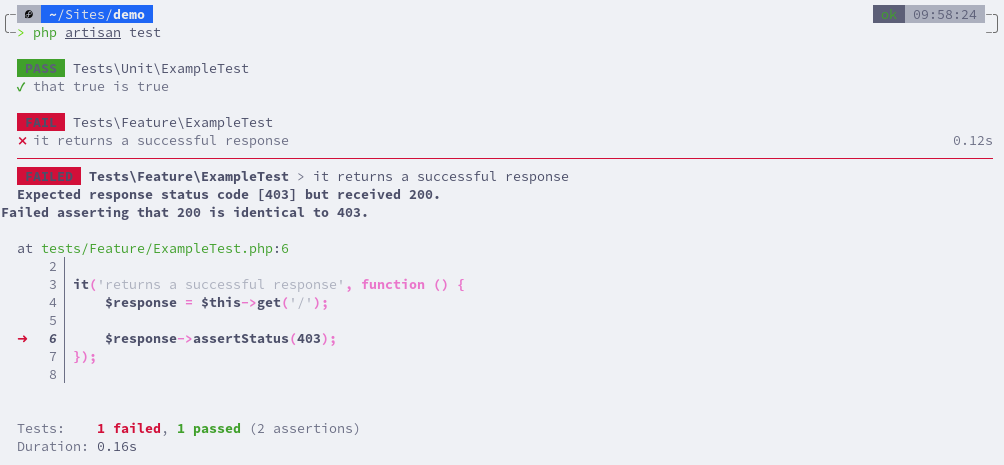
Now we can see 1 passed and 1 failed.
And inside, we can see which test failed and on which code line. It also shows the actual error Expected response status code [403] but received 200.. This is what a failed test would look like.
PHPUnit examples
As mentioned above, we will try to provide the PHPUnit code at the end of each lesson. So, what are the default tests if you want to use PHPUnit?
For PHPUnit, the ExampleTest is a class that extends the TestCase, and every test or feature to be tested is a function.
Compare that to Pest, where you don't need to create a class. Instead, you just write test functions right away.
The test class may contain multiple functions. In each function, you execute some code and then test or assert that something happened and whether it's correct. The function name should start with the test_ prefix. Here's the default example:
public function test_the_application_returns_a_successful_response(): void{ $response = $this->get('/'); $response->assertStatus(200);}The same artisan command can be used to run tests.
Notice that the names for the tests in the Terminal come from the naming of the function. When naming the test function, don't be afraid of longer names because those will be readable when someone launches tests in the feature.
Example of a failed test for PHPUnit:
public function test_the_application_returns_a_successful_response(): void{ $response = $this->get('/'); $response->assertStatus(403);}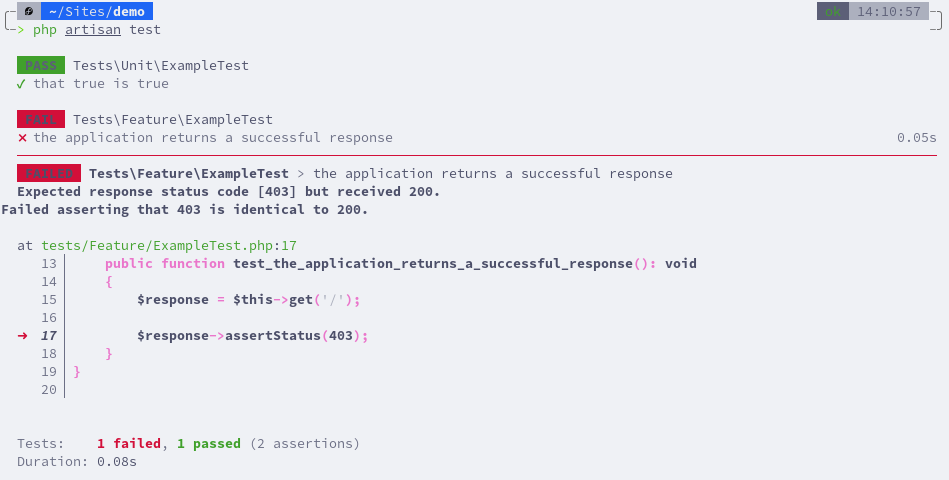
See, it's easy to start!
So, as you can see, it's not hard to start testing. Most feature tests are just launching some page or calling some API and then testing whether it is successful.
If you just want to go through all your pages/endpoints and check if they return 200 (or another success message), such tests have a special name: they are called smoke tests. When starting with testing, smoke tests can be a great starting point. You ensure your application works when you launch a new feature without digging too deep into more complex testing syntax.
All the following deeper topics of automated testing are about exploring different assertions and ways to simulate those scenarios for specific pages or functionality. This is exactly what we will cover in the upcoming lessons.
This course almost completely duplicates the already exist course (Laravel Testing For Beginners: PHPUnit, Pest, TDD), except for some information and examples on PEST.
That is the point, as one is a video format and this one is text based. Plus this one is updated for Laravel 11
Please tell me how to switch to pest if you previously had an older version of laravel with PHPUnit. Is it worth rewriting standard tests for Pest?
There is a couple of ways you can do that. But none of them are automated (besides https://laravelshift.com/phpunit-to-pest-converter ):
In both cases, the answer to "is it worth it" - really depends. If you will see a benefit from that - sure! If you are unsure - there is absolutely nothing wrong with using PHPUnit at all.
Thank you! Great lessons, everything is accessible. I like text ones even more, since they can be translated into my language and parts of the code can be copied.
Hello, no github repo ? I’m too lazy to type the code, especially since it’s often full of errors.
Hi, no repository on this tutorial, sorry.
As for errors - we would love to know where they are seen - as we fix them as soon as they are spotted :) Mistakes happen in our editing proccess and some things, sadly, get lost.
I think he meant that he makes the errors, not you :-)