
Imagine you need a system for booking appointments: doctor, hair salon, or cart racing track. In this tutorial, we will create exactly that, with a 2-in-1 demo: how to build a dynamic form in Filament and how to reuse it outside the adminpanel for non-logged-in users to be able to book an appointment.
Specifically, we will make bookings for cart racing tracks. But the same logic could be applied to a different company. Just use room numbers or doctor names instead of track names.
As usual, the link to the complete repository will be at the end of the tutorial.
Here's the Table of Contents for this detailed step-by-step tutorial.
Section 1. Filament Panel: Reservation Table/Form
- Install Filament
- Set Up User to Access Admin Panel
- Filament CRUD Resource for Tracks
- Filament: Dynamic Reservation Form
- Filament: Table of Reservations
- Filament: Disable Reservation Edit
Section 2. Public Form for Reservation
- Install And Configure TailwindCSS
- Set Up Main App Layout
- Use Service In Filament ReservationResource
- Create Livewire ReservationForm Component
Setup: DB Models and Migrations
Before getting to Filament, we need to create the DB structure in Laravel.
- Tracks will have many Reservations
- Reservation belongs to a Track and also belongs to a User
Here are our migrations and Models:
Tracks table:
Schema::create('tracks', function (Blueprint $table) { $table->id(); $table->string('title'); $table->timestamps();});app/Models/Track.php
use Illuminate\Database\Eloquent\Relations\HasMany; // ... protected $fillable = ['title']; public function reservations(): HasMany{ return $this->hasMany(Reservation::class);}Reservations table:
use App\Models\Track;use App\Models\User; // ... Schema::create('reservations', function (Blueprint $table) { $table->id(); $table->foreignIdFor(User::class)->constrained()->cascadeOnDelete(); $table->foreignIdFor(Track::class)->constrained()->cascadeOnDelete(); $table->datetime('start_time'); $table->datetime('end_time'); $table->timestamps();});app/Models/Reservation.php
use Illuminate\Database\Eloquent\Relations\BelongsTo; // ... protected $fillable = [ 'user_id', 'track_id', 'start_time', 'end_time']; public function track(): BelongsTo{ return $this->belongsTo(Track::class);} public function user(): BelongsTo{ return $this->belongsTo(User::class);}app/Models/User.php
use Illuminate\Database\Eloquent\Relations\HasMany; public function reservations(): HasMany{ return $this->hasMany(Reservation::class);}We also seed the admin user and five racing tracks.
database/seeders/DatabaseSeeder.php
use App\Models\Track;use App\Models\User; public function run(): void{ User::create([ 'name' => 'Admin', 'password' => bcrypt('password'), ]); $tracks = [ 'Track 1', 'Track 2', 'Track 3', 'Track 4', 'Track 5', ]; foreach ($tracks as $track) { Track::create(['title' => $track]); }}And finally, migrate and seed the database.
php artisan migrate:fresh --seedOk, we have the database ready. Now it's time to build the admin panel.
1. Filament Panel: Reservation Table/Form
First, we will build a Filament project so that the administrator can place a booking. In the following Section 2, we will re-use that form to accept reservations from the outside.
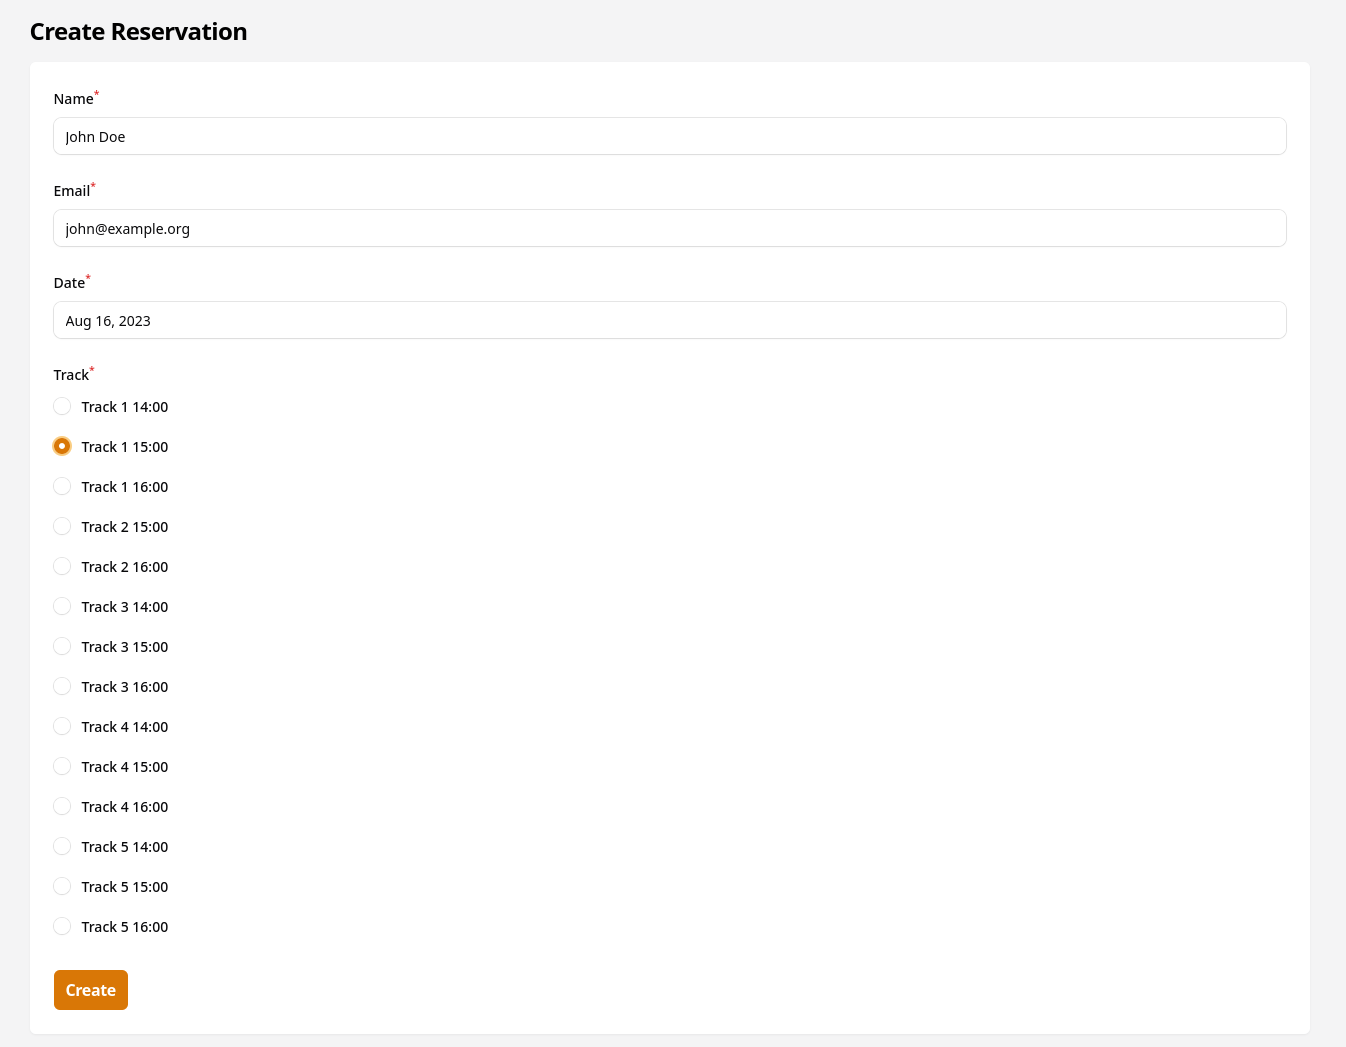
Our form will be dynamic: the admin chooses the date, sees the available timeslots, and then picks the radio button selected.
1.1. Install Filament
Since Livewire v3 is still in beta, set the minimum-stability in your composer.json to dev.
composer.json
"minimum-stability": "dev"Install the Filament Panel Builder by running the following commands in your Laravel project directory.
composer require filament/filament:"^3.0-stable" -W php artisan filament:install --panels--with-all-dependencies (-W): Update also dependencies of packages in the argument list, including those which are root requirements.
1.2. Set Up User to Access Admin Panel
To set up your User Model to access Filament in non-local environments, you must implement the FilamentUser contract and define the canAccessPanel() method.
use Filament\Models\Contracts\FilamentUser;use Filament\Panel; class User extends Authenticatable implements FilamentUser{ // ... public function canAccessPanel(Panel $panel): bool { return true; }}The canAccessPanel() method returns true or false depending on whether the user can access the $panel. In this example, we let all users access the panel.
When using Filament, you do not need to define any routes manually. Now you can log in by visiting the /admin path.

After logging in, you should see the following dashboard.
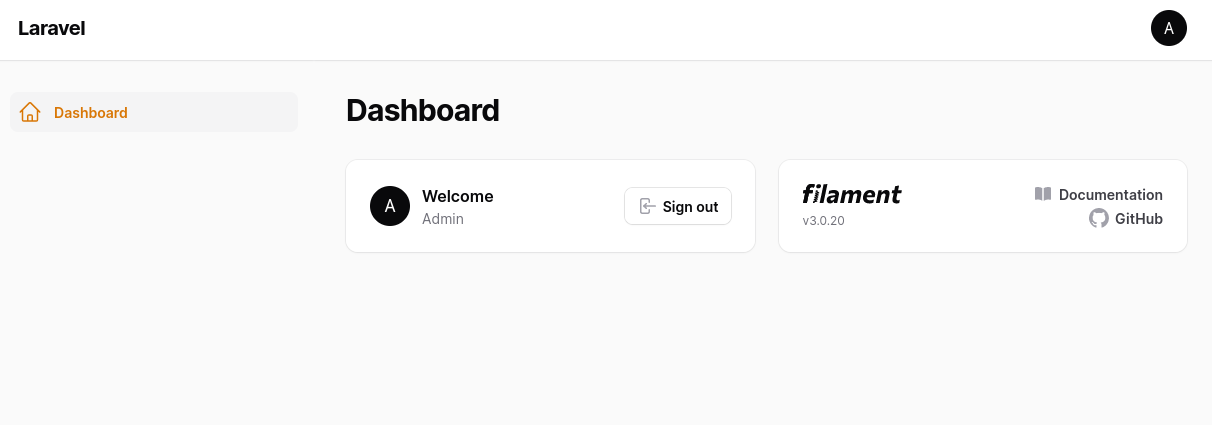
Our dashboard is empty, so let's make a section for managing tracks.
1.3. Filament CRUD Resource for Tracks
Let's allow admins to manage Tracks.
In Filament, resources are static classes used to build CRUD interfaces for your Eloquent models. They describe how administrators can interact with data from your panel using tables and forms.
Use the following artisan command to create a new Filament resource for the Track Model.
php artisan make:filament-resource TrackThen in the table() method columns() call, define TextColumn to display title.
app/Filament/Resources/TrackResource.php
use Filament\Tables\Columns\TextColumn; public static function table(Table $table): Table{ return $table ->columns([ TextColumn::make('title'), ]) // ...}That's it, and when you refresh the dashboard, you should see a new Tracks entry in the menu.

You can explore different column types on Filament Table Columns Documentation.
Now let's define input fields for creating and editing Track in the form() method.
app/Filament/Resources/TrackResource.php
use Filament\Forms\Components\TextInput; public static function form(Form $form): Form{ return $form ->schema([ TextInput::make('title')->required()->maxLength(255), ]);}Validation rules can be applied to the TextInput by calling required() and maxLength() methods.
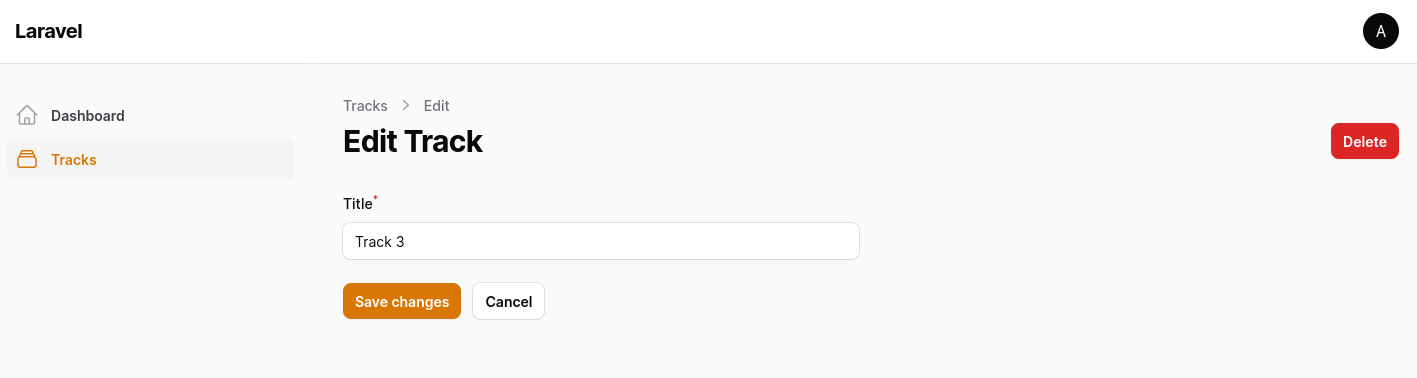
Now we can edit and create new tracks in just a minute.
Filament will try to save model attributes under the same name you defined by default.
Possible form components and their options are on Filament Fields Documentation.
1.4. Filament: Dynamic Reservation Form
Let's create a Reservation resource.
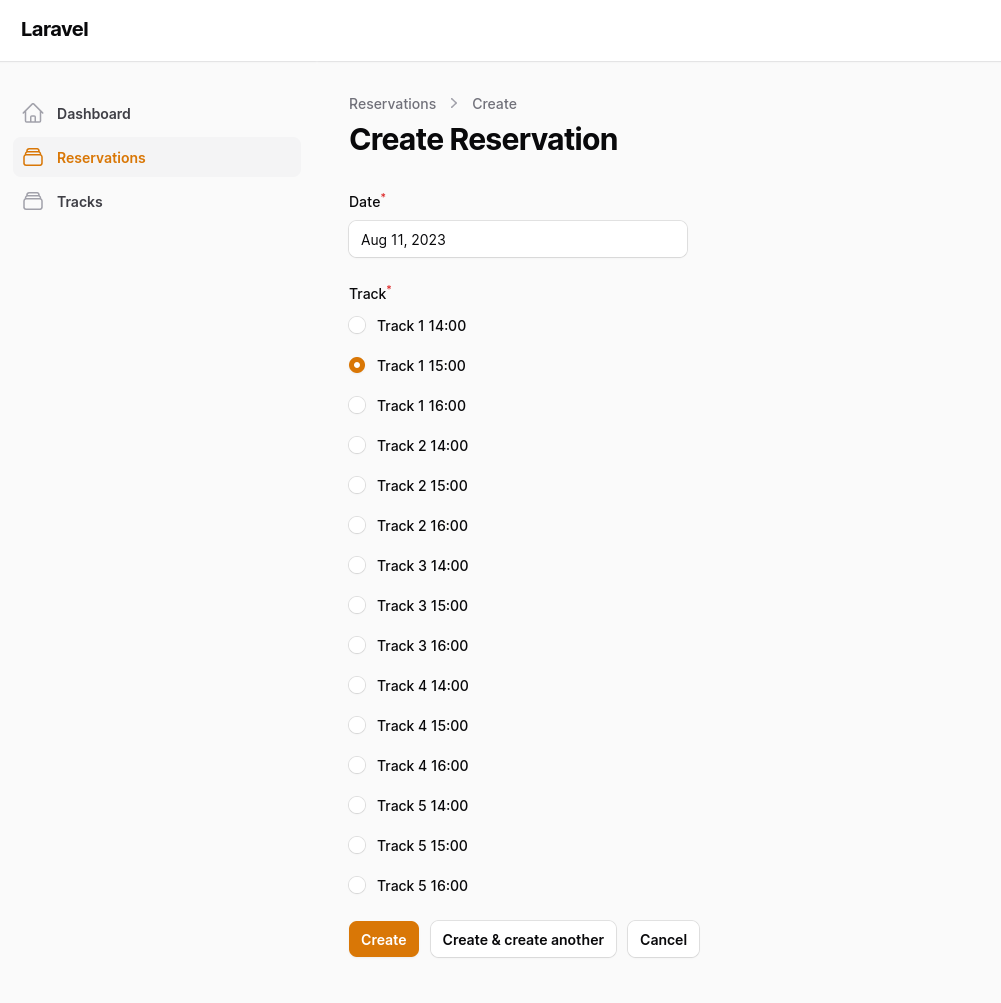
php artisan make:filament-resource ReservationAnd define the create form's date and track fields. We use the getAvailableReservations() static method to get available reservations. Note that in the resource, all methods are static.
app/Filament/Resources/ReservationResource.php
use App\Models\Track;use Carbon\Carbon;use Carbon\CarbonPeriod;use Filament\Forms\Components\DatePicker;use Filament\Forms\Components\Radio;use Filament\Forms\Get; // ... public static function form(Form $form): Form{ $dateFormat = 'Y-m-d'; return $form ->schema([ DatePicker::make('date') ->native(false) ->minDate(now()->format($dateFormat)) ->maxDate(now()->addWeeks(2)->format($dateFormat)) ->format($dateFormat) ->required() ->live(), Radio::make('track') ->options(fn (Get $get) => self::getAvailableReservations($get)) ->hidden(fn (Get $get) => ! $get('date')) ->required() ->columnSpan(2), ]);} public static function getAvailableReservations(Get $get): array{ $date = Carbon::parse($get('date')); $startPeriod = $date->copy()->hour(14); $endPeriod = $date->copy()->hour(16); $times = CarbonPeriod::create($startPeriod, '1 hour', $endPeriod); $availableReservations = []; $tracks = Track::with([ 'reservations' => function ($q) use ($startPeriod, $endPeriod) { $q->whereBetween('start_time', [$startPeriod, $endPeriod]); }, ]) ->get(); foreach ($tracks as $track) { $reservations = $track->reservations->pluck('start_time')->toArray(); $availableTimes = $times->copy()->filter(function ($time) use ($reservations) { return ! in_array($time, $reservations) && ! $time->isPast(); })->toArray(); foreach ($availableTimes as $time) { $key = $track->id . '-' . $time->format('H'); $availableReservations[$key] = $track->title . ' ' . $time->format('H:i'); } } return $availableReservations;}Now let's get through all the logic.
DatePicker::make('date') ->native(false) ->minDate(now()->format($dateFormat)) ->maxDate(now()->addWeeks(2)->format($dateFormat)) ->format($dateFormat) ->required() ->live(),By default DatePicker component uses...
Premium Members Only
This advanced tutorial is available exclusively to Laravel Daily Premium members.
Already a member? Login here
Premium membership includes:
This. is an excellent and very complete example of how to use this. Thank you!
Love this! Is there a way to access the form object with state in livewire component realtime?
Excellent tutorial!! Combines a lot of (not all so trivial) stuff!!
I added a filament-livewire-form to a new breeze-project, but the styling seems to conflict. Form-borders etc are disappearing. I did exactly like the tutorial, some was already there by Breeze, so I added it. But something is different, so the forms and buttons are disappearig.
Any suggestions?
Solved! I missed to add @filamentStyles in the layout.
Briljant tutorial!
I am following the tutorial, and it throws this error:
I had to use this code for postcss.config.js:
Hi there,
I'm loving your content. I was just wondering if you know of a way to allow some parts of a Filament panel to be accessible to unauthenticated guest users? My thinking was to use middleware that logs in a "guest" pseudouser with extremely limited permissions if no user is authenticated, but this would require some kind of customization to the "sign out" button to make it a "sign in" button, and a few other things. What are your thoughts on this?
We've never done it that way, I think you're overcomplicating it. It should be either for authenticated users (and then you play with their permissions), or for guest public users, like in this tutorial example. That "middle option" you're talking about requires very custom solutions and just not worth that effort, in my opinion.
Is there a repo for this? I tried to replicate the form on the frontend but the styling just broke and I can't figure out where.
Repository link is at the bottom of the article:
https://github.com/LaravelDaily/Filament-Appointment-Reservations-Demo
probably you need to run
npm iandnpm run devWonder if there is a way to "share" resources between panels... Let's say I have some "ClientResource" under some "operators" panel... Is it possible to gain access to this "ClientResource" while you are under the "admin" panel ???
You can manually register the same resource OR create a new file in admin that extends the operator class.
But to be honest, that's the point of panels - they are supposed to be separated and work individually
Ok, I agree with you... But anyway, how do you "manually register" the same resource from one panel in some other ???
can this use the filament notifications and buttons as well?
With multiple panels and infolists, it seems the public parts of the app can also be made with Filament. Create the admin panel like normal, then a public panel that uses mostly infolists in its pages, and set the roles and permissions accordingly on each panel. No need to have a separate app and deal directly with livewire components.
How to add dark theme?
This is great. Now in 2026, it will be even more polished on Filament5 to connect https://filamentphp.com/plugins/guava-calendar with the Zap backend https://www.laravel-zap.com/
Is their any way you would conceter updating this to the latest versions of Laravel and Filament I have been trying to do just that but it will not work for me keep getting crazy errors.
code line used