Bagisto is one of the most popular Laravel e-commerce systems. In this tutorial, we will try to build a small demo e-shop with it, step-by-step, creating a custom design theme.
The example shop idea is taken from a "former official" store of Laravel products. At the time of writing this article, the Laravel team is rebuilding a new store, so not sure if this link is still working in the future, but: laravel.bigcartel.com
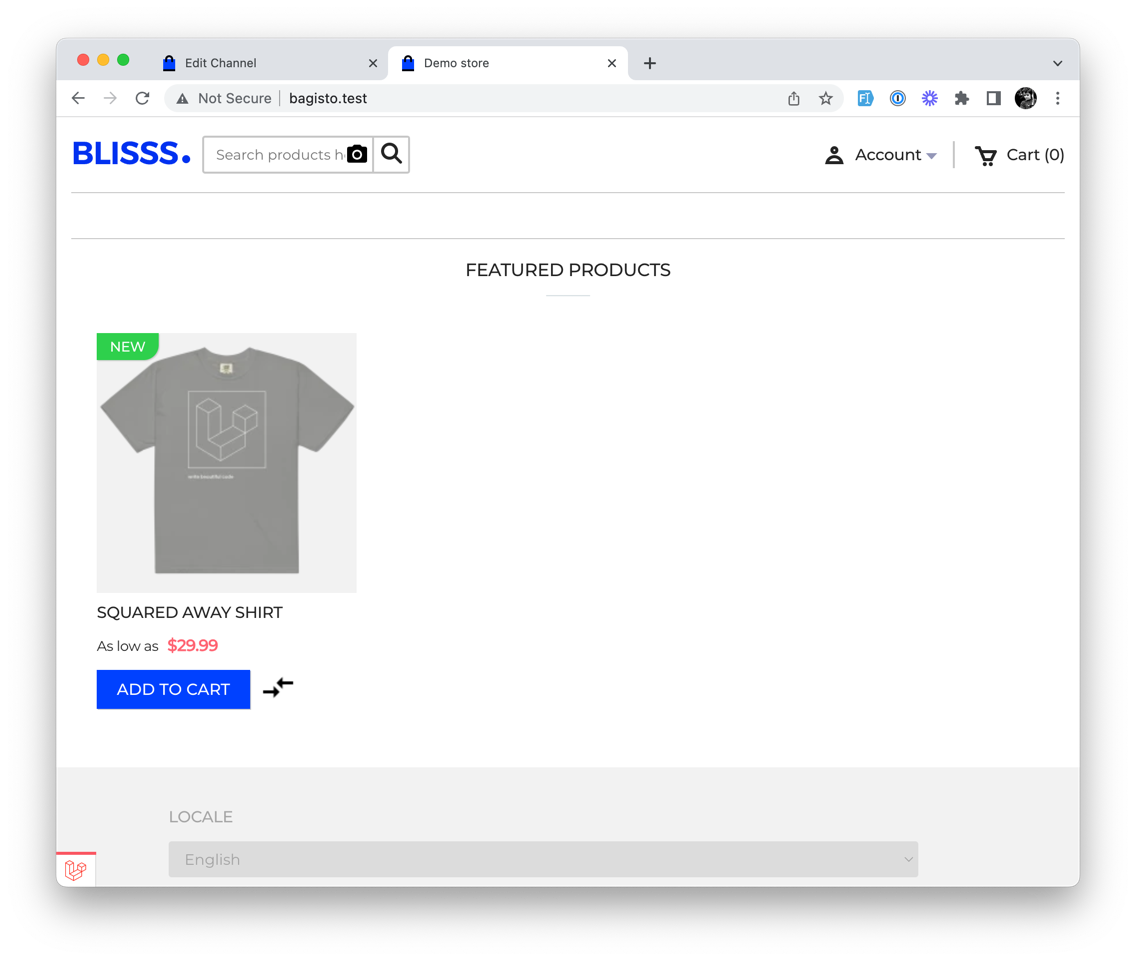
The end goal will look something like this:
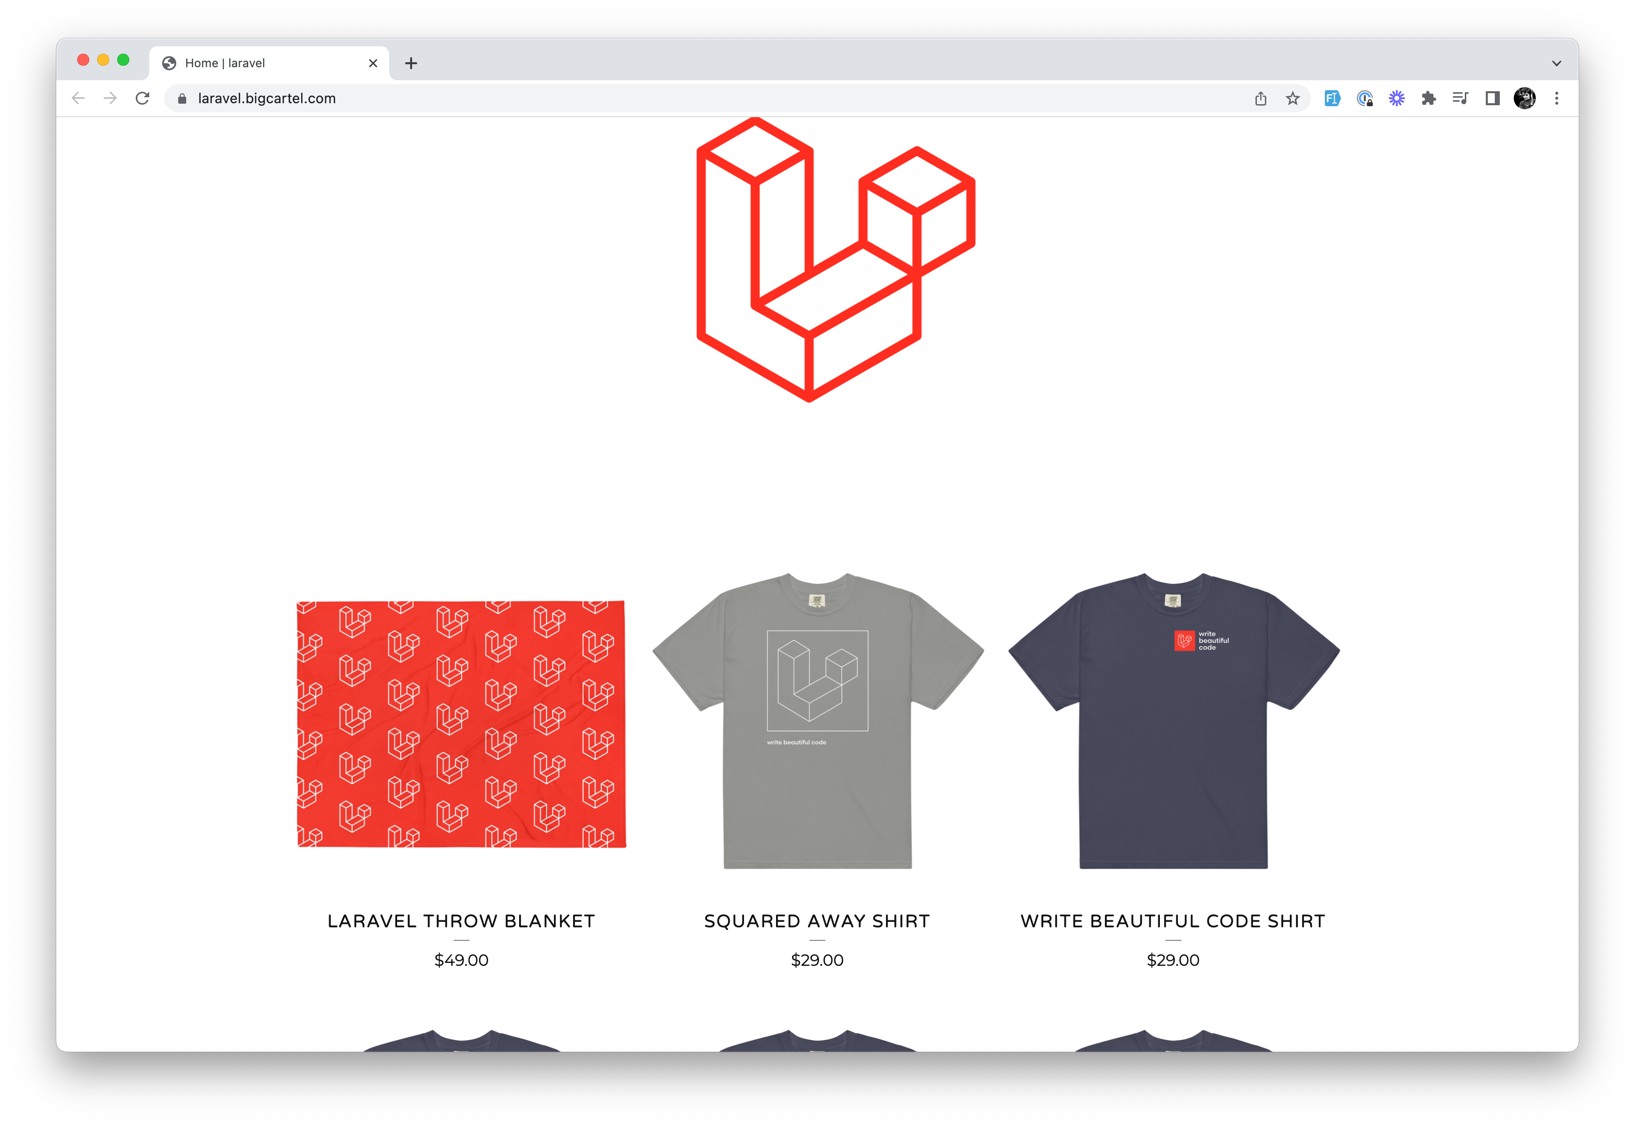
This Laravel merchandise store has this functionality:
- Custom design
- Product lists
- Product preview pages
- Product variation
- Basket
- Checkout
And to build it, we'll have to:
- Install Bagisto
- Add a custom theme
- Add products
Notice: in this tutorial, we will not touch the checkout and payment processes, only the visual front look of the store with products. Maybe a topic for a future follow-up.
Installation
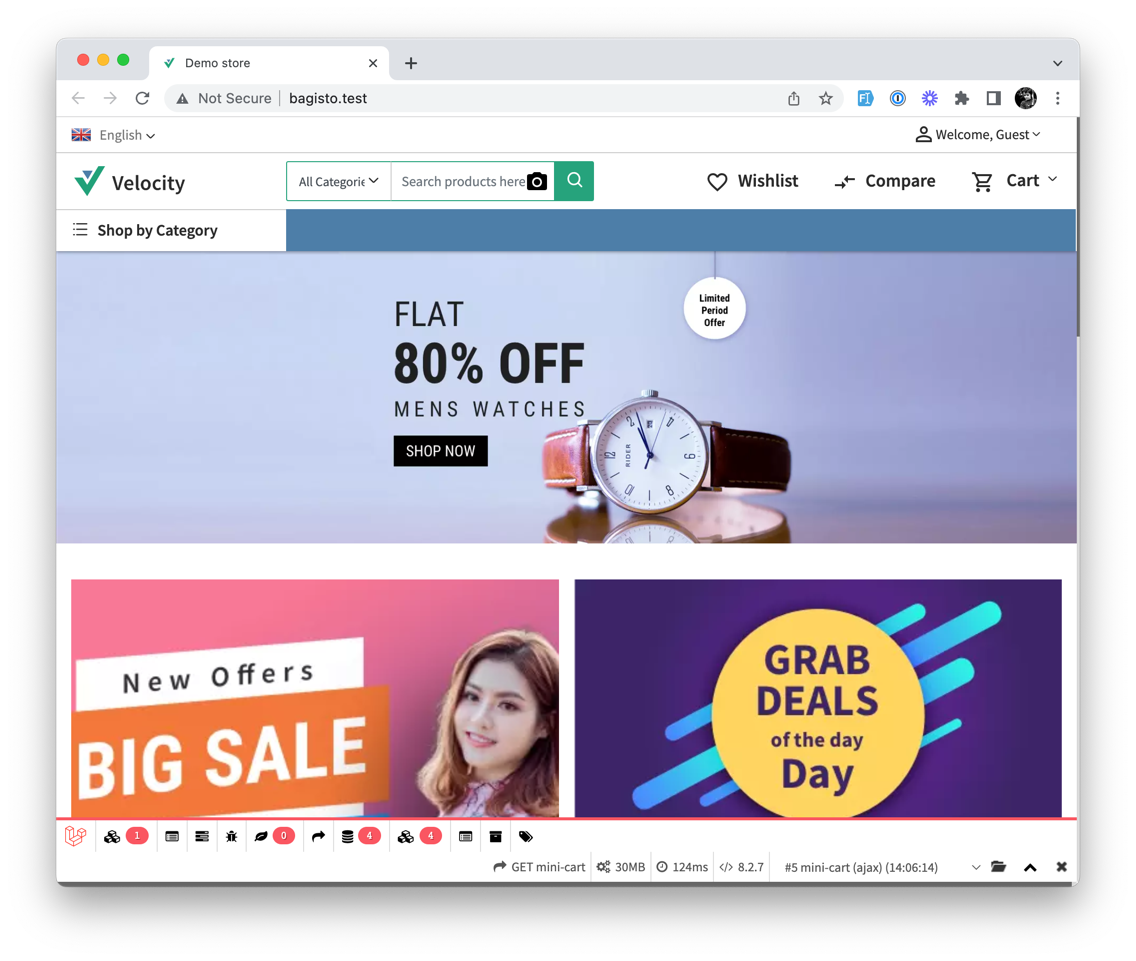
To install Bagisto, we've followed the official installation guide:
composer create-project bagisto/bagistoAfter that, we modified our .env file filling database credentials. Then we've run migrations:
php artisan migrate --seedThis already set quite a lot of things in place, but we've also had to run:
php artisan storage:linkTo make sure that our images are accessible.
And lastly, we've just published all the assets:
php artisan vendor:publish --allThis step might have been overkill, but it's on the guide, so we've done it. This resulted in a store that looks like this:
Creating a Custom Theme
Now that we have a store, we must make it look like the one we've shown in the beginning. To do that, we have to create a theme. This can be done like this:
Copy the folder resources/themes/default to resources/themes/laravelshop (or any other name you need)
Copy the folder public/themes/default to public/themes/laravelshop (or any other name you need)
Then open up config/themes.php and add your theme to the list:
<?php return [ 'default' => 'default', 'themes' => [ 'default' => [ 'views_path' => 'resources/themes/default/views', 'assets_path' => 'public/themes/default/assets', 'name' => 'Default' ], 'velocity' => [ 'views_path' => 'resources/themes/velocity/views', 'assets_path' => 'public/themes/velocity/assets', 'name' => 'Velocity', 'parent' => 'default' ], 'laravelshop' => [ 'views_path' => 'resources/themes/laravelshop/views', 'assets_path' => 'public/themes/laravelshop/assets', 'name' => 'LaravelShop', 'parent' => 'default' ], ], 'admin-default' => 'default', 'admin-themes' => [ 'default' => [ 'views_path' => 'resources/admin-themes/default/views', 'assets_path' => 'public/admin-themes/default/assets', 'name' => 'Default' ] ]];The last step is to log in to the admin panel and set the theme to the one we've just created:
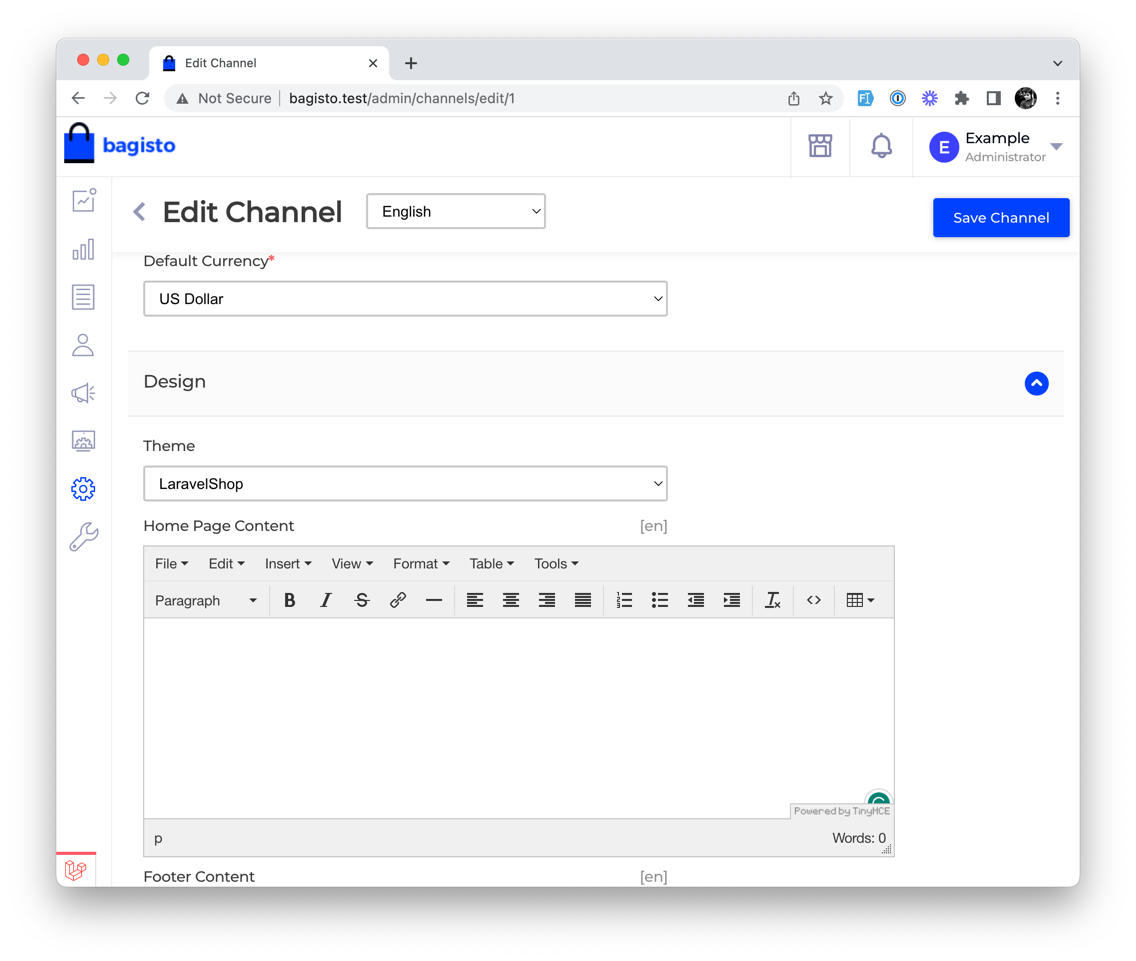
You need to navigate to Settings -> Channels:
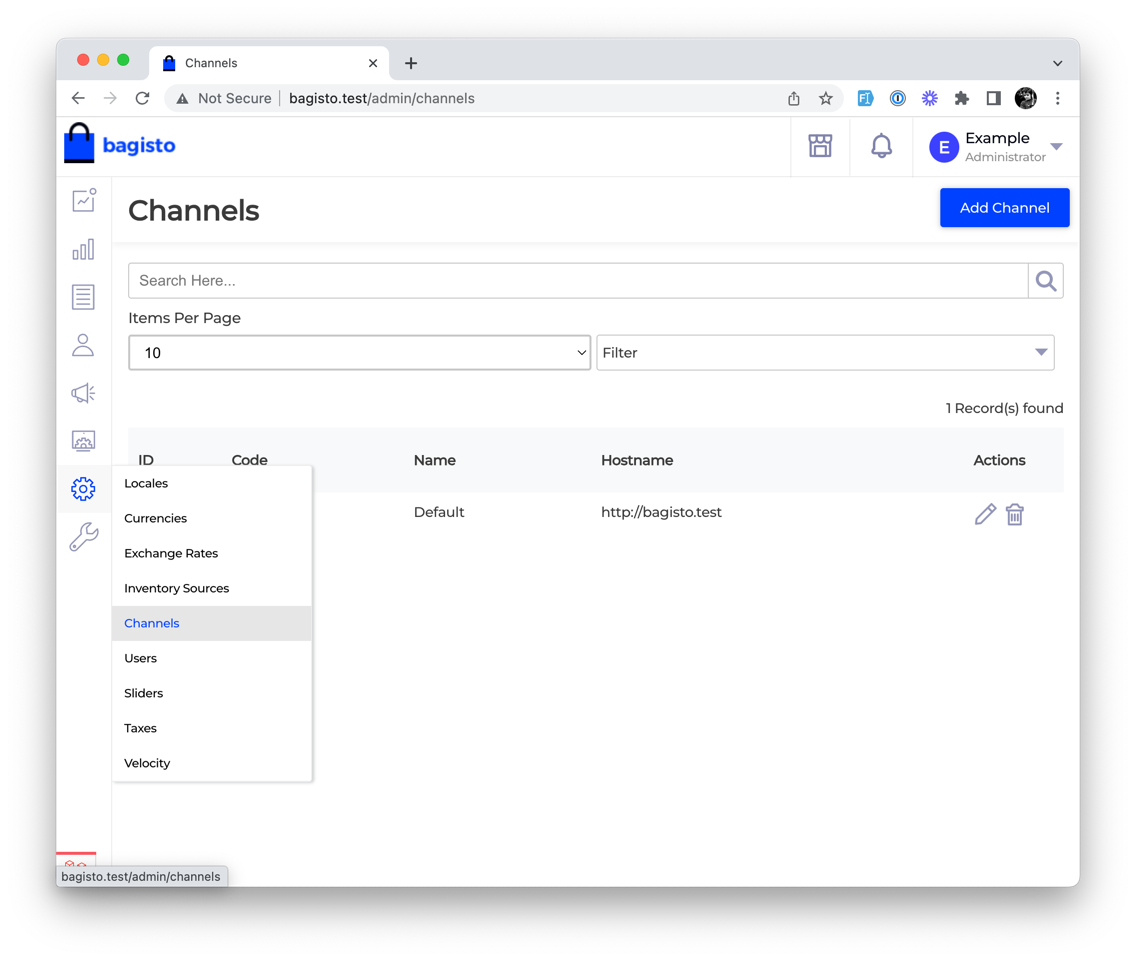
Then edit the default channel by scrolling until you find the Theme field:
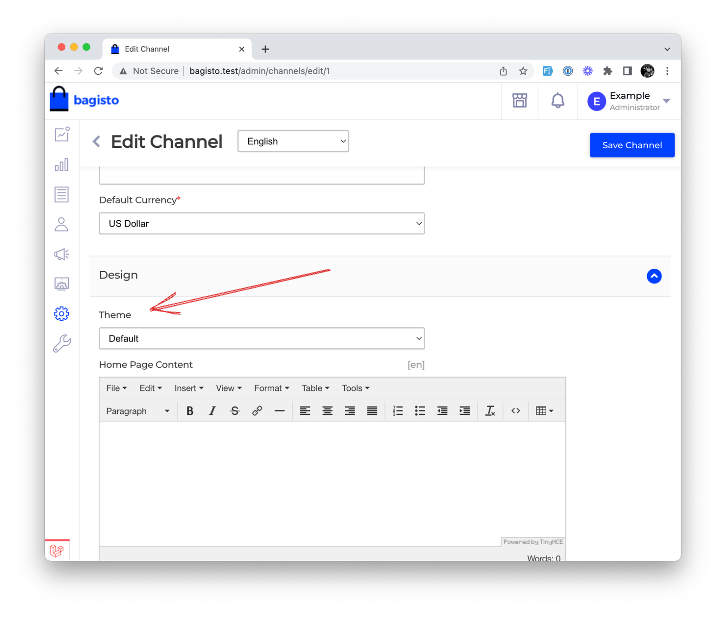
In this dropdown, you should select a theme named LaravelShop (or whatever you've named your theme in config/themes.php).
That's it! Now we have our custom theme running and can modify the shop!
Customizing the Theme
Now that our theme is live, we must make it unique and specifically created for us. We'll have to modify the files in the resources/themes/laravelshop/views folder to do that. This is where all the views are stored, and we can modify them to our liking.
Warning: looking from a pure Laravel MVC perspective, Bagisto Blade code may look like anti-pattern, because A LOT of logic is in Blade files. You will see many @php ... @endphp blocks and <?php calls in the Views, which is generally not recommended. But in this case, it makes perfect sense, as different blocks now are totally isolated and independent from other files.
Homepage
Let's start by modifying the homepage. The initial step is to change what is displayed on the homepage. To do that, we need to go into channel settings (we've changed the theme there) and change the Home Page Content value:
New value:
@include('shop::home.featured-products')
Then we need to clear the Footer Content input and save. This will make our homepage update look like this:
Which already made our job easier by removing a lot of unnecessary elements. Next is the actual customization of the template:
Fixing the Header
The first thing we need to fix is...
-front_grid.jpg)
![[Mini-Course] Laravel 11: Breeze with User Role Areas](https://laraveldaily.com/storage/699/conversions/laravel-vue-inertia-beginners-(26)-front_grid.jpg)