
Seeding data in Laravel is quite simple, but also has a lot of caveats, less-known functions and use-cases. Both Seeders and Factories have so much "hidden" power that we've compiled this HUGE tutorial, with screenshots from real scenarios.
You can treat it as "Laravel docs on steroids": same functions explained in a more practical visual way, with a better flow to read step-by-step.
Among other topics, in this tutorial, we will answer questions, like:
- How do you create model factories with complex relationships?
- What's the best way to test with large datasets?
- How can you make one factory field depend on another?
- Which factory methods are powerful but rarely used?
- How do you make test data look realistic?
So, let's dive in!
Table of Contents
1. Seeding Approaches
- Using the DatabaseSeeder Class
- Using Separate Seeder Files
- Running Individual Seeders
2. Understanding Laravel Factories
- Creating a Factory
- Using Factories in Seeders
- Other Factory Use Cases
3. Factory Methods and Features
- Factory States
- Persistent vs Non-Persistent Factories
- Overriding Factory Values
- Sequence Factories
- Lifecycle Hooks: afterMaking and afterCreating
4. Working with Relationships
- BelongsTo Relationships
- HasMany Relationships
- ManyToMany Relationships
- Polymorphic Relationships
- Reusing Models with recycle()
5. Tips and Best Practices
- Accessing Other Attributes
- Seeding Unique Values
- Lesser-Known Factory Methods
- Matching Real-World Data
- Testing with Large Datasets
1. Seeding Approaches
In Laravel, we have a couple of ways to seed our Database:
- Using the
DatabaseSeederclass - Using separate files for each Seeder and calling them from the
DatabaseSeederclass
Let's explore each approach.
Using the DatabaseSeeder Class
Laravel provides a DatabaseSeeder class by default:
database/seeders/DatabaseSeeder.php
// ... class DatabaseSeeder extends Seeder{ /** * Seed the application's database. */ public function run(): void { // User::factory(10)->create(); User::factory()->create([ 'name' => 'Test User', ]); }}Which already contains a seed for Test User. But what if we want to add more things? Let's take our Currency example:
database/seeders/DatabaseSeeder.php
class DatabaseSeeder extends Seeder{ /** * Seed the application's database. */ public function run(): void { User::factory(10)->create(); User::factory()->create([ 'name' => 'Test User', ]); $currencies = [ [ 'name' => 'US Dollar', 'code' => 'USD', ], [ 'name' => 'Euro', 'code' => 'EUR', ], [ 'name' => 'British Pound', 'code' => 'GBP', ], ]; foreach ($currencies as $currency) { Currency::create($currency); } }}Let's try to run the Seeder:
php artisan db:seed# Or (if you want to refresh the database)php artisan migrate:fresh --seed
This screen shows that our Seeder ran successfully. But that's all the information we get. We don't know how long it took to run, which can lead us to think that the Seeder is stuck. This is because the Seeder is running synchronously, and we have no way to know how long it will take.
Of course, this is not the only problem. When the system grows - and it will - the DatabaseSeeder class will become a mess. It will be hard to maintain and understand. We should consider using separate files for each Seeder.
Using Separate Seeder Files
Let's take a look at separate files for each Seeder. In this case, we will move the Currency Seeder and User Seeder to separate files:
php artisan make:seeder CurrencySeederphp artisan make:seeder UserSeederLet's fill the CurrencySeeder with the Currency data:
database/seeders/CurrencySeeder.php
class CurrencySeeder extends Seeder{ /** * Run the database seeds. */ public function run(): void { $currencies = [ [ 'name' => 'US Dollar', 'code' => 'USD', ], [ 'name' => 'Euro', 'code' => 'EUR', ], [ 'name' => 'British Pound', 'code' => 'GBP', ], ]; foreach ($currencies as $currency) { Currency::create($currency); } }}And the UserSeeder with the User data:
database/seeders/UserSeeder.php
class UserSeeder extends Seeder{ /** * Run the database seeds. */ public function run(): void { User::factory(10)->create(); }}Finally, let's call these Seeders from the DatabaseSeeder class:
database/seeders/DatabaseSeeder.php
class DatabaseSeeder extends Seeder{ /** * Seed the application's database. */ public function run(): void { User::factory()->create([ 'name' => 'Test User', ]); $this->call([ CurrencySeeder::class, UserSeeder::class ]); }}Now, let's run the Seeder:
php artisan db:seed# Or (if you want to refresh the database)php artisan migrate:fresh --seed
As you can see, we have a detailed report of which Seeders ran and how long they took. This is a much better approach than using the DatabaseSeeder class.
Running Individual Seeders
Another advantage of using separate files is that we can run them individually. This can be useful when we want to run only one Seeder:
php artisan db:seed --class=UserSeederThis will run only the UserSeeder and not the CurrencySeeder:
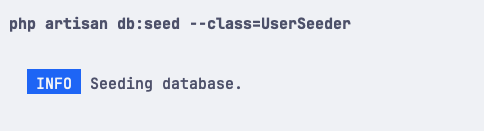
This is a great way to test and debug Seeders or in testing environments where we need to run only a specific Seeder.
2. Understanding Laravel Factories
Let's talk about Factories in Laravel. Factories are great if we want to generate fake data for our Database:
Factory Example
public function definition(): array{ return [ 'name' => fake()->name(), 'email' => fake()->unique()->safeEmail(), 'email_verified_at' => now(), 'password' => static::$password ??= Hash::make('password'), 'remember_token' => Str::random(10), ];}This Factory will generate a User with a random name and a unique email. But how does it work?
Creating a Factory
Let's look at how Factories are Created. For this, we need...
Thank you for this wonderful and detailed article! One factory method I discovered recently is
forEachSequence()– it lets you pass in arrays of sequenced attributes and creates exactly that many models, eliminating the need to specify thecount()method.Thank you for the kind words and another tip!
Will update the article with this change soon
useful course thanks
Another way I used to generate data for one to many and many to many relationships. my main purpose is to generate random records rather stick with constant value.
Someone might have a different opinion on this. I would like to hear those. Greate article by the way!!
Yeah, I think it's also a valid option. Thanks for the comment, Kal!
So I have a question. I have two tables that are large. One has 44K rows and other approximately 8K rows. If I use RefreshDatabase then simply reloading these two tables takes time and I need them to do adquate testing.
Do you have any thoughts or strategies to deal with large table issues and RefreshDatabase?
Currently I simply do not use RefreshDatabase and I truncate the tables I need to in the before and after events.
In your case, I would not use
RefreshDatabasebut instead I would useDatabaseTransactions. That way records are automatically cleared after the test is done, but you can still manually seed the initial data and keep it there. Of course, this won't work on the CI.To have this working on the CI, I would do a setup action for your tests where it would import an SQL file. Yes, a static test only file. That way, you'd spend less time on fake data :)
Thank you for the suggestion, I will look into it.
I know for Nightwatch the team generated sample data for each hour of the day and more data in business hours vs. non business hours by timezone for their testing. I would be interested in a detailed understanding of how they did it efficiently. Just a suggestion for future directions for this excellent subject matter.