
There are a lot of courses and articles about coding but much less about putting it in production. With a lot of questions asked, I decided to write this ultimate (hopefully) guide to deploy Laravel projects.
In this article, I will assume two things:
- You already know Laravel and its artisan commands on at least junior level
- You want to deploy your project to a dedicated server and not a shared hosting, meaning you have full access to the server via SSH
Notice 1: please take this article as personal advice but not 100% accurate process. Every team have their own way to deploy projects, so you may read different advice elsewhere. Notice 2: this article was written in October 2018 and updated in August 2022, check for any updates to software and Laravel/PHP versions at the time you're reading it, IT world is constantly changing.
Enough formalities, let's dive in. In this article, we will cover these steps:
- Prepare your dedicated server for Laravel
- Initial launch of the project
- How to deploy new changes
- Zero-downtime deployment
- Teamwork, staging server and branches
- Brief overview: Automated testing and continuous integration
Step 1. Prepare your dedicated server for Laravel
In 2018, I wrote a recommendation article for the server needed for Laravel projects. My personal preference is Digital Ocean. They have their own guides for Laravel projects.
To be honest, I don't want to focus on this step too much, cause server preparation is not part of deployment. But these are the parts that you need to prepare, in short:
Part 1. Create/purchase your dedicated server. In case of Digital Ocean it's called Droplet, Amazon AWS call it EC2 instance etc.
Part 2. Install LEMP or LAMP stack. LAMP/LEMP stands for LInux (comes with server), web-server (Nginx for "E" and Apache for "A"), MySQL database and PHP. A lot of server providers offer this as a one-click install - see Digital Ocean example below:

Notice: Linux-server is the reason I advise to use Linux environment on local computer, too. This way you get used to configuration. But don't worry, you don't need to install Linux or buy specific new computer - it all can be emulated with Laravel Valet or Laravel Sail. For Windows users, I've also heard good things about Laragon. There's also Laravel Herd available for Mac and Windows.
Part 3. Configure SSH access for yourself. You will probably deploy changes by SSHing to the machine and running commands like git pull, php artisan migrate etc. Forget uploading via FTP, if you still do it. Learn more about users/privileges for SSH access in this Digital Ocean article.
Part 4. PHP and Dependencies for Laravel. At the time of writing this, Laravel latest version is 12 with these requirements:
- PHP >= 8.2
- Ctype PHP Extension
- cURL PHP Extension
- DOM PHP Extension
- Fileinfo PHP Extension
- Filter PHP Extension
- Hash PHP Extension
- Mbstring PHP Extension
- OpenSSL PHP Extension
- PCRE PHP Extension
- PDO PHP Extension
- Session PHP Extension
- Tokenizer PHP Extension
- XML PHP Extension
Part 5. Install/configure composer. You do want to run composer install command on the server, right? Follow the instructions from the official GetComposer.org website.
Part 6. Install/configure git. Putting the code to the server will work by pulling it down from git repository. Probably this official instruction will help.
Part 7. Configure MySQL. You need to create a database specific for your project, and a user to access it. You may create a separate user, granting only specific privileges. Digital Ocean have article on it, too.
Part 8. Configure Web-server. Prepare a specific folder for your website. Here's an example Nginx config provided in official Laravel documentation.
server { listen 80; listen [::]:80; server_name example.com; root /srv/example.com/public; add_header X-Frame-Options "SAMEORIGIN"; add_header X-Content-Type-Options "nosniff"; index index.php; charset utf-8; location / { try_files $uri $uri/ /index.php?$query_string; } location = /favicon.ico { access_log off; log_not_found off; } location = /robots.txt { access_log off; log_not_found off; } error_page 404 /index.php; location ~ \.php$ { fastcgi_pass unix:/var/run/php/php8.3-fpm.sock; fastcgi_param SCRIPT_FILENAME $realpath_root$fastcgi_script_name; include fastcgi_params; fastcgi_hide_header X-Powered-By; } location ~ /\.(?!well-known).* { deny all; }}Part 9. Point the Domain to Server. our new server probably has some IP address given to you by Digital Ocean (or other provider), so now you need to go to the page of your domain configuration (where you've bought the domain) and change its DNS records, specifically A record to point to that new IP address. Here's article on Quora about it.
Ok, at this stage, if you've completed all of the above successfully, you have your server ready. Not that simple, huh? To avoid all that manual work, I totally recommend using Laravel Forge - it prepares the server for you, with all the correct settings, in just a few clicks. If you work with multiple clients, totally worth $19/month (this is the most popular plan price at the time of writing this article). Also, you support Taylor Otwell and Laravel by using Forge.
Step 2. Initial launch of the project
Now, as we have server ready, let's put the code there.
Part 1. Putting the code to the repository. Choose the system you want to use - GitHub, Bitbucket or Gitlab. Then create a repository there and push your code from your local computer.
Here's a sample sequence of commands from Github, from the point of initializing Git repository:
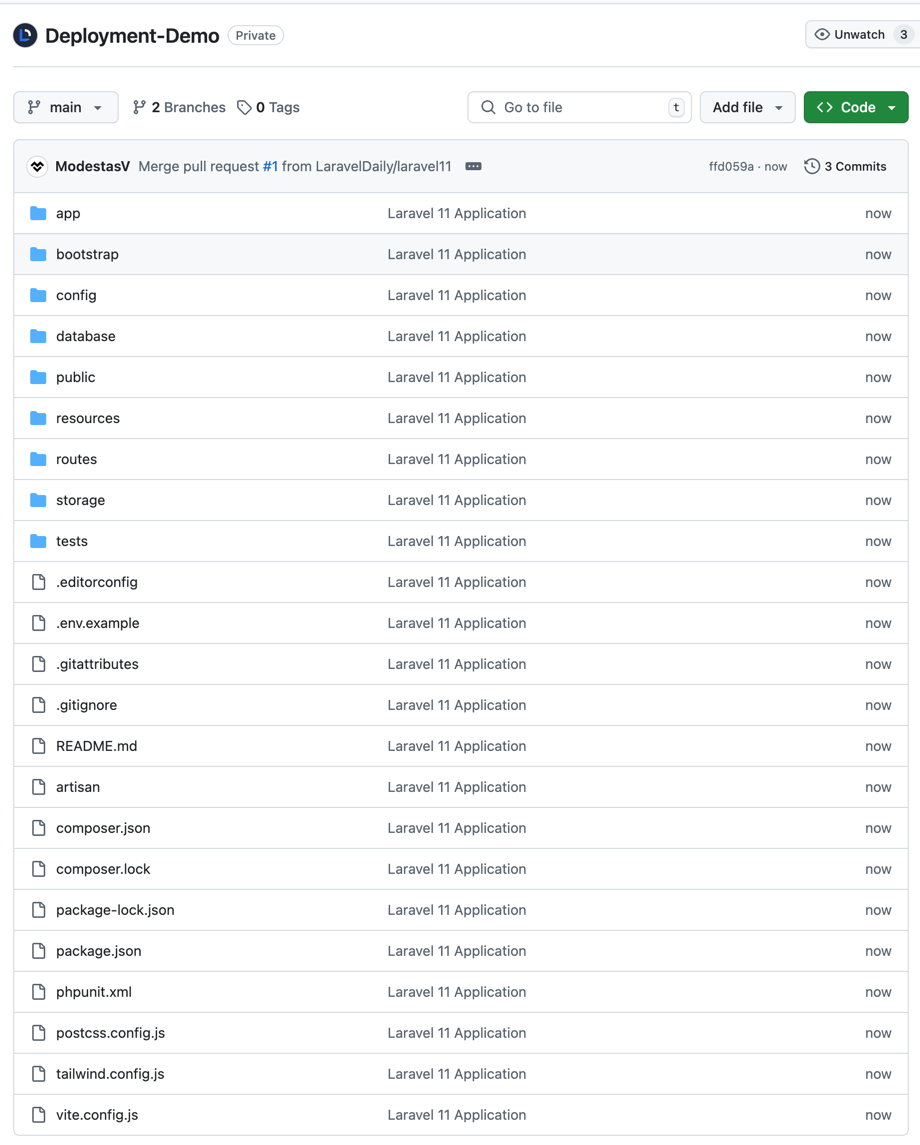
git initgit add README.mdgit commit -m "first commit"git branch -M maingit remote add origin https://github.com/LaravelDaily/Deployment-Demo.gitgit push -u origin mainLet's take an example of totally fresh Laravel 12 project. Now, if you pushed your code to Github, your repository should look like this.
Part 2. Cloning repository to the server. We need to SSH into our server, navigate to the folder prepared for the project, and launch git clone command:
git clone https://github.com/LaravelDaily/Deployment-Demo .Keep in mind that your server should have access to the repository, if it's not public. You can do that by specifying your username and Github personal access token (not password! Read more here) every time you're asked, or you can set up the access following these instructions.
After cloning is successful, we should see the files downloaded to the server.

Important thing about public folder - make sure that your Web-server configuration points to public folder correctly, and your full repository is cloned in one folder above, not into public. Here's an example from Nginx config:
server { ... server_name deploymentdemo.laraveldaily.com; root /home/forge/deploymentdemo.laraveldaily.com/public; ...Part 3. .env file.
Now, we need to configure our environment.
Laravel comes with a file called .env.example, with all typical configuration values, here's its version from Laravel 12:
APP_NAME=LaravelAPP_ENV=localAPP_KEY=APP_DEBUG=trueAPP_URL=http://localhost APP_LOCALE=enAPP_FALLBACK_LOCALE=enAPP_FAKER_LOCALE=en_US APP_MAINTENANCE_DRIVER=file# APP_MAINTENANCE_STORE=database # PHP_CLI_SERVER_WORKERS=4 BCRYPT_ROUNDS=12 LOG_CHANNEL=stackLOG_STACK=singleLOG_DEPRECATIONS_CHANNEL=nullLOG_LEVEL=debug DB_CONNECTION=sqlite# DB_HOST=127.0.0.1# DB_PORT=3306# DB_DATABASE=laravel# DB_USERNAME=root# DB_PASSWORD= SESSION_DRIVER=databaseSESSION_LIFETIME=120SESSION_ENCRYPT=falseSESSION_PATH=/SESSION_DOMAIN=null BROADCAST_CONNECTION=logFILESYSTEM_DISK=localQUEUE_CONNECTION=database CACHE_STORE=database# CACHE_PREFIX= MEMCACHED_HOST=127.0.0.1 REDIS_CLIENT=phpredisREDIS_HOST=127.0.0.1REDIS_PASSWORD=nullREDIS_PORT=6379 MAIL_MAILER=logMAIL_SCHEME=nullMAIL_HOST=127.0.0.1MAIL_PORT=2525MAIL_USERNAME=nullMAIL_PASSWORD=nullMAIL_FROM_NAME="${APP_NAME}" AWS_ACCESS_KEY_ID=AWS_SECRET_ACCESS_KEY=AWS_DEFAULT_REGION=us-east-1AWS_BUCKET=AWS_USE_PATH_STYLE_ENDPOINT=false VITE_APP_NAME="${APP_NAME}"But for your server the values will be different, so we need to do two things:
- Copy that example file as our main .env file with this command:
cp .env.example .env- Edit that new .env file, with Linux editors like Vim:
vi .envYou can change a lot of variables, but the main ones are these:
APP_ENV=localAPP_DEBUG=trueAPP_URL=http://localhost DB_CONNECTION=mysqlDB_HOST=127.0.0.1DB_PORT=3306DB_DATABASE=laravelDB_USERNAME=rootDB_PASSWORD=So set up your app URL, app env to production, app debug to false, and database credentials. Everything else can be edited when you actually need it.
Part 4. Composer install. Let's run this "magic" command. On this step, you may encounter some errors if some packages are not compatible with your PHP version or extensions. So check for any messages.
In case of success, it looks something like this:

Part 5. Generate application key. We need to run this command:
php artisan key:generateIt generates a random key which is automatically added to .env file APP_KEY variable.
Part 6. Migrating DB schema. Do you have any database table to migrate? Then let's launch this:
php artisan migratePlease make sure you've set up correct database credentials in .env file.
Part 7. Seeding data? If you have set up your database/seeds , this is probably the time to run them:
php artisan db:seedTo speed up the process, you may run two commands above as one:
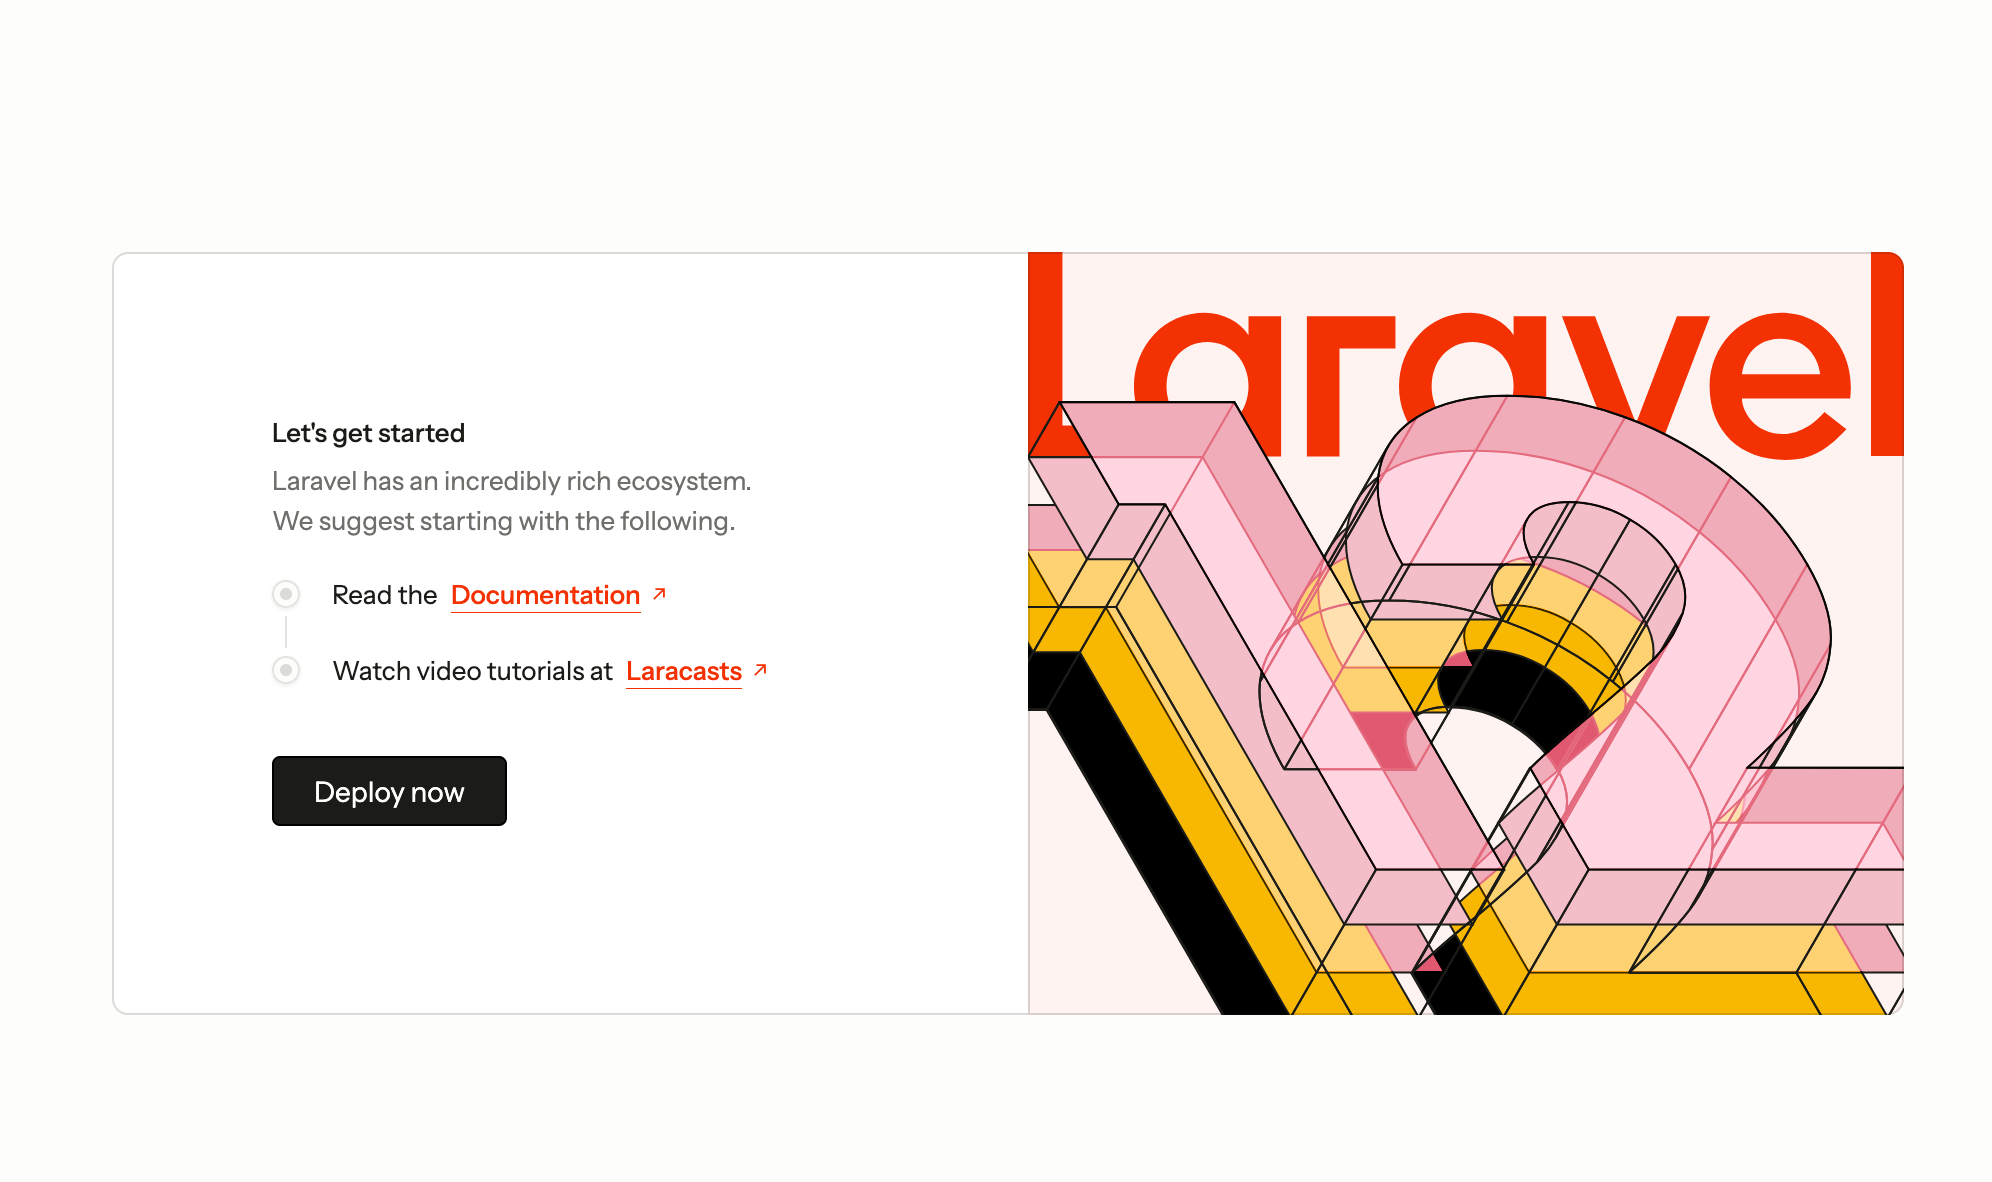
php artisan migrate --seedPart 8. Launch! Finally, let's try it out in the browser... It works!
Congratulations, if you've reached this far, you have deployed Laravel project to your server!
But that's not the end of the article, let's see how to work with this project and deploy future changes.
Step 3. How to deploy new changes
Ok so we have the first version of the project deployed. Now, how to deploy the changes in our code? Also, how to do it without breaking anything and with least amount of downtime possible? Here's the plan:
Part 1. Artisan down. There is an Artisan command to get all the website "down".
php artisan downIf you launch it on the server, the whole website becomes unavailable, and then you can do any deployment actions, and your visitors won't interrupt you. Otherwise you're at risk the someone will change some database data in live mode, which may even break your deployment.
After this command, your visitors will see this page (in Laravel 12):

To get the site up and running again, after all the deployment actions, run this command:
php artisan upPart 2. Git pull. You need to pull the latest version of the code to the folder. It's simple:
git pullYou can add more parameters like branch, but we will be talking about branching strategy a little later in the article.
Part 3. Composer install. Next thing is to check if there are any new changes in composer.lock files, so run composer install.
Important notice: don't run "composer update" on a live server. It will take a lot of time (a few minutes) and will break repository consistency.
This is how you install a new package to the project:
- On local computer run
composer requirewith whatever package you need - Or, add your package to
composer.jsonfile and runcomposer update - During committing to the repository, you will have both
composer.jsonandcomposer.lockchanged. That's ok. - If you do
composer installon the server, it will look intocomposer.lockand will do only the necessary changes, without checking all of the versions for all packages.
Part 4. DB migrations. If you have any database changes in database/migrations, run this:
php artisan migrateActually, run this anyway, even if you don't have changes. It won't error, just will say "Nothing to migrate".
But important notice: don't edit the migration files if they are already in repository, for every change add a new migration file.
Part 5 (optional). Restart FPM. This step is not always necessary, but will restart PHP and kill any processes that have been started. For the latest PHP 8.1 version, at the moment, on Ubuntu, run this:
sudo service php8.3-fpm restartChange 8.3 version here to your real PHP version.
Part 6 (optional). Restart queues. If you have any Queue mechanism running, it is advisable to run this:
php artisan queue:restartPart 7. Optimization. After deployment a variety of files should be cached: configuration, events, routes, and views. Laravel provides a single command to do that:
php artisan optimizePart 8. Up and running again! And that's it, let's get the site working again.
php artisan upTo sum up, here's an example sequence of commands in one of my projects:
cd /home/forge/deploymentdemo.laraveldaily.comphp artisan downgit pull origin maincomposer installphp artisan migratephp artisan optimizephp artisan queue:restartphp artisan upStep 4. Zero-downtime deployment
You probably think that it takes a lot of time to (properly) deploy the changes. While you're running various commands, and investigate potential issues, visitors may be waiting for the site to be working again. For minutes. Not cool.
To solve this problem, people came up with a solution called zero-downtime deployment. The principle is pretty easy:
- You create a new folder on the server
- You clone the newest version of the code there from repository
- You run all the commands above on that new folder (while website is still running from the old folder)
- Now you have two folders, you just need to change Linux so-called symbolic link - point it to a new folder
This way, your customers experience absolutely zero downtime - symlinks happen almost instantly.
There are a few tools that arrange this zero-time deployment for you, with ability to rollback to a different folder, logging the process and report about errors. For example, Laravel Forge have this feature.
Step 5. Teamwork, Staging Server and Branches
Let's take one step even further. How do you deploy the changes, while working in a team? And not necessarily sitting in the same office or even working within the same timezone. How do you not break each other's code?
You need to use git branching, here's an example screenshot from my own SourceTree for one of the projects:

There are quite a few options to organize this process, but here's the process I would personally recommend.
- You should have (at least) two branches in repository - main/master and develop
- You should have two servers - one is LIVE version and would pull the code from main branch (git pull origin main), and testing server (also often called "staging") which would pull the code from develop (git pull origin develop)
- No developer is allowed to commit directly to main branch. It may be even restricted on repository settings level. Everyone commits to develop branch ONLY. (or feature branches, more on that below)
- When you're ready to release some function to live version, it should be done in develop branch and tested (manually and maybe with automated tests) on staging server. Then you do a Pull Request in repository, which merges develop into main. Pull Request may be reviewed by teammates, and then officially approved/merged. Then live server pulls the code from the main branch.
- If someone is working on a bigger feature, they should create so-called "feature branch" from develop branch, and then at some point do a Pull Request from that branch into develop (not main!). Likely there will be code conflicts to merge manually and talk between teammates.
.env File on Staging Server
Speaking about staging server, this is the one that probably your client will test on to confirm the feature is ready. So you need to prepare a separate environment for it, specifically .env file. Here are the important variables:
APP_ENV=stagingAPP_DEBUG=trueAPP_URL=http://test-something.yourdomain.comDon't leave APP_ENV as "local", it should be different (but not "production").
Also, APP_DEBUG=true means it will show errors with all trace, as it should for testing purposes. But don't forget that on live server it should be strictly APP_DEBUG=false, otherwise you have security issue.
Finally, put your server's URL as APP_URL. Simple.
DB_CONNECTION=mysqlDB_HOST=127.0.0.1DB_PORT=3306DB_DATABASE=database_nameDB_USERNAME=userDB_PASSWORD=passwordHave a separate database for staging server. Don't ever play around with live data for testing.
STRIPE_API_KEY=sk_test_N9voB......PUB_STRIPE_API_KEY=pk_test_pIaGo.....Finally, if you have any external services like Stripe, don't forget to put their sandbox/testing credentials in .env file. Or, for email sending, you can use a separate driver and service like Mailtrap.
Bonus: Automated testing and continuous integration
Kind of a separate "advanced" topic of deployment is you may want to run automated tests on a separate testing server. You can set it up manually or use tools like GitHub Actions.
There are many ways how developers set it up and configure, but short version will be this:
- You have written automated tests - unit, feature, behavior or other type of tests. Check my 2-hour course Laravel Testing For Beginners for this.
- You have prepared database seeders to run and create a new fresh database with some dummy data for running your tests.
- Every time you commit code to develop branch, testing server pulls it and runs the tests, informing you whether code is "safe" to go live (but don't trust that "green light" blindly).
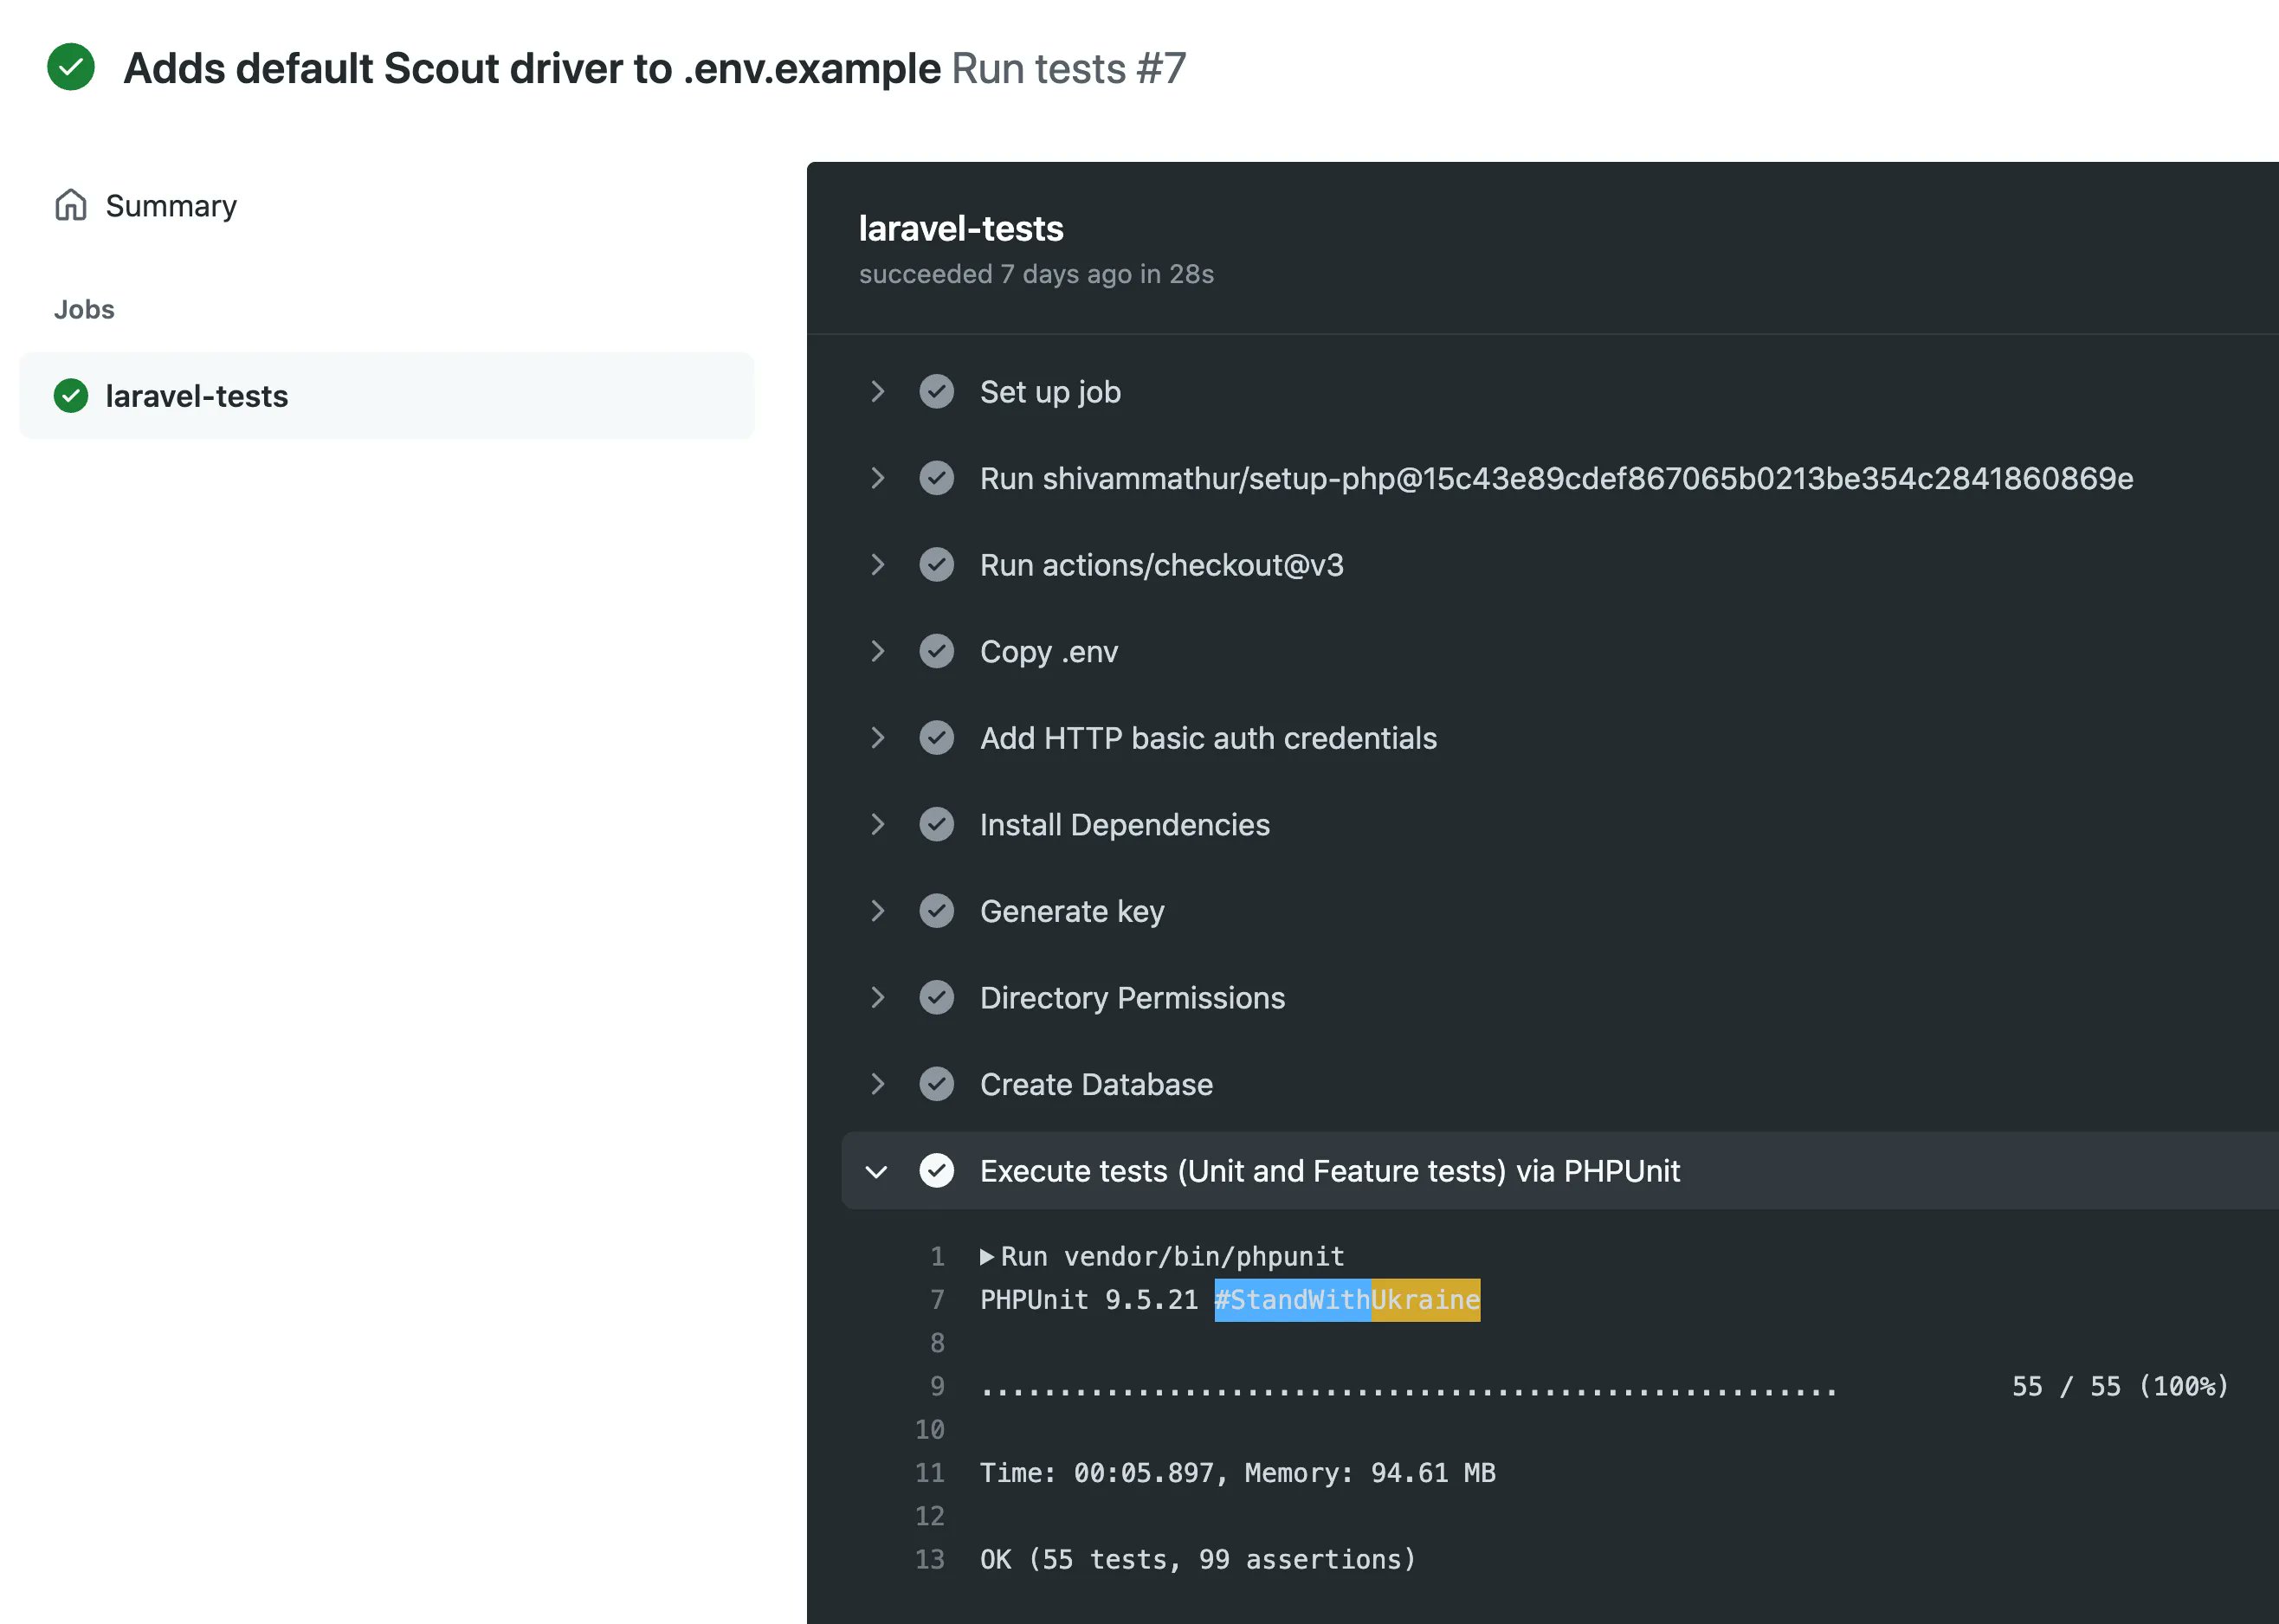
Here's example automated check by Github Actions in our Pull Request on Github:
In ideal scenario, which is called Continuous Integration, everything is automatic - developers just commit their code, and system informs the team if some tests fail.
But it can be done in more simple and manual way - just have basic automatic tests and run them manually by typing php artisan test on your staging server. Just don't forget to prepare the database for it - with seeders and fake data (recommended) or some testing semi-real data (be REALLY careful about it).
Final Notes
So here it is, I have described deployment process for Laravel (but most of it is applicable for other frameworks/languages, too). But even in this big article I haven't touched some topics that may help to make this even smoother. So I'm leaving these for you to explore:
- Bug tracking and reporting software. Laravel has Nightwatch. Here's my video review of Nightwatch. There are also services like BugSnag, Flare.
- Backup your database before every deployment, it's really easy with Spatie Laravel Backup package or using a paid service like SnapShooter Backups
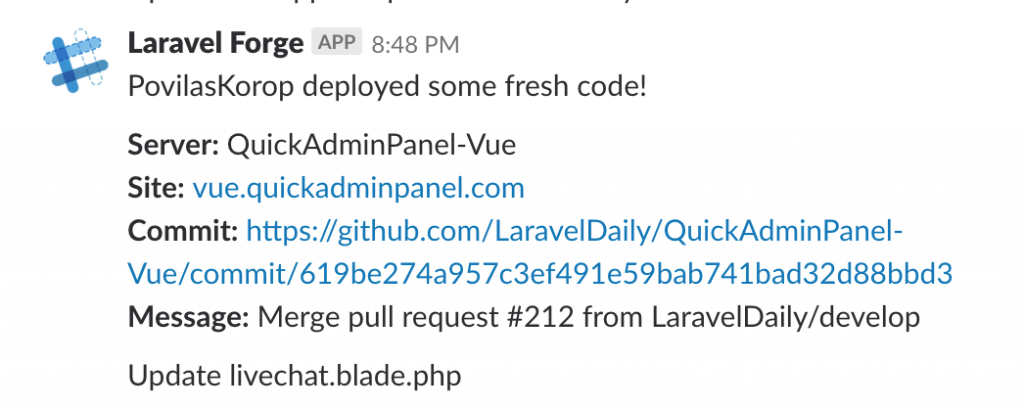
- After successful (or not) deployment you may configure notifications to email or Slack, it depends on what repository system you use or what auto-deployment tools like Envoyer. Here's how Laravel Forge informs us via Slack.
I guess that's it. I wish you more success messages like the one above :)
Again, please take this article as advice for "typical scenario" but keep in mind there are dozens of other ways to deploy projects, and you may here different tips and processes from other teams. Come up with your own process that is suitable for you!
If you want to deploy to AWS manually - check out our PREMIUM course Deploy to AWS EC2 instance.
Thank you for this article.
This Guide was fantastic thank you so much !!!
Nice! What do you think about deploying using Docker?
Never used myself, but it is an ok thing. I don't think that it is bad, just heavy and a bit complicated to learn initially.
You mean without Docker the application would run faster?
No, I meant that docker itself is an additional layer that might not be for everyone.
It does not have impact on site speed
I would recommend this approach for smaller projects only.
What if you have 5 or 10 servers? Whith this guide you would build the app 10 times on each server.
Usually you would build the app once within an CI/CD pipeline and then upload the artifacts to all the servers (using a tarball or rsync), then symlink the current directory to the new release and restart FPM.
On the production servers there are no build or dev tools like git, composer, Node.js, phpunit but only what is really required for running the application, 1st to reduce attack surface and 2nd so save storage space or image size.
Of course this approach isn't ideal for someone deploying big application.
Then again, it might sound a bit arrogant, but at that scale/need, you should have a dedicated person in the team that knows how to do it correctly :) Doing it yourself for the first time (and this tutorial is targeted at that group) - can be challenging
You could make a tutorial like this one day using ploi.io
Ploi handles this really well and they have quite an extensive documentation on how to do things there.
Is there anything specific you encountered that needs further explanation?
Hello, I did the first deployment according to your instructions. It's a simple ToDo project and takes up 1.2GB of disk space. How to optimize the size of that project. I didn't catch anything in the instructions:
Hi, it shouldn't take up that much space (but it is possible). I would really look into:
node_modulesif you are compiling assets on the server (after it's done).composer install --no-dev)As for the production vs non mode - that is dictated by the .env file. Composer does not care what is filled there (even with debug mode).
As for release of schedule tasks... Not sure what you mean here :)