We have built static pages. Now, let's talk about the backend, database structure and data, and how Laravel deals with that.
You don't need to create DB tables with columns manually. For that, Laravel uses a concept named migrations. You describe your migration schema in a migration file and then run the migrations, creating tables with columns.
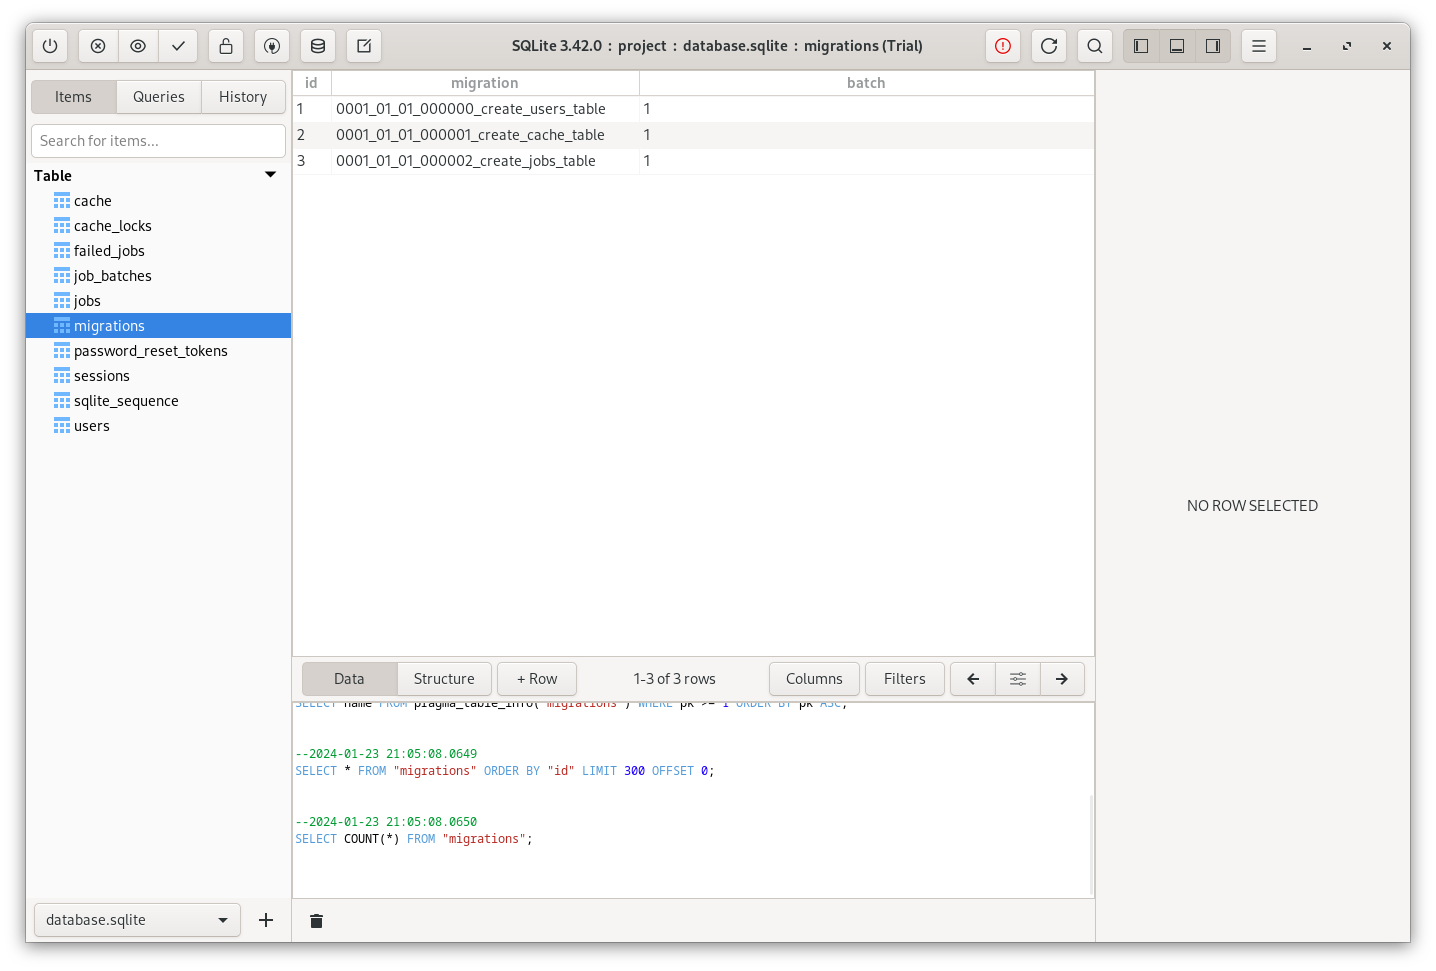
The migrations are added in the database/migrations folder. When you create a new Laravel project, there are three migration files. The only important Migration file when learning Laravel is the first one where the Users table is created. Usually, one Migration file would create one table. The framework creates three tables in one migration file, all corresponding to users.
database/migrations/0001_01_01_000000_create_users_table.php:
public function up(): void{ Schema::create('users', function (Blueprint $table) { $table->id(); $table->string('name'); $table->string('email')->unique(); $table->timestamp('email_verified_at')->nullable(); $table->string('password'); $table->rememberToken(); $table->timestamps(); }); Schema::create('password_reset_tokens', function (Blueprint $table) { $table->string('email')->primary(); $table->string('token'); $table->timestamp('created_at')->nullable(); }); Schema::create('sessions', function (Blueprint $table) { $table->string('id')->primary(); $table->foreignId('user_id')->nullable()->index(); $table->string('ip_address', 45)->nullable(); $table->text('user_agent')->nullable(); $table->longText('payload'); $table->integer('last_activity')->index(); });}They are pretty readable, even if you don't know how Migrations work. First, you define a table name and all the columns inside a closure.
Let's see what fields are inside the users table:
-
idfield, which is automatically a primary key and auto-incremented - String for
nameandemailfields. Also, email is unique, so it cannot be repeated. - The
rememberToken()is a Laravel-specific field for checking the "Remember me" checkbox. - The
timestamps()is a shortcut for two fields:created_atandupdated_at. They are filled in automatically. We will see that later.
Now, how to execute these Migrations?
If you use the default database driver SQLite, migrations are run automatically after creating a new project. If you use any other database driver, the database will be empty initially.
![]()
To run migrations, use the artisan command php artisan migrate in the terminal. This command will run all the migrations from the database/migrations folder.

In the DB client, we can now see all the tables created.
How to Change DB Driver? Config and Env Variables.
Now, what if you want to change the database driver, from SQLite to MySQL? First, let's check where values are stored. They are stored in the configuration file. In the config/database.php file, we can see the connections key with different available DB drivers out-of-the-box like SQLite, MySQL, MariaDB, etc.
We can see values with the env() helper in each driver. This helper takes values from the .env file. Those values are called environment variables. If the .env value isn't set, the second parameter is the default value.
So, for example, if you want to use MySQL instead of SQLite, first in the .env, you should change the DB_CONNECTION value to mysql. Then, uncomment DB_xxxxx values and set them if default values don't suit your configuration. The DB_DATABASE, DB_USERNAME, and DB_PASSWORD values in production should be changed.
Protip: never use the
env()helper in your code outside config files.
Create a New Migration File
Let's create a Migration for the DB table called categories. We can do it using an artisan command php artisan make:migration. Then, as a parameter, we specify "create [table name] table" in quotation marks.
php artisan make:migration "create categories table"
You may also see a few other syntax options, like separating the actions with the underscore symbol instead of words with quotes:
php artisan make:migration create_categories_tableThe command creates a new Migration class inside the database/migrations folder with two default columns: id() and timestamps().
database/migrations/xxx_create_categories_table.php:
public function up(): void{ Schema::create('categories', function (Blueprint $table) { $table->id(); // ... Your custom fields should go here $table->timestamps(); });}For example, a category will have only a name, so we use a string name as a column.
database/migrations/xxx_create_categories_table.php:
public function up(): void{ Schema::create('categories', function (Blueprint $table) { $table->id(); $table->string('name'); $table->timestamps(); });}"Undo": Rolling Back Migrations
Every migration class has two methods: up() and down().
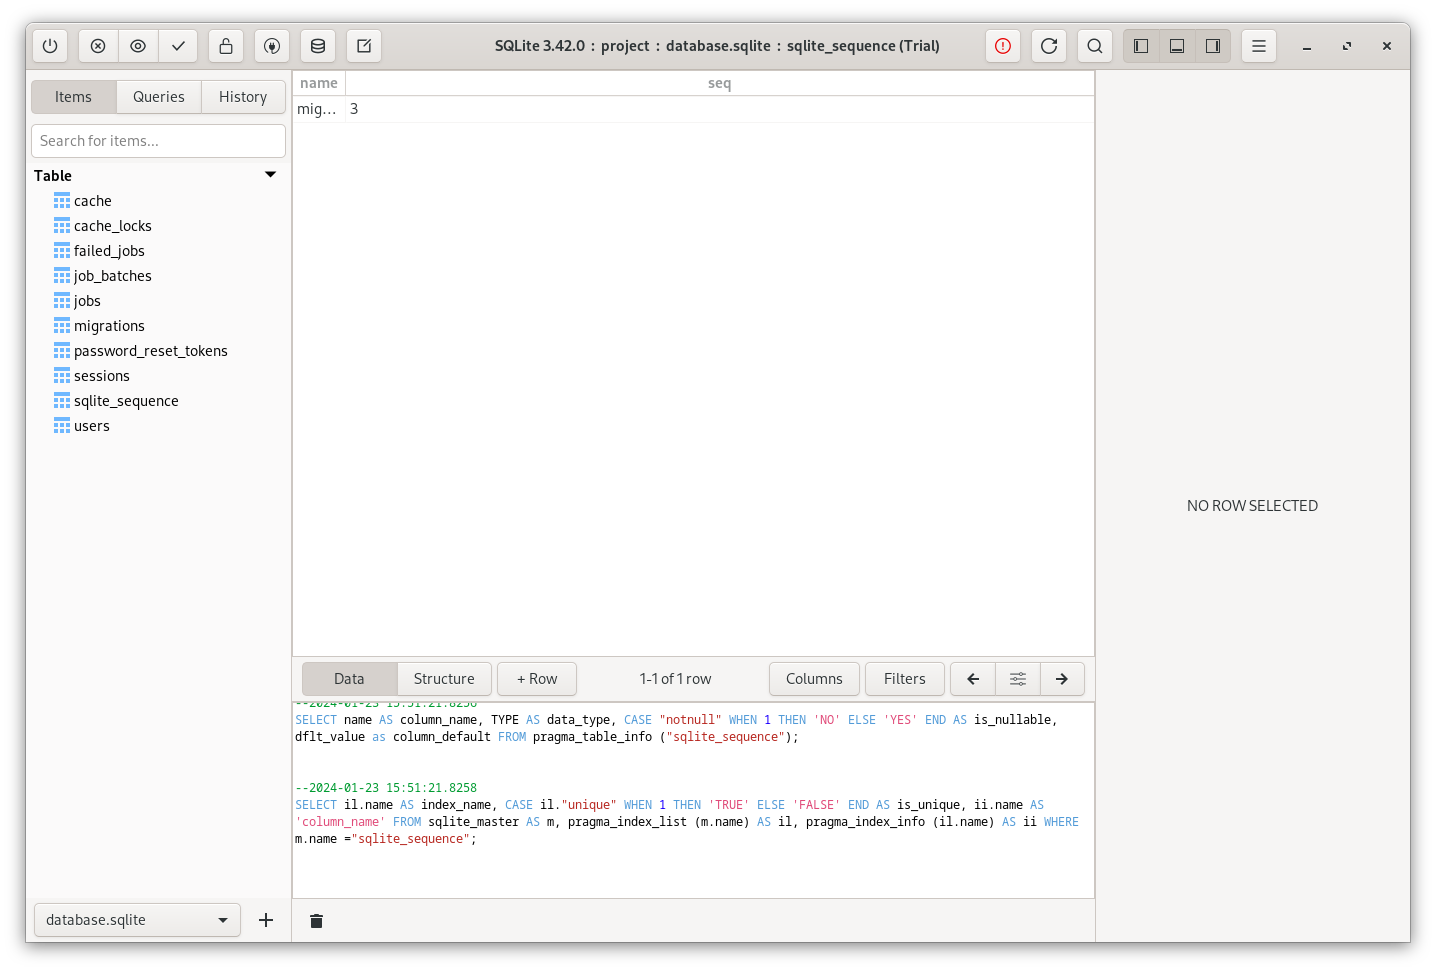
The down() method can be run to roll back the migrations. How does it work? When you run the migrate artisan command, it only migrates migrations that haven't been executed yet. For that, Laravel has a table called migrations that stores all migrations that have been run, with their batch number.
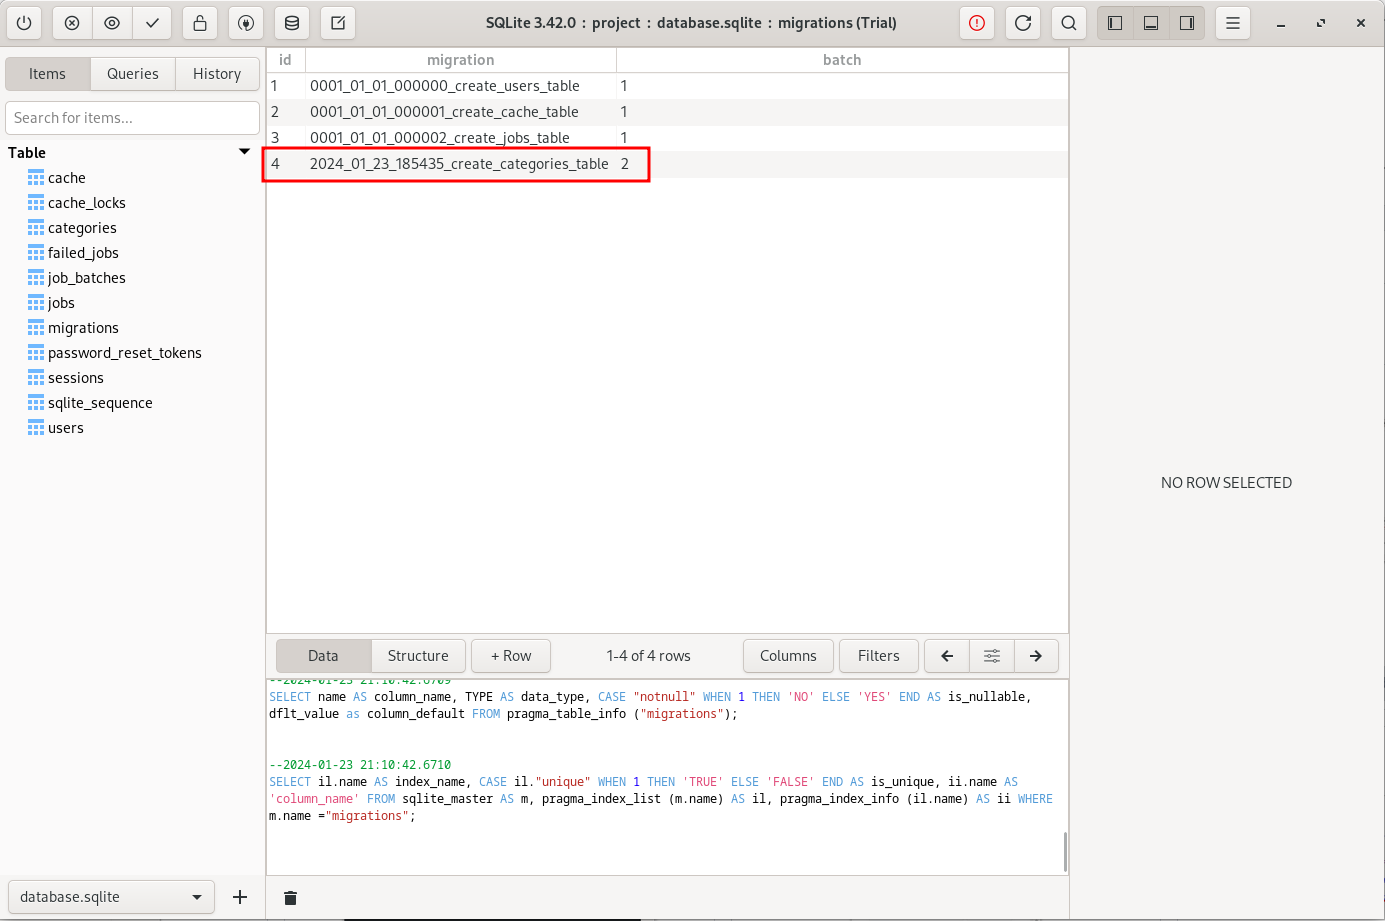
When we run the migration, a new record is inserted with the categories table and a batch number of two.
The rollback command will only roll back migrations of the last batch.
php artisan migrate:rollback
In the database, we don't have a record in the migrations table, and we don't have a categories table.
Check Current DB Schema
Before finishing this lesson, one tip that might be helpful. You can quickly view information about DB and tables without opening your SQL client. Use this artisan command:
php artisan db:show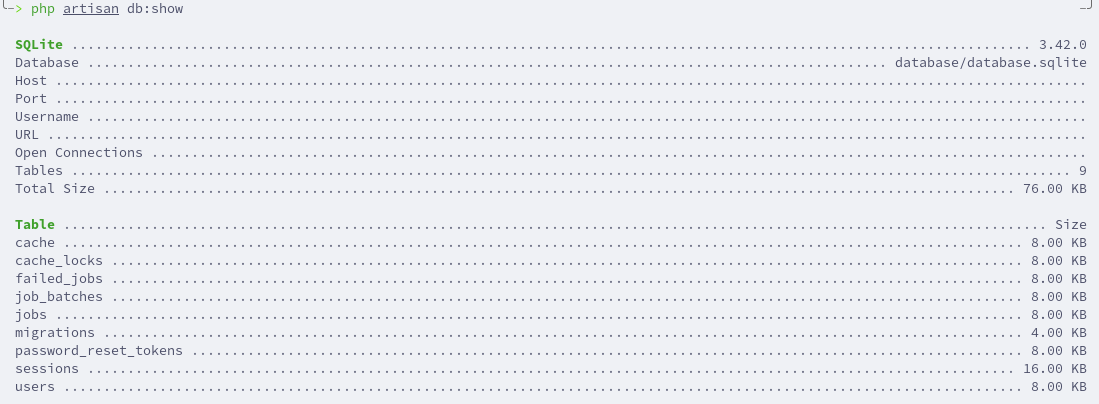
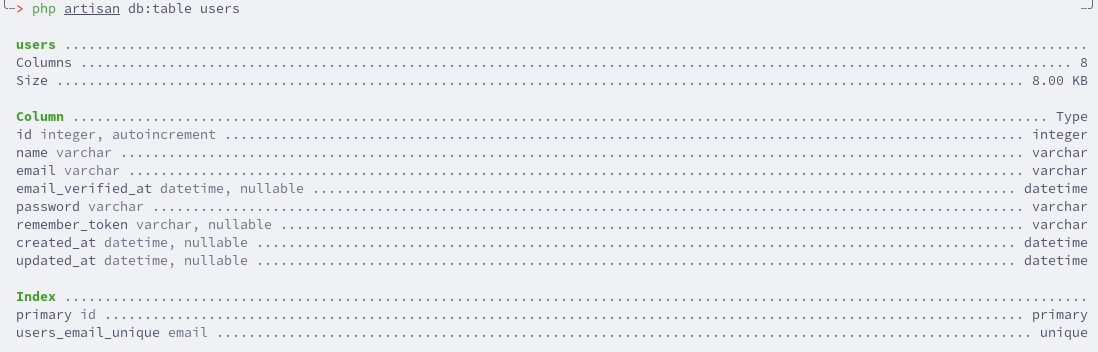
To view information about a specific table, use php artisan db:table and provide a table.
Personal note. At first glance, you might think the migration system is too complex. You could manually create tables with an SQL client, right?
But what about when you need to deploy to production? Or you work in a team and need to share the schema of the tables. Exporting/importing the SQL is very inconvenient. So, migrations help to transfer all the DB schema changes and their history quickly.
No comments or questions yet...