IMPORTANT: this course is for older Laravel 11, released in 2024. We have a new VIDEO course for the LATEST version: Laravel 12 for Beginners: Your First Project.
Now, let's create an administrator user. To generate this user, we will take a look at factories and seeders.
Inside the database folder, there are three sub-folders:
-
migrations: we've learned about it -
factories: they describe fake data values/rules for each Model -
seeds: they describe the data to be seeded, which may or may not use factories from above
In other words, Migrations are about the structure of the database, and Factories/Seeds are about the data itself, the values.
For example, in the database/seeders/DatabaseSeeder.php, there is a seeder for a test user.
database/seeders/DatabaseSeeder.php:
class DatabaseSeeder extends Seeder{ public function run(): void { // User::factory(10)->create(); User::factory()->create([ 'name' => 'Test User', ]); }}In the seeder, a factory is used to create a user. In the create() method, the name and email fields are overwritten so they wouldn't be randomly generated.
The factories are stored in the database/factories folder. By default, there's already a Factory for the User Model.
databse/factories/UserFactory.php:
class UserFactory extends Factory{ protected static ?string $password; public function definition(): array { return [ 'name' => fake()->name(), 'email' => fake()->unique()->safeEmail(), 'email_verified_at' => now(), 'password' => static::$password ??= Hash::make('password'), 'remember_token' => Str::random(10), ]; } // ...}A package called Faker is used for the factories. In the definition(), we see that the name and email are generated using Faker. That's why these values are overwritten in the seeder so that you would know them and could quickly log in to your application.
In the DatabaseSeeder.php file, you can seed as much data as your project needs, like articles, comments, etc. But there is a better way to write seeders and have a better structure with a concept called seeding files.
We can generate a new seeder class using an artisan command. Let's create a seeder for the admin user.
php artisan make:seeder AdminSeeder
This artisan command generated a seeder AdminSeeder in the database/seeders folder, and it has its own run() method.
database/seeders/AdminSeeder.php:
use App\Models\User; class AdminSeeder extends Seeder{ public function run(): void { User::factory()->create(); }}All the seeders must be called in the DatabaseSeeder.php file using the $this->call() method and providing the seed class.
database/seeders/DatabaseSeeder.php:
class DatabaseSeeder extends Seeder{ public function run(): void { // User::factory(10)->create(); User::factory()->create([ 'name' => 'Test User', ]); $this->call(AdminSeeder::class); }}But now, we need a new field in the users table to know whether a user is an admin. For this, we will add a boolean field called is_admin.
Of course, we will do it using Migration. Migrations don't have to be only for generating new tables. They can also be used to alter tables.
php artisan make:migration "add is admin to users table"
The general naming for such migrations should be added as a field to some tables. Then Laravel will create a Migration with Schema::table() instead of Schema::create() and add the correct table name. Now, we can add the Boolean field, which will be false by default.
database/migrations/xxx_add_is_admin_to_users_table.php:
public function up(): void{ Schema::table('users', function (Blueprint $table) { $table->boolean('is_admin')->default(false); });}Then, we migrate the latest migration. And now we can overwrite the is_admin field in the AdminSeeder seeder.
database/seeders/AdminSeeder.php:
use App\Models\User; class AdminSeeder extends Seeder{ public function run(): void { User::factory()->create(); User::factory()->create(['is_admin' => true]); }}We can run the seeder manually, again, with the artisan command.
php artisan db:seedWhen there is a separate seeder, the artisan command shows it is running. When it is done, Terminal shows how long it took.

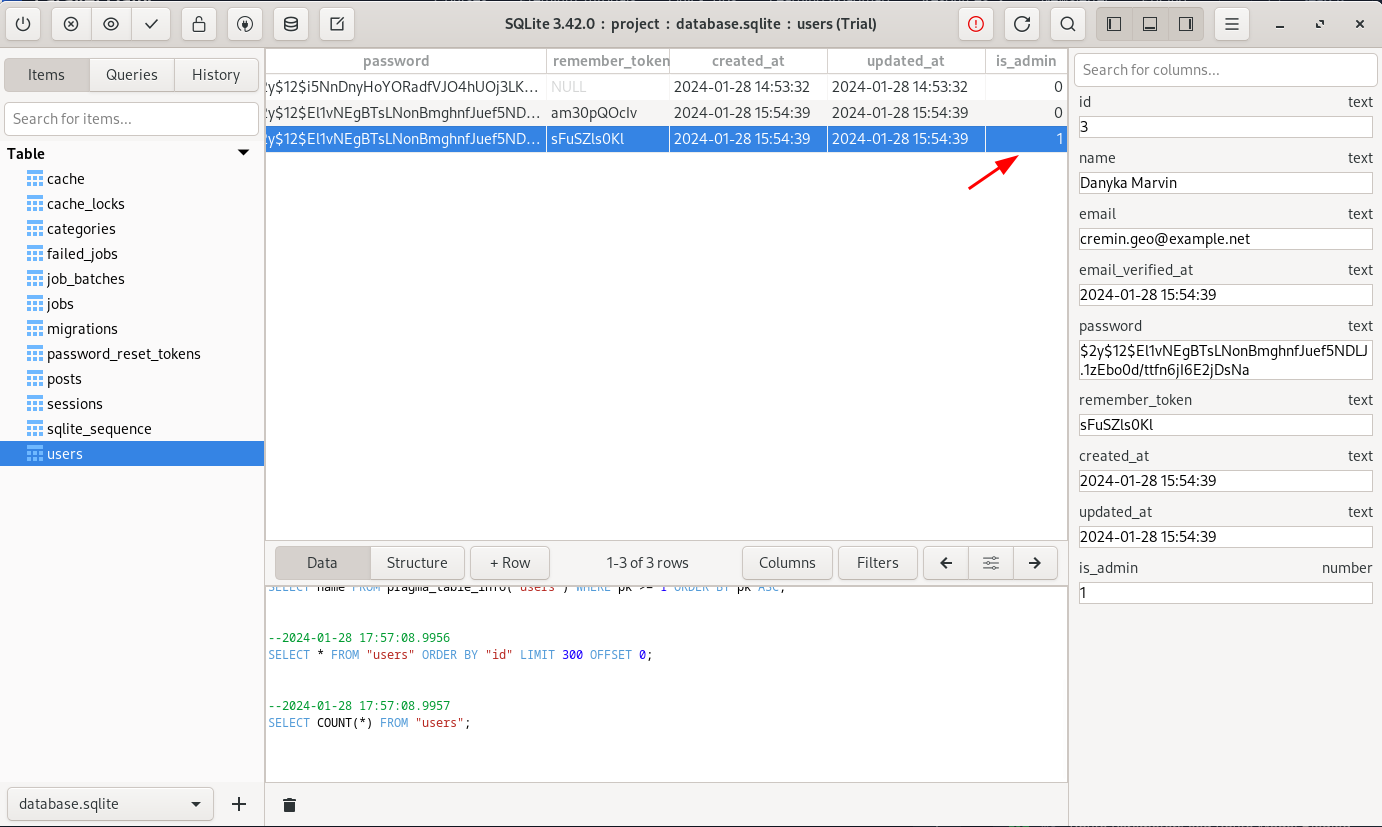
The database shows that the last user has the is_admin column as true.

Generally, this is how seeders with factories work to pre-populate some data, usually for testing or the project's initial values.

Looks like we forgot to add the down() code to the migration. Here is what I added
Also I override the name and email for the AdminSeeder because I like easy quick to type test users.