Now we have a default app with basic counter implementation with sample code to see how the state works in React. We don't need this basic scaffolding for our application and in addition, we're going to use TailwindCSS to style the application.
1. Remove unnecessary files
This is the list of files we won't need in our project, you can delete them since we are not going to use them.
deleted: src/App.cssdeleted: src/assets/react.svgdeleted: src/index.css2. Install TailwindCSS
Installing TailwindCSS as a PostCSS plugin is the most seamless way to integrate it with build tools like Vite.
Install tailwindcss and its peer dependencies via npm.
npm install -D tailwindcss postcss autoprefixerAfter installation run this command to publish the initial TailwindCSS configuration.
npx tailwindcss initA new tailwind.config.cjs file will be created in the project root directory.
Now update this file to:
const colors = require('tailwindcss/colors') /** @type {import('tailwindcss').Config} */module.exports = { content: ['./src/**/*.jsx'], theme: { extend: { colors }, }, plugins: [],}The following changes were applied:
- extended configuration to include more colors, so any setting will work out of the box to play around.
- and added the
'./src/**/*.jsx'value to the content key so TailwindCSS will look at all React'sjsxfiles in the./srcfolder for classes to compile.
More information on how to configure TailwindCSS can be found in official documentation.
Now manually create a new postcss.config.cjs configuration file in the project root directory with the following content.
module.exports = { plugins: { tailwindcss: {}, autoprefixer: {}, },}Create a new src/assets/main.css file with the predefined CSS classes we are going to use for this demo project. Tailwind's @apply directive extracts repeated utility patterns to custom CSS classes, so instead of defining them every time on each element we basically "group" them.
@tailwind base;@tailwind components;@tailwind utilities; @layer components { label.required { @apply before:text-red-600 before:content-['*'] before:mr-1; } .form-input { @apply p-1 border bg-gray-100 disabled:opacity-50; } .heading { @apply font-bold text-2xl mb-4 text-center; } .btn { @apply inline-flex items-center gap-2 justify-center p-2 font-bold relative disabled:!opacity-50 disabled:!cursor-progress; } .btn-primary { @apply text-white bg-blue-600 hover:bg-blue-500; } .btn-secondary { @apply text-white bg-gray-600 hover:bg-gray-500; } .btn-danger { @apply text-white bg-red-600 hover:bg-red-500; } .alert { @apply border px-4 py-3 rounded relative; } .alert-danger { @apply text-red-700 bg-red-100 border-red-400; } .alert-success { @apply text-green-700 bg-green-100 border-green-400 } .plate { @apply font-mono font-bold uppercase; }}3. Vite Config
Update Vite config vite.config.js with the following content.
import { defineConfig } from 'vite'import react from '@vitejs/plugin-react'import { fileURLToPath, URL } from 'node:url' // https://vitejs.dev/config/export default defineConfig({ plugins: [react()], resolve: { alias: { '@': fileURLToPath(new URL('./src', import.meta.url)), }, },})Here we imported the fileURLToPath function from the node and defined resolve.alias for our components so we can use the @ alias to define global paths when importing components instead of relative ones. This makes life easier if you later decide to move some components to different folders.
4. Update Project Files
After removing files not needed and the Vite configuration update we also need to update existing project files to get rid of any dead references and test if our TailwindCSS works.
Update the src/App.jsx file with the following content.
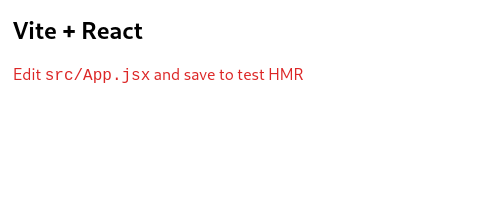
function App() { return ( <div className="p-4"> <h1 className="heading">Vite + React</h1> <div className="text-red-600"> <p> Edit <code>src/App.jsx</code> and save to test HMR </p> </div> </div> )} export default AppAnd update the src/main.jsx file.
import React from 'react'import ReactDOM from 'react-dom/client'import App from '@/App'import '@/assets/main.css' ReactDOM.createRoot(document.getElementById('root')).render( <React.StrictMode> <App /> </React.StrictMode>,)Now after restarting Vite and reloading the page you should see this page with some simple styling.

5. Configure eslint
In this last step we are going to configure eslint as our linter for this project.
ℹ️ This step is optional, you can skip it and complete all course material without it.
ESLint is a tool for identifying and reporting on patterns found in ECMAScript/JavaScript code, to make code more consistent and avoid bugs.
This is especially useful if you are planning to work in a team. There's a high chance that there will be some sort of tool to enforce specific code styles and patterns.
Install eslint with react plugins to allow the linter better understand the code with the following command.
npm install -D eslint eslint-plugin-jsx-a11y eslint-plugin-react eslint-plugin-react-hooksCreate a new file .eslintrc.cjs in the project root directory.
/* eslint-env node */module.exports = { root: true, env: { browser: true, es2021: true, }, extends: [ 'eslint:recommended', 'plugin:react/recommended', 'plugin:react/jsx-runtime', 'plugin:jsx-a11y/recommended', ], overrides: [], parserOptions: { ecmaVersion: 'latest', sourceType: 'module', ecmaFeatures: { jsx: true, }, }, plugins: ['react', 'react-hooks', 'jsx-a11y'], rules: { 'no-undef': 'off', 'comma-dangle': ['error', 'always-multiline'], indent: ['error', 2], 'linebreak-style': ['error', 'unix'], quotes: ['error', 'single'], semi: ['error', 'never'], 'react/react-in-jsx-scope': 'off', 'react-hooks/rules-of-hooks': 'error', 'react-hooks/exhaustive-deps': 'warn', }, settings: { react: { version: 'detect', }, },}Modern editors can detect eslint presence in your project and will highlight important places automatically, but you can also do that manually from the command line.
To do that manually you need to update the scripts section in your package.json file
from:
"scripts": { "dev": "vite", "build": "vite build", "preview": "vite preview"},to:
"scripts": { "dev": "vite", "build": "vite build", "preview": "vite preview", "lint": "eslint . --ext .js,.jsx,.cjs,.mjs --fix --ignore-path .gitignore"},To lint your project now you can run this command.
npm run lint
I needed to run: npx tailwindcss-cli@latest init
in order to get the "npx tailwindcss init" to work. Not sure what about my setup, maybe just because new machine and first react project ever.
Anyway, thought it might help someone else
actually having other problems now with Step 2. looks like maybe the course needs an update
What were the problems you were having? Specifically, was there error messages or something?