The goal of our first course section is to create a full CRUD like this:
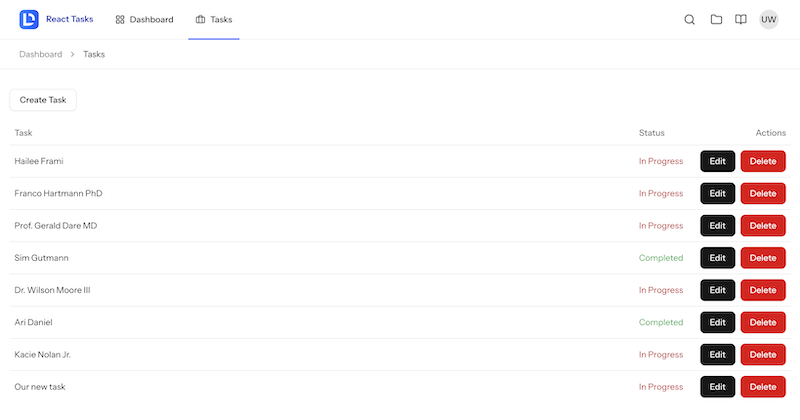
In this first lesson, we will install Laravel with the React starter kit and familiarize ourselves with its general structure and code.
Installation
We install a new Laravel project and will choose the React starter kit:
laravel new laravel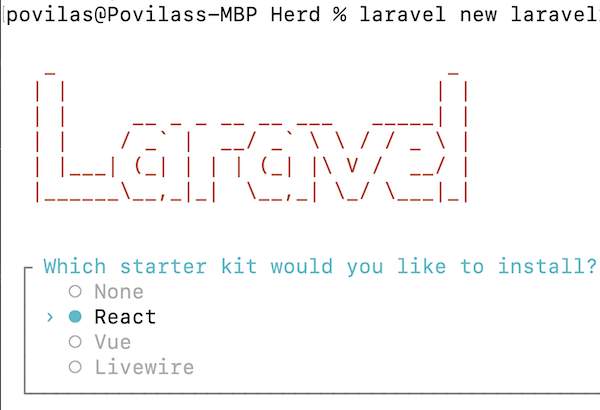
We stay with the default values for all the other choices in the wizard.
As a result, we have a regular Laravel homepage with "Log in" and "Register" links at the top.
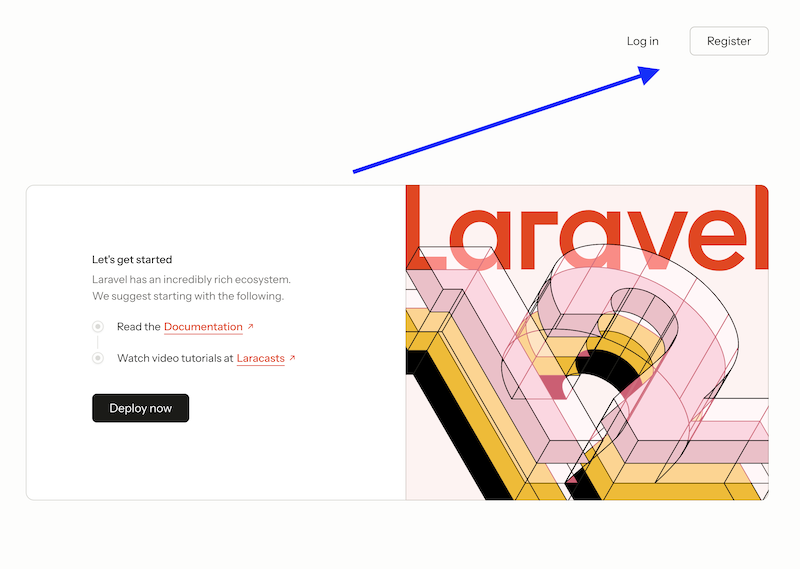
When we register as a new user, we land on an empty dashboard with a sidebar.
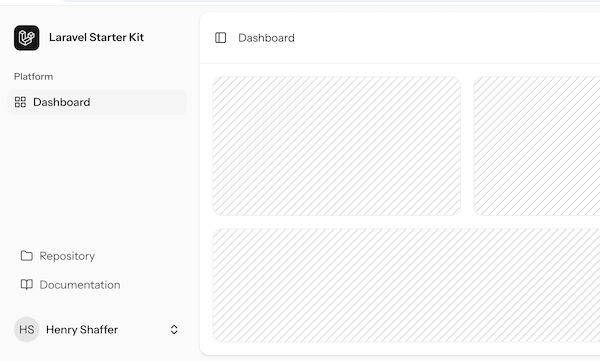
In addition to the layout, we have the "Settings" menu item that allows user profile data:
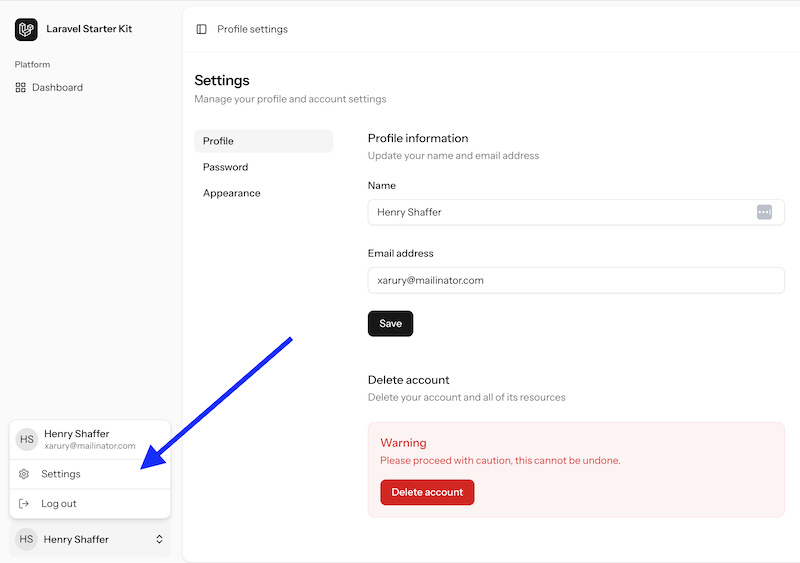
So yeah, that's all about installation! Simple, huh? Now, let's see what's inside the code.
Project Code Structure: Back-End
I typically start analyzing any Laravel project with Routes.
routes/web.php:
Route::get('/', function () { return Inertia::render('welcome');})->name('home'); Route::middleware(['auth', 'verified'])->group(function () { Route::get('dashboard', function () { return Inertia::render('dashboard'); })->name('dashboard');}); require __DIR__.'/settings.php';require __DIR__.'/auth.php';Nothing special here, right? Regular routes, Inertia, and a few includes of other route files.
In the Settings route, we can find a few Controllers:
routes/settings.php:
use App\Http\Controllers\Settings\PasswordController;use App\Http\Controllers\Settings\ProfileController; Route::middleware('auth')->group(function () { Route::redirect('settings', 'settings/profile'); Route::get('settings/profile', [ProfileController::class, 'edit'])->name('profile.edit'); Route::patch('settings/profile', [ProfileController::class, 'update'])->name('profile.update'); Route::delete('settings/profile', [ProfileController::class, 'destroy'])->name('profile.destroy'); Route::get('settings/password', [PasswordController::class, 'edit'])->name('password.edit'); Route::put('settings/password', [PasswordController::class, 'update'])->name('password.update'); Route::get('settings/appearance', function () { return Inertia::render('settings/appearance'); })->name('appearance');});If we look at the ProfileController, it returns Inertia with React components:
app/Http/Controllers/Settings/ProfileController.php:
use App\Http\Controllers\Controller;use App\Http\Requests\Settings\ProfileUpdateRequest;use Illuminate\Contracts\Auth\MustVerifyEmail;use Illuminate\Http\RedirectResponse;use Illuminate\Http\Request;use Illuminate\Support\Facades\Auth;use Inertia\Inertia;use Inertia\Response; class ProfileController extends Controller{ /** * Show the user's profile settings page. */ public function edit(Request $request): Response { return Inertia::render('settings/profile', [ 'mustVerifyEmail' => $request->user() instanceof MustVerifyEmail, 'status' => $request->session()->get('status'), ]); } /** * Update the user's profile settings. */ public function update(ProfileUpdateRequest $request): RedirectResponse { $request->user()->fill($request->validated()); if ($request->user()->isDirty('email')) { $request->user()->email_verified_at = null; } $request->user()->save(); return to_route('profile.edit'); } /** * Delete the user's account. */ public function destroy(Request $request): RedirectResponse { $request->validate([ 'password' => ['required', 'current_password'], ]); $user = $request->user(); Auth::logout(); $user->delete(); $request->session()->invalidate(); $request->session()->regenerateToken(); return redirect('/'); }}The main "meat" of the pages is inside the React components in the resources/js folder.
Project Code Structure: Front-End
Let's look at what's inside that Inertia::render('settings/profile') file in React.
It's pretty big! But don't get scared if you're not that familiar with React. In the course, we will create our own React components where I will explain everything step-by-step.
resources/js/pages/settings/profile.tsx:
import { type BreadcrumbItem, type SharedData } from '@/types';import { Transition } from '@headlessui/react';import { Head, Link, useForm, usePage } from '@inertiajs/react';import { FormEventHandler } from 'react'; import DeleteUser from '@/components/delete-user';import HeadingSmall from '@/components/heading-small';import InputError from '@/components/input-error';import { Button } from '@/components/ui/button';import { Input } from '@/components/ui/input';import { Label } from '@/components/ui/label';import AppLayout from '@/layouts/app-layout';import SettingsLayout from '@/layouts/settings/layout'; const breadcrumbs: BreadcrumbItem[] = [ { title: 'Profile settings', href: '/settings/profile', },]; interface ProfileForm { name: string; email: string;} export default function Profile({ mustVerifyEmail, status }: { mustVerifyEmail: boolean; status?: string }) { const { auth } = usePage<SharedData>().props; const { data, setData, patch, errors, processing, recentlySuccessful } = useForm<Required<ProfileForm>>({ name: auth.user.name, email: auth.user.email, }); const submit: FormEventHandler = (e) => { e.preventDefault(); patch(route('profile.update'), { preserveScroll: true, }); }; return ( <AppLayout breadcrumbs={breadcrumbs}> <Head title="Profile settings" /> <SettingsLayout> <div className="space-y-6"> <HeadingSmall title="Profile information" description="Update your name and email address" /> <form onSubmit={submit} className="space-y-6"> <div className="grid gap-2"> <Label htmlFor="name">Name</Label> <Input id="name" className="mt-1 block w-full" value={data.name} onChange={(e) => setData('name', e.target.value)} required autoComplete="name" placeholder="Full name" /> <InputError className="mt-2" message={errors.name} /> </div> <div className="grid gap-2"> <Label htmlFor="email">Email address</Label> <Input id="email" type="email" className="mt-1 block w-full" value={data.email} onChange={(e) => setData('email', e.target.value)} required autoComplete="username" placeholder="Email address" /> <InputError className="mt-2" message={errors.email} /> </div> {mustVerifyEmail && auth.user.email_verified_at === null && ( <div> <p className="text-muted-foreground -mt-4 text-sm"> Your email address is unverified.{' '} <Link href={route('verification.send')} method="post" as="button" className="text-foreground underline decoration-neutral-300 underline-offset-4 transition-colors duration-300 ease-out hover:decoration-current! dark:decoration-neutral-500" > Click here to resend the verification email. </Link> </p> {status === 'verification-link-sent' && ( <div className="mt-2 text-sm font-medium text-green-600"> A new verification link has been sent to your email address. </div> )} </div> )} <div className="flex items-center gap-4"> <Button disabled={processing}>Save</Button> <Transition show={recentlySuccessful} enter="transition ease-in-out" enterFrom="opacity-0" leave="transition ease-in-out" leaveTo="opacity-0" > <p className="text-sm text-neutral-600">Saved</p> </Transition> </div> </form> </div> <DeleteUser /> </SettingsLayout> </AppLayout> );}It's not the most straightforward file to start with, but it's here for common understanding. For now, notice the main things:
- Laravel starter kits use TypeScript, with the file extension
.tsx. It's not a strict requirement, you can proceed writing your custom code with regular JavaScript, but it may be a good tool to adopt. Here's our free article about TypeScript in Laravel. - The design elements are taken from
@/components/ui/powered by Shadcn library. - React.js component consists mainly of two sections:
importlibraries on top, and thenexportthe HTML, enhanced by JS components and internal variables/functions - The main page structure is in
<AppLayout>, with<Head>and then content inside.
And this is exactly our next step for the next lesson: customizing the layout.

Thank you for this!
great tutorial !