Let's create a menu item and a table/form to manage products.
Generate Filament Resource
Every menu item in Filament is called a Resource, a visual representation of the Eloquent Model. Imagine we have this simple Model with two fields:
app/Models/Product.php:
class Product extends Model{ use HasFactory; protected $fillable = ['name', 'price'];}Then we generate a Filament Resource for this model:
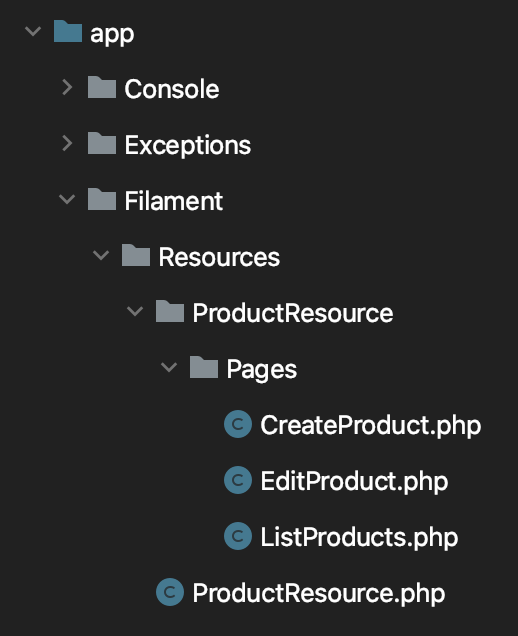
php artisan make:filament-resource ProductIt generates a folder app/Filament/Resources/ProductResource with these files:
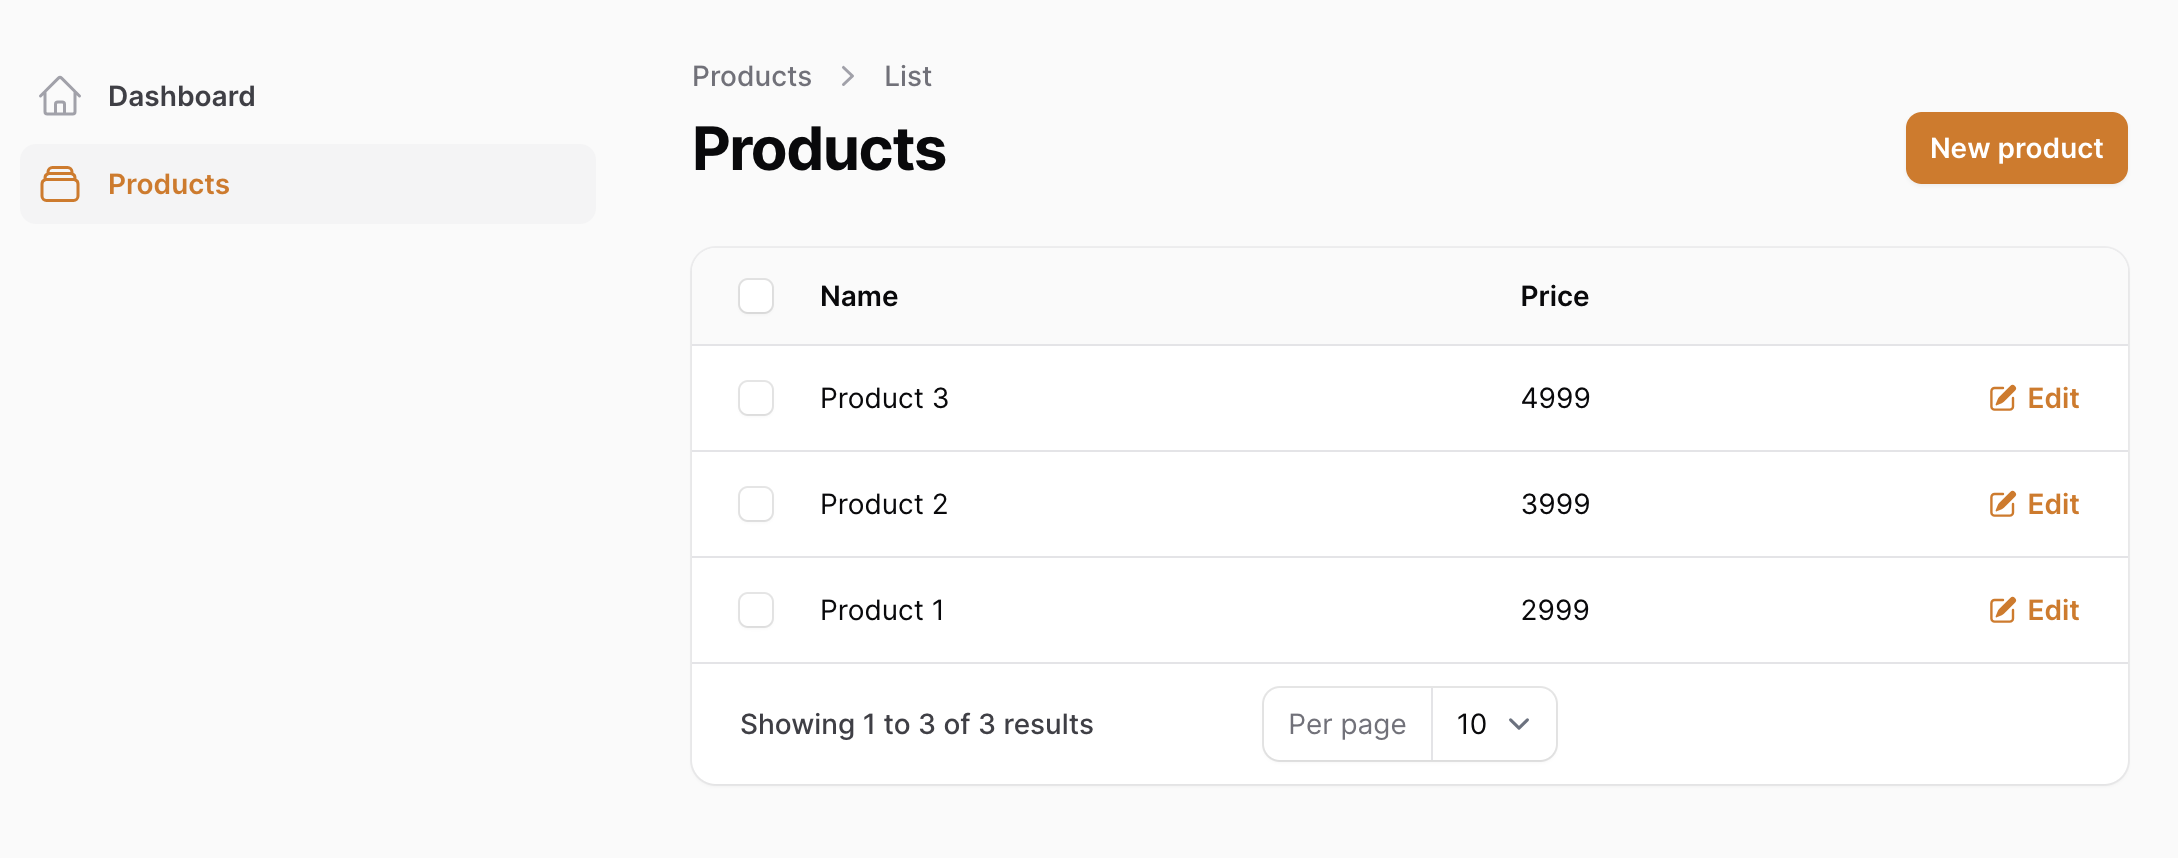
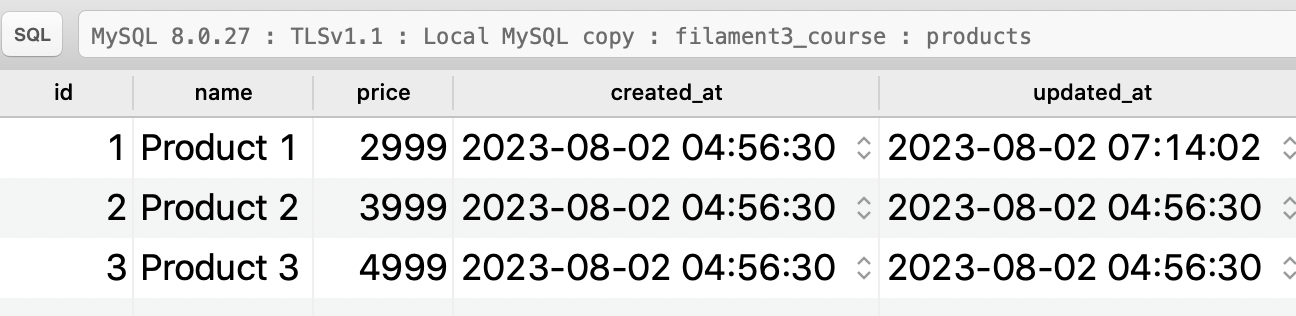
And you know what? The menu item "Products" already works just like that! If we log in and refresh our dashboard, we see a new menu item on the left. And if we click it, we will see the table of three products I have pre-seeded in the DB.
Filament tries to list them but doesn't know which columns to show. This is what we will need to do next.
Listing Columns in Table
Let's take a look at the main file for the Filament Resource.
app/Filament/Resources/ProductResource.php:
class ProductResource extends Resource{ protected static ?string $model = Product::class; protected static ?string $navigationIcon = 'heroicon-o-rectangle-stack'; public static function form(Form $form): Form { return $form ->schema([ // ]); } public static function table(Table $table): Table { return $table ->columns([ // ]) ->filters([ // ]) ->actions([ Tables\Actions\EditAction::make(), ]) ->bulkActions([ Tables\Actions\BulkActionGroup::make([ Tables\Actions\DeleteBulkAction::make(), ]), ]) ->defaultSort('price', 'desc') ->emptyStateActions([ Tables\Actions\CreateAction::make(), ]); } public static function getRelations(): array { return [ // ]; } public static function getPages(): array { return [ 'index' => Pages\ListProducts::route('/'), 'create' => Pages\CreateProduct::route('/create'), 'edit' => Pages\EditProduct::route('/{record}/edit'), ]; }}It sounds like a lot, but hey, just read this file: it's all understandable in plain English language.
You can configure how your CRUD works by changing the values of arrays or class properties.
For basic needs, it's enough to work with form() and table() methods and fill them with values.
Remember that under the hood, Filament is not a single package but a set of packages. So, "Table Builder" and "Form Builder" can also be used separately, outside of Filament Resource, or even in non-Filament projects if you use Livewire. Even in the documentation, they are separated into Form Builder and Table Builder sections.
For now, let's focus on the table() method and the array of columns. To show columns in the table, we just need to add the column objects to that array.
Filament has a lot of different column types, each is described with the method XxxxxColumn::make('[column_name]').
use Filament\Tables;use Filament\Tables\Table; // ... public static function table(Table $table): Table{ return $table ->columns([ Tables\Columns\TextColumn::make('name'), Tables\Columns\TextColumn::make('price'), ]) // ... other methods}Just add those two lines, and refresh the table:
See? It's that easy to add columns. You can browse the docs and see what other columns they have. We will add some later during the course. For now, I just want you to understand the principle.
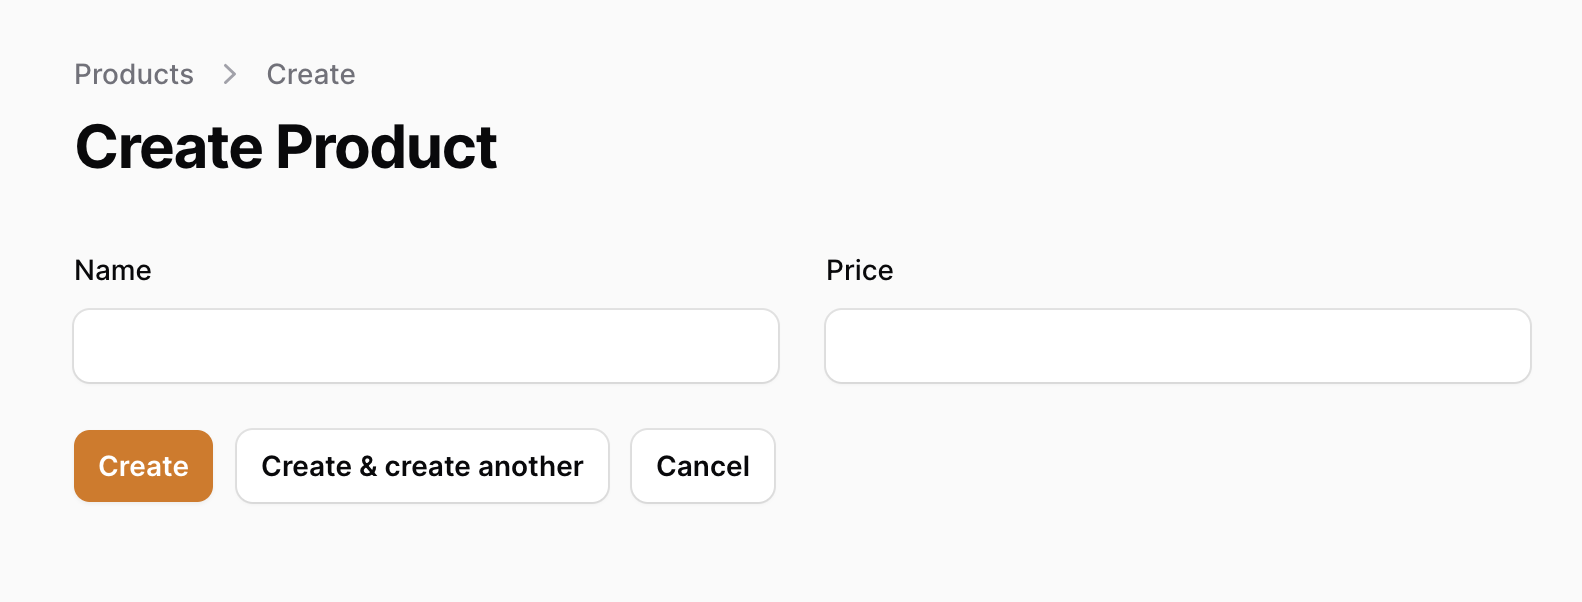
Add Fields to Form
Now, see that button on the top-right of the table in the screenshot above? Yeah, that already shows the form to add a product!
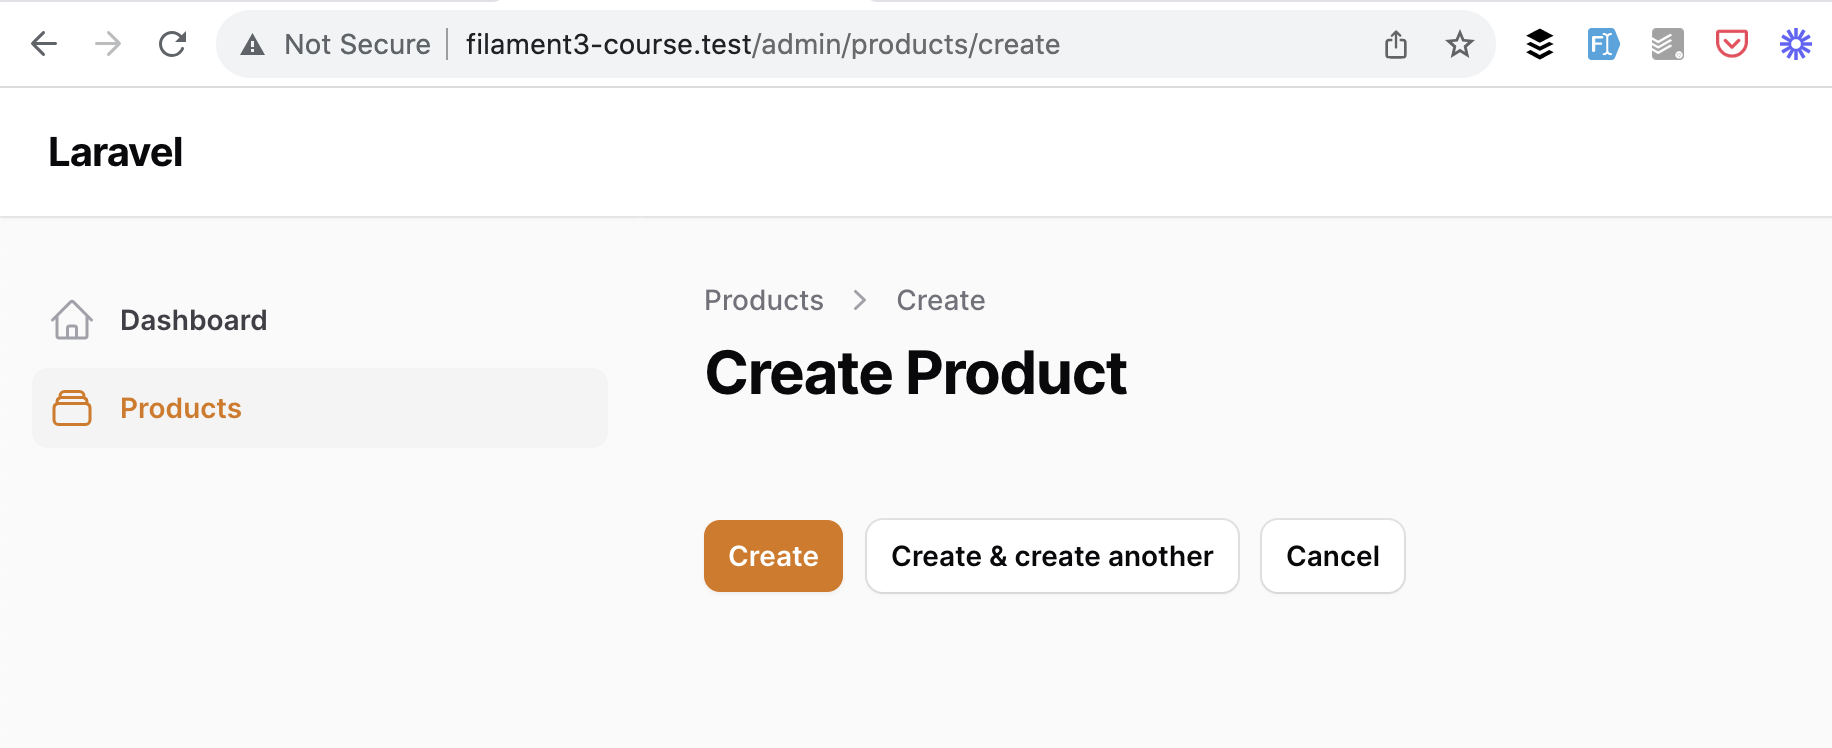
But, similarly to the table, Filament doesn't know which input fields to show in the form. Let's specify exactly that in the form() method.
The tables operate with XxxxxColumn::make(), and the forms follow the same syntax of Xxxxx::make().
So, let's add two simple TextInput fields:
use Filament\Forms;use Filament\Forms\Form; // ... public static function form(Form $form): Form{ return $form ->schema([ Forms\Components\TextInput::make('name'), Forms\Components\TextInput::make('price'), ]);}Refresh the page, and we have the fields!
And that's it: we can now create and edit the products, and both forms work.
Yes, exactly, we just specify the table columns and form fields, and Filament generates everything else for us.
Of course, we can add much more functionality to tables/forms, and this is exactly what we will explore for the rest of the course.
Customize Redirect After Submit
One thing that surprised me personally about Filament: after create/edit form submission, it doesn't redirect you back to the table.
Create form redirects you to the edit form of the new record, and the Edit form redirects you back to the Edit form with a success notification on the top-right:
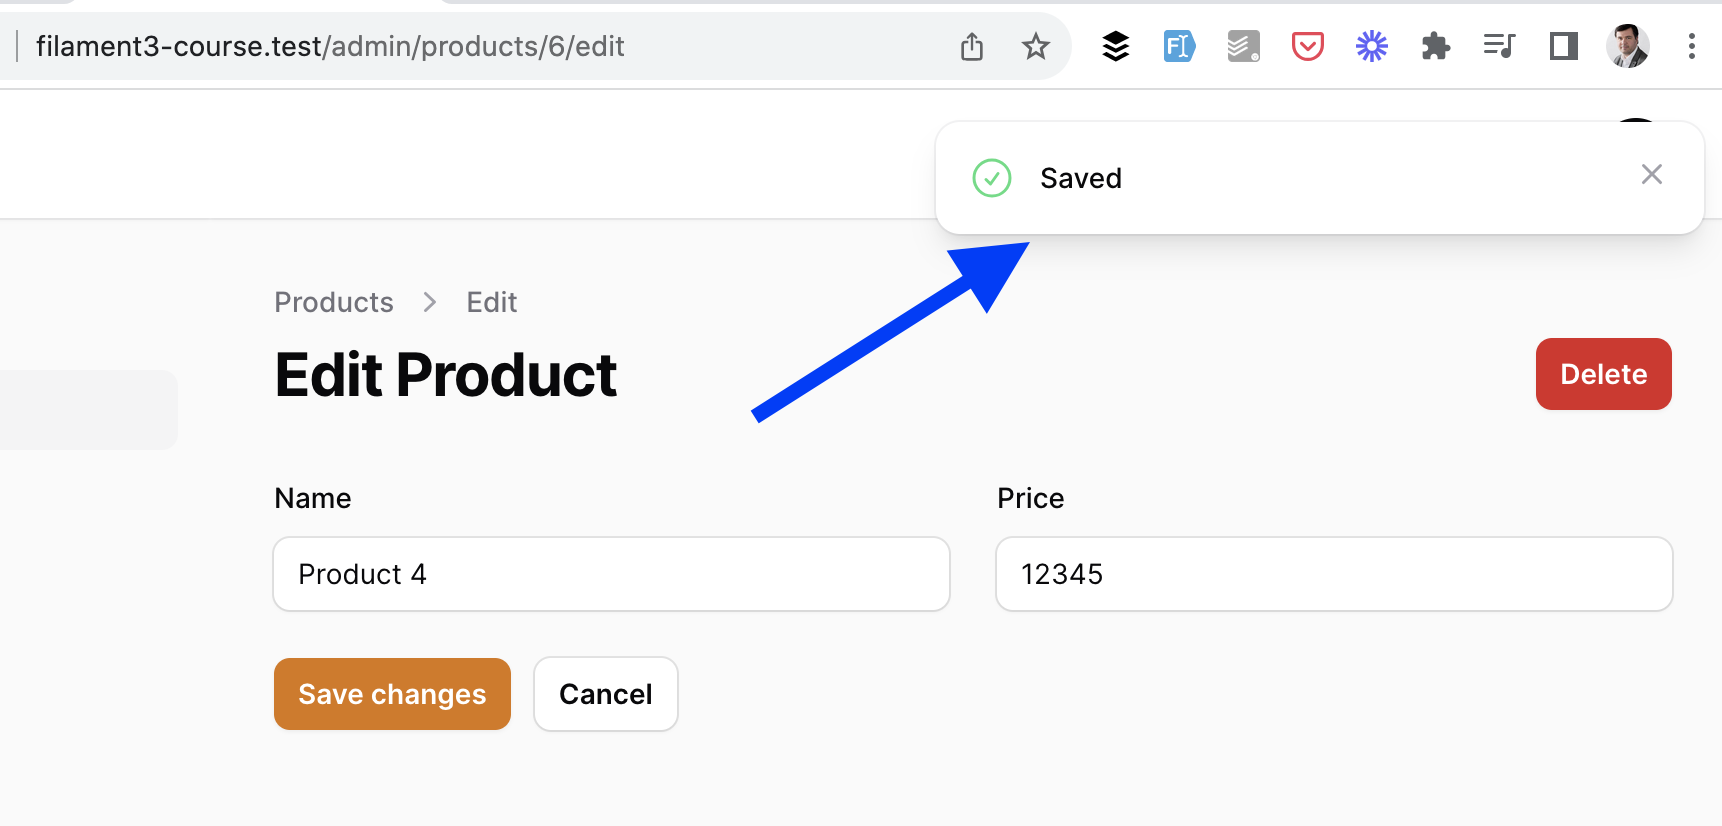
But you can easily customize this behavior and override the redirect logic.
For that, we need to look at other files in the Filament Resource folder. In addition to the main ProductResource file, there's a separate file for each page if you want to customize them:
- Pages/CreateProduct.php
- Pages/EditProduct.php
- Pages/ListProducts.php
In many cases, you will likely not touch them at all, but in our case, let's override the redirect by adding one identical method to both the CreateProduct and EditProduct pages.
app/Filament/Resources/ProductResource/Pages/CreateProduct.php:
class CreateProduct extends CreateRecord{ // ... protected function getRedirectUrl(): string { return $this->getResource()::getUrl('index'); } }app/Filament/Resources/ProductResource/Pages/EditProduct.php:
class EditProduct extends EditRecord{ // ... protected function getRedirectUrl(): string { return $this->getResource()::getUrl('index'); } }And now, our forms will redirect back to the table after submission.
Delete Record: Weird UX
Another interesting UX decision by the Filament team was to "hide" the Delete button from the table.
Personally, I'm used to having "Edit" and "Delete" near each other for every record in the table. But in Filament, if you want to delete the record, you have two options:
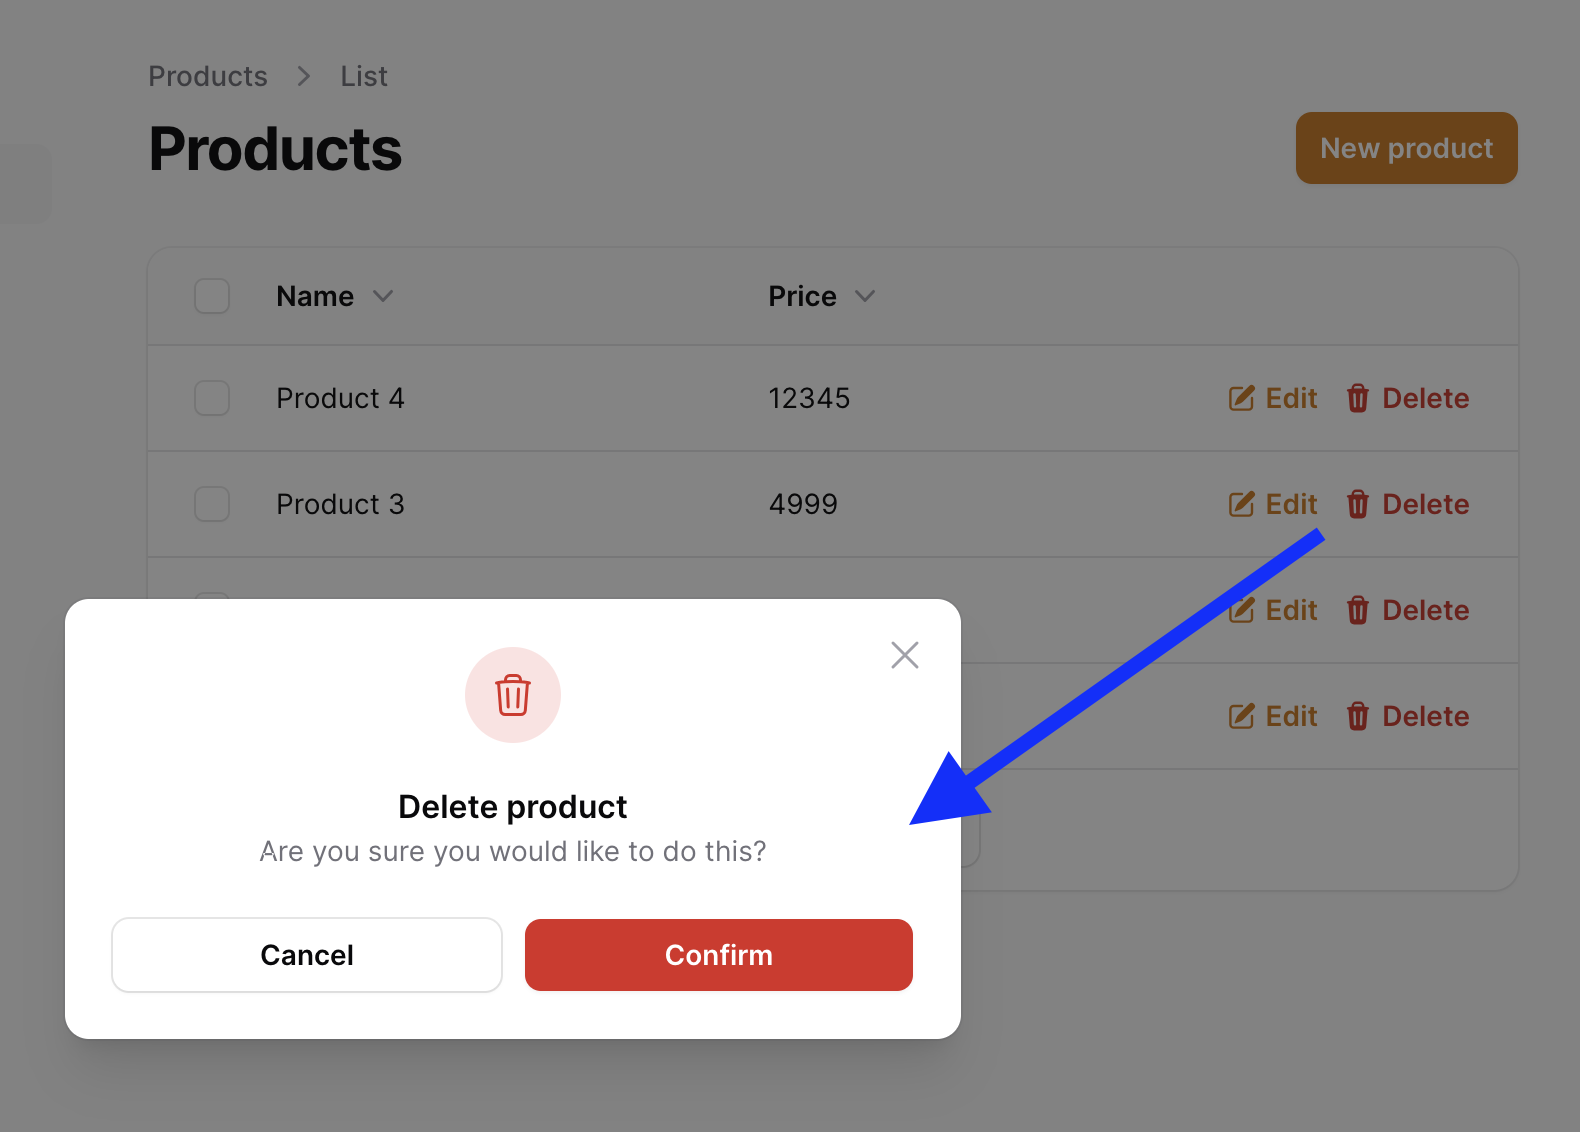
Option 1. Go to the Edit page and click the Delete button on top-right.
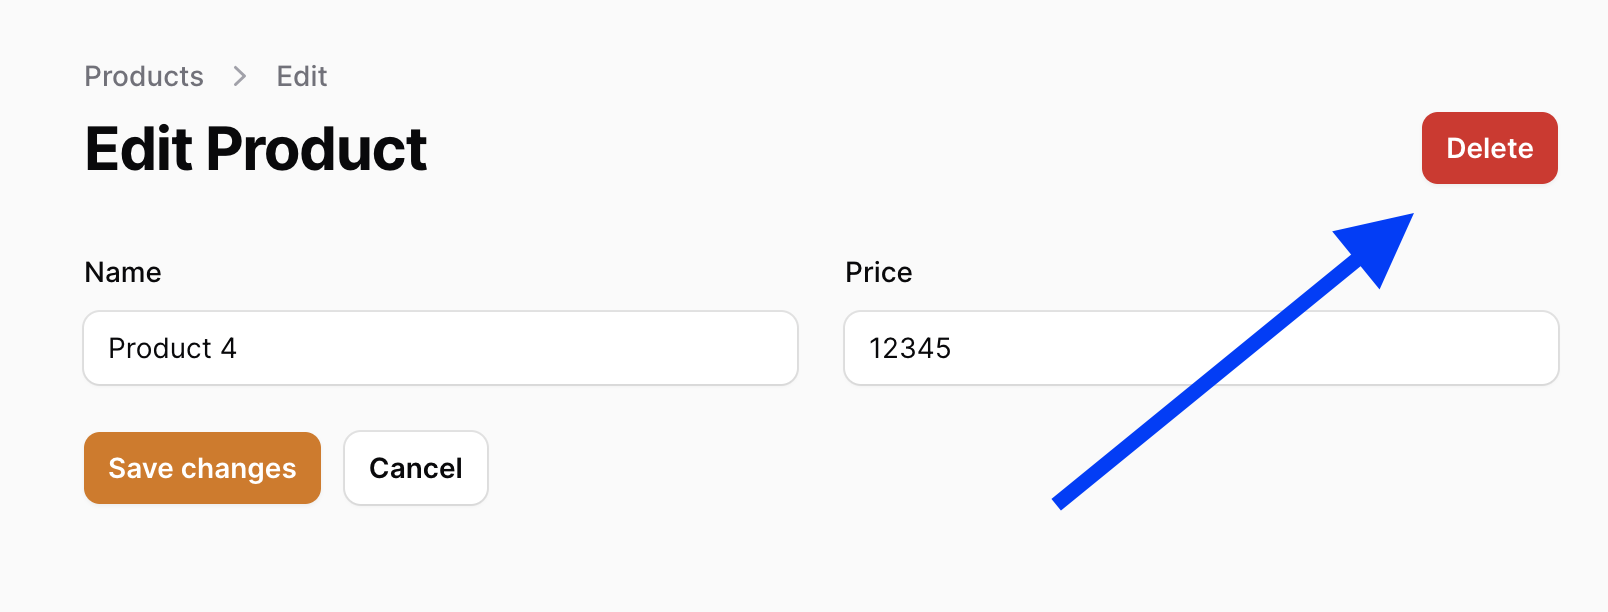
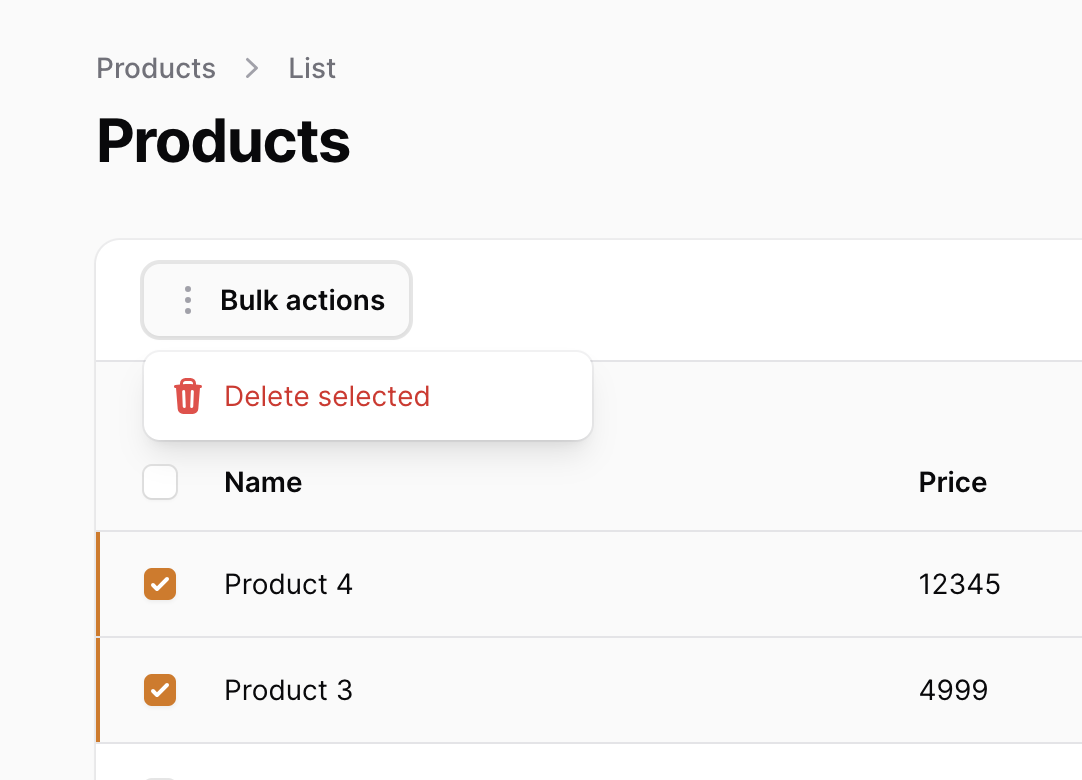
Option 2. Select checkboxes and choose Bulk Actions -> Delete Selected.
But, as in most Filament features, you can easily customize this.
Have you noticed the method actions() in the Table description of the Resource?
By default, it contains only Edit action, but we can add Delete there, as well.
return $table ->columns([ // ... ]) ->actions([ Tables\Actions\EditAction::make(), Tables\Actions\DeleteAction::make(), ])And then we have a typical Delete button/link in the table, with the confirmation modal before deleting.
So yeah, that's all the basics you need to know about using Filament as a CRUD builder.
Your job is just to fill in the columns and form fields, and Filament will take care of the rest.
In the following lessons, we will explore many more customization options for various field types.
About:
If you remove the edit and create from public static function getPages(): then it will open a modal, so you won't need the redirect.
Yes, I'm also planning to later talk about Simple resources where no redirect needed.
Good looking contant so far, will probably sign up.
One nice option to the artisan command to make a Resource worth mentioning is this:
Yes I showed that in the other lesson a bit later. Great option, indeed!
Hi. Is it possible to use Filament table builder using external data like json data. Thanks
Yup, the Filament site has a nice article on that topic: https://filamentphp.com/community/how-to-consume-an-external-api-with-filament-tables
Thanks
I have a problem with a resource: i created the form for the creating/editing of a row, but I need to make also a "bulk creting action": I have to insert in the creation form a start date and a end date, and then for each date in the range I have to create a new row with the other fields value. My problem is: how to create a specific form for this "bulk creation"?
I wouldn't call the thing you described as a "bulk action", in Filament terms the "bulk action" means that you select multiple records with checkboxes and then delete (or do something else) in bulk.
In your case, it's a custom action, which I would probably do as a Custom Page which means it's a Livewire component, and then you would add a link to it in your resource.
Example of such custom page with a form is in this article.
Hello, do you know if I can in some way use the Filament TextInput in a custom blade component ? I would like to keep the same the same design everywhere in the panel. Thx !
Filament has a few of their own Blade components, maybe try to use those? Here's my video about it.
Hey, it is possible to add event listener update last login column(users table) in filament?
It is!
But you will have to create a custom login page to add the function (You can follow this guide: https://laraveldaily.com/post/filament-registration-form-extra-fields-choose-user-role - just change the register action to login everywhere, same logic!) - then once user is logged in - you can add the column update.
Or another option is to listen for the
Loginevent. This is probably the fastest way to handle this. Here's the event you might want to listen tovendor/laravel/framework/src/Illuminate/Auth/Events/Login.phpnamespace App\Listeners;
use Illuminate\Auth\Events\Login;
class UpdateLastLoginAt { /** * Create the event listener. */ public function __construct() { // }
} i have error: Undefined method 'save'.intelephense(1013) function Model::save(array|null $options = []): bool Save the model to the database.
Re-fetch the user based on the ID, rather than trying to save like this. It should work as you should have an ID accessible
thx, working
public function handle(Login $event) { $user = User::find($event->user->id);
i ahve prblem at edit select users thats the edit not appear which user have edit how can i fix it
problem when click New Produk button, fill forms push create, and got error : Target class [Spatie\LaravelIgnition\ContextProviders\ComponentRegistry] does not exist.
it solved, using composer remove --dev spatie/laravel-ignition
Hey, how I can prevent double click in filament?