
Until now, we have been working with existing data and only showing it, not entering it. Now, let's look at how we can manage the data.
We will create a simple admin panel to manage categories and posts. For that, we will create a separate Laravel project based on the same Models and database structure.
Why do we need a separate project? Two reasons:
- Starter Kits. Laravel has starter kits to help with authentication and authorization. They must be installed on a fresh Laravel project because they overwrite some files. That's why we can't use our existing project.
- Visual Design. We have used a simple Tailwind template for the front page. Starter kits offer different designs, which conflict with our current project code.
But first, we need to discuss the options in the Starter Kits ecosystem, which changed in the Laravel 12 version.
Starter Kits in Laravel 12: Which One To Choose?
In Laravel, you don't have ONE single starter kit. You have options depending on which full-stack dependencies you want to have in your project.
Before Laravel 12, there were two official first-party starter kits released in Laravel 8:
- Laravel Breeze: more simple one, just Laravel MVC + Tailwind
- Laravel JetStream: using Livewire or Vue Inertia, with 2FA and Teams functions
Those are still operational, but in Laravel 12, Laravel core team changed the ecosystem by releasing three NEW starter kits by tech-stack:
- React starter kit
- Vue starter kit
- Livewire starter kit
They have modern design and functionality:
However, the problem is that all those new starter kits are directed toward full-stack dynamic applications.
So for Laravel beginners, those starter kits assume additional prerequisites or things to learn:
- React, Vue or Livewire. At the time of writing in March 2025, there's no Laravel 12 starter kit equivalent of Breeze, with "just Laravel Controllers with Blade".
- Also, component libraries: React starter kit uses Shadcn, Vue uses the equivalent Shadcn/Vue, and Livewire uses Flux UI. So, you need to learn those, too.
In this course, I'm aiming toward juniors and newcomers to Laravel, so it's hard to recommend one of the new starter kits. Then, I would need to teach React/Vue/Livewire and component libraries, which is 10x more content (I'm planning to do it in separate courses).
As I understand, you're here to learn Laravel and not those other prerequisites, right?
So, for now...
I decided to demonstrate the Laravel Auth functionality still using the old Laravel Breeze. It still works in Laravel 12 and will continue to be supported in the future. It's just not advertised anymore on the homepage and in the docs, which causes confusion.
Technically, the only outdated thing is that Laravel Breeze uses Tailwind v3 and not Tailwind v4, but you can upgrade quite easily with a Tailwind migration tool.
I know it's a weird situation. In the comments, let me know which Laravel 12 starter kit you may want to learn instead. I may update the course in the future and/or create separate tutorials.
Installing Laravel Breeze
So, I will create a new project using Laravel Installer:
laravel new project2Choose a None starter kit, and we will install Laravel Breeze separately.
Since it's not mentioned in the official Laravel 12 docs, we need to follow the Laravel 11 docs about starter kits.
cd project2composer require laravel/breeze --dev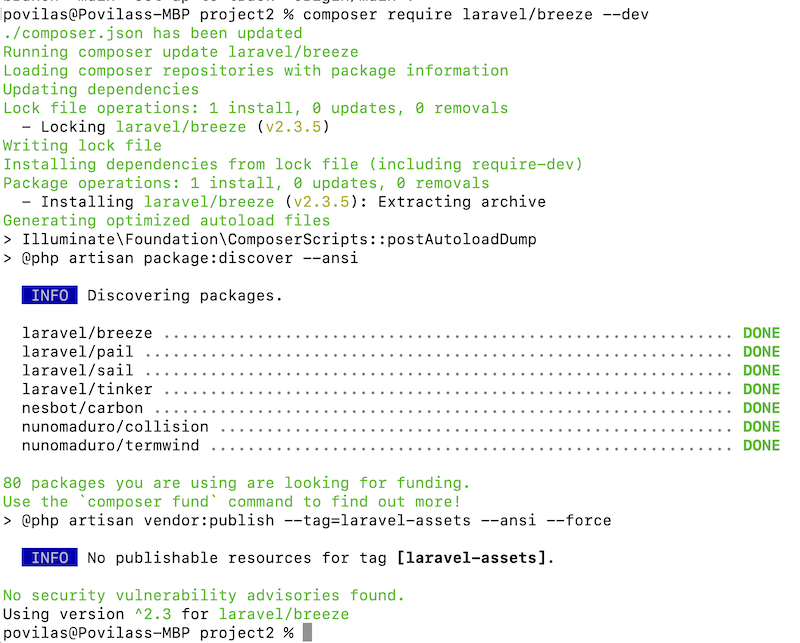
As you can see, it works well with the Laravel 12 version.
Next, let's run this command:
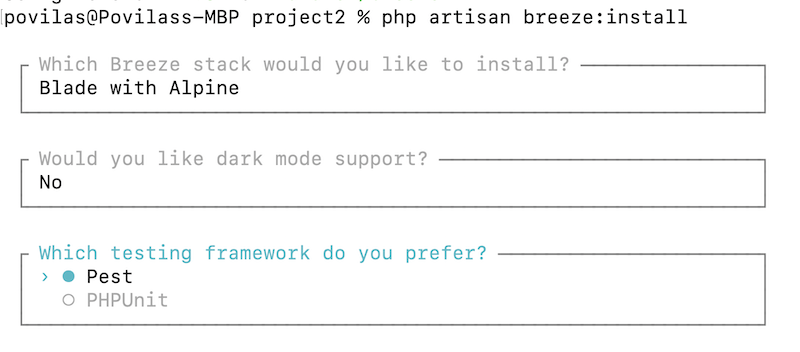
php artisan breeze:install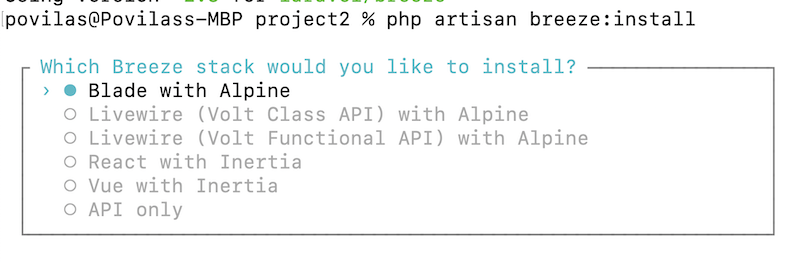
We will select Laravel Breeze with the stack Blade with Alpine. Don't worry about the Alpine part: you won't even feel the Alpine.js in the code, it's added for a tiny function that we wouldn't even touch.
With other options, choose what you prefer. The testing framework doesn't matter, as we won't write tests in this course.
And that's it!
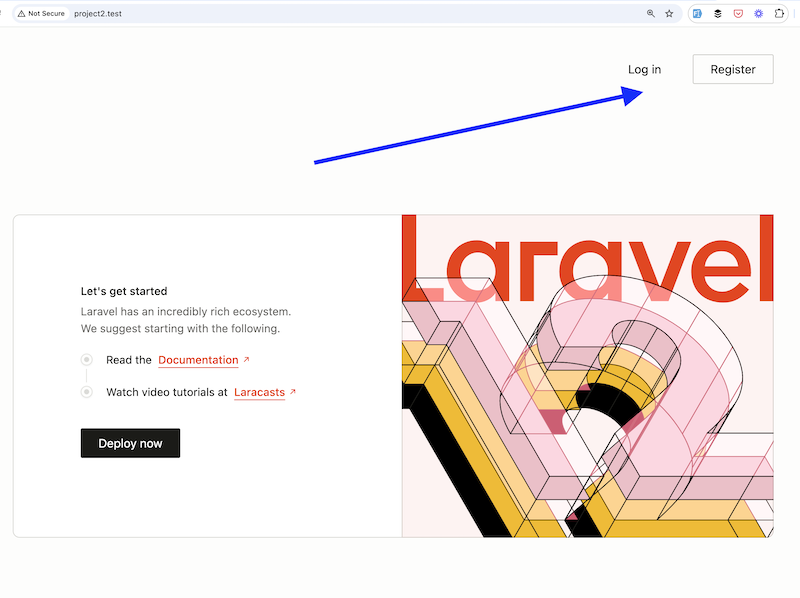
Now, if we load our homepage, we see the Login and Register buttons on the top right.
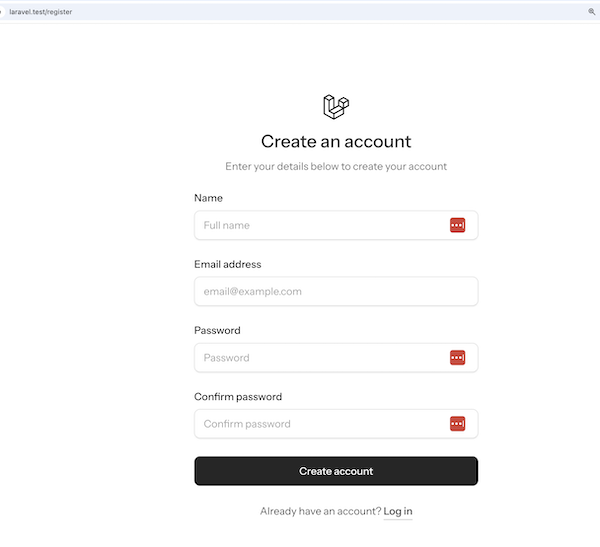
If we click on the Register, here's the form:
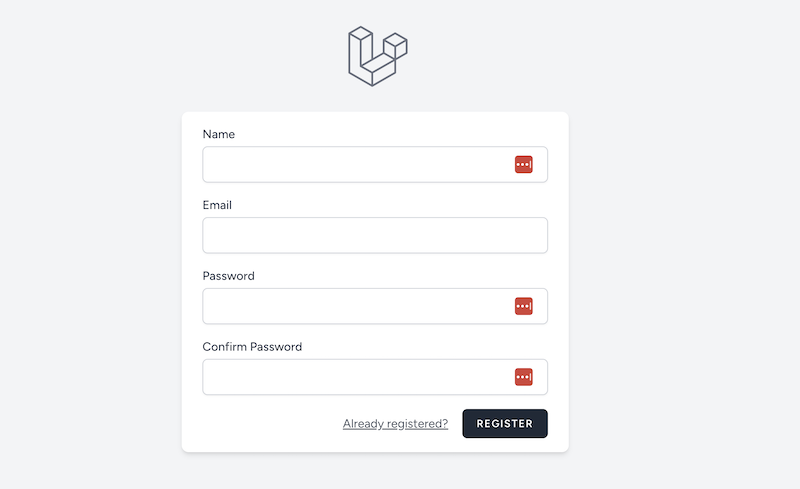
It will work if we configure the database in the .env file and run the DB migrations for the default Laravel tables:
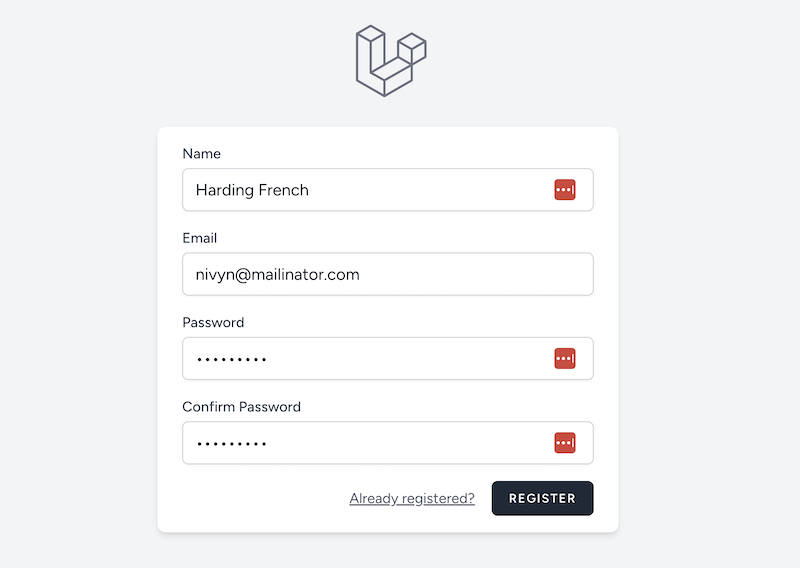
php artisan migrateNow, we can fill in the registration form:
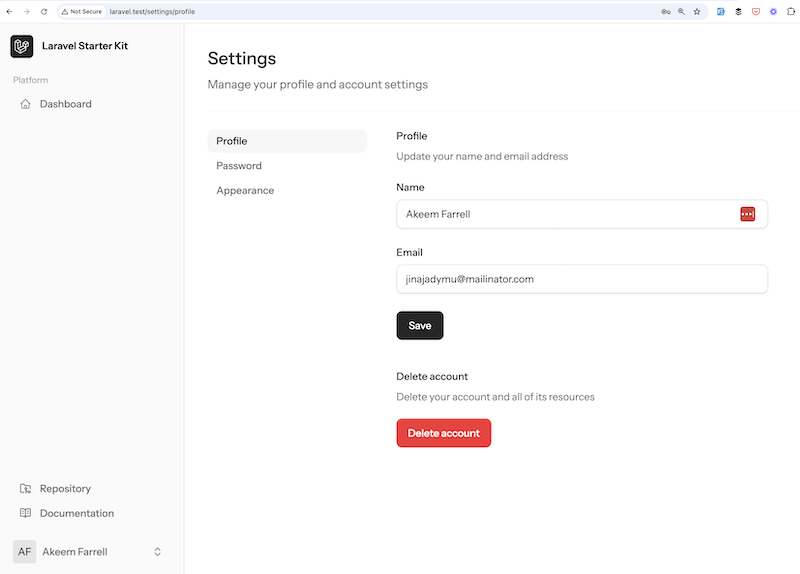
We submit the form and land inside the Laravel Breeze dashboard!
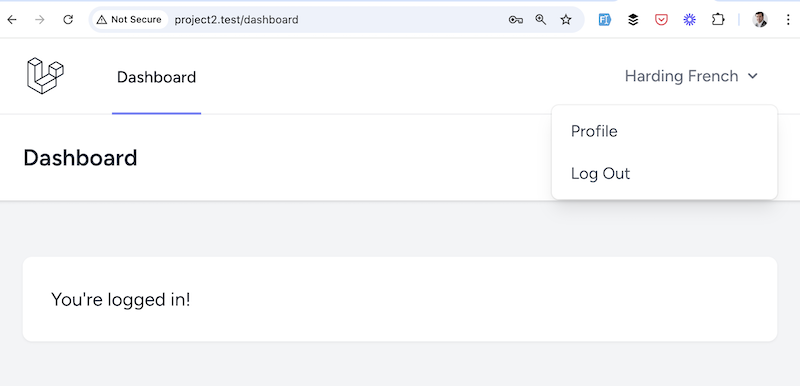
Great, we can now log in/out and register new users, without having written any line of code. Cool, right?
Here's the GitHub commit for the installation of Breeze.
Now, what's inside the generated code?
Code of Laravel Breeze Routes
Laravel Breeze automatically adds a few routes below the default Welcome page.
routes/web.php:
use App\Http\Controllers\ProfileController; Route::get('/', function () { return view('welcome');}); Route::get('/dashboard', function () { return view('dashboard');})->middleware(['auth', 'verified'])->name('dashboard'); Route::middleware('auth')->group(function () { Route::get('/profile', [ProfileController::class, 'edit'])->name('profile.edit'); Route::patch('/profile', [ProfileController::class, 'update'])->name('profile.update'); Route::delete('/profile', [ProfileController::class, 'destroy'])->name('profile.destroy');}); require __DIR__.'/auth.php';The first route is for the /dashboard URL. It has an additional method, middleware, with auth as a parameter. It means that only authenticated logged-in users can access that page.
The second is a group of routes for the user profile. This group also has an auth Middleware. We will talk more about Middleware and Route groups in later lessons.
On the last line, Breeze adds a link to a separate Auth routes file. In that file, we can see all the Routes required for authentication: login, registration, logout, forgot password, etc.
routes/web.php:
use App\Http\Controllers\ProfileController; Route::get('/', function () { return view('welcome');}); Route::get('/dashboard', function () { return view('dashboard');})->middleware(['auth', 'verified'])->name('dashboard'); Route::middleware('auth')->group(function () { Route::get('/profile', [ProfileController::class, 'edit'])->name('profile.edit'); Route::patch('/profile', [ProfileController::class, 'update'])->name('profile.update'); Route::delete('/profile', [ProfileController::class, 'destroy'])->name('profile.destroy');}); require __DIR__.'/auth.php'; If you open the routes/auth.php file, you will see two groups of Routes with different Middlewares: guest and auth. The guest Middleware is used when Routes should be accessed only by unauthenticated users, like login or register pages.
routes/auth.php:
Route::middleware('guest')->group(function () { // ...}); Route::middleware('auth')->group(function () { // ...});So yeah, now we have all the login/register functionality. Wasn't it a breeze? :)
In the following lessons, we will manage the categories and posts as administrators.
You say create new project for it, because it can overwrite current files. How we can use it on current site if we alredy have? Or we can use Livewire or any other libraries for it, because it's confusing?
Starter kits are meant to be used at the start of the project to kick off your development.
If you already have a project running - there's no way to install the starter kit. You can in theory take it from another project and copy paste every single file - but that's manual work.
As for Livewire - I'm not sure what your question is. You can use livewire without any starter kits, but I feel that it wasn't the question
Interesting auth/registration functionality. If we can't use starter kits, how we can create auth/registration, just manually?
Yep, you either create it manually or copy-paste it manually from a starter kit into your project :)
Here is Laravel Daily's own starter kit: https://github.com/LaravelDaily/starter-kit